User Guide of iDelock (Android)
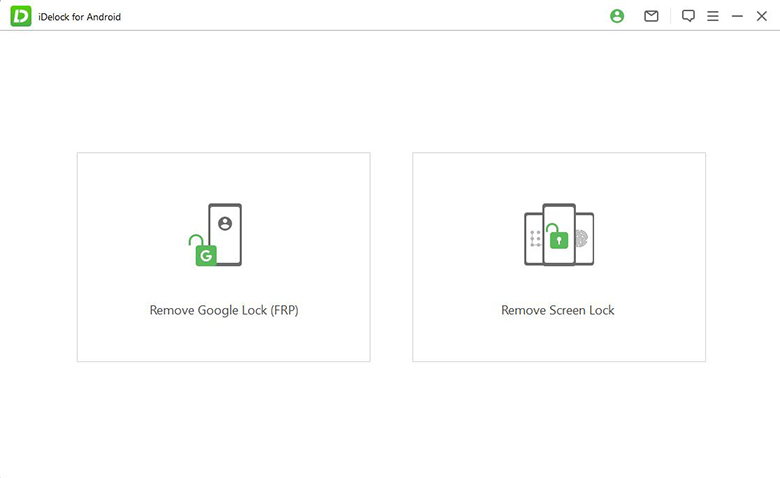
As an all-in-one phone unlocker, iDelock (Android) can help you remove Google FRP lock and various types of screen lock (PIN, pattern, password, fingerprint and face ID) without a password and with a very high success rate.
Simply follow the guide and let iDelock (Android) do the service for you.
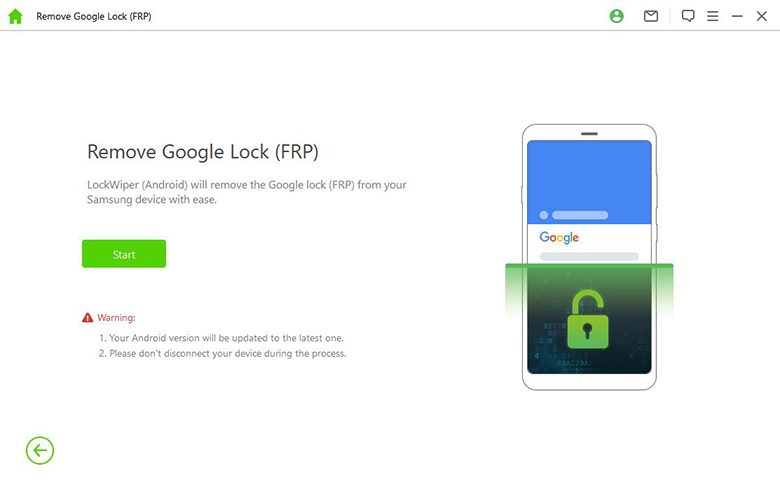
Mode 1. Remove Google Lock (FRP)
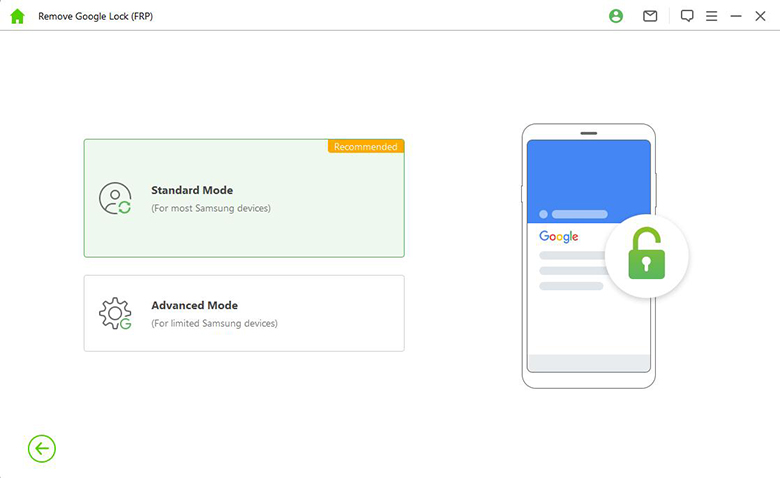
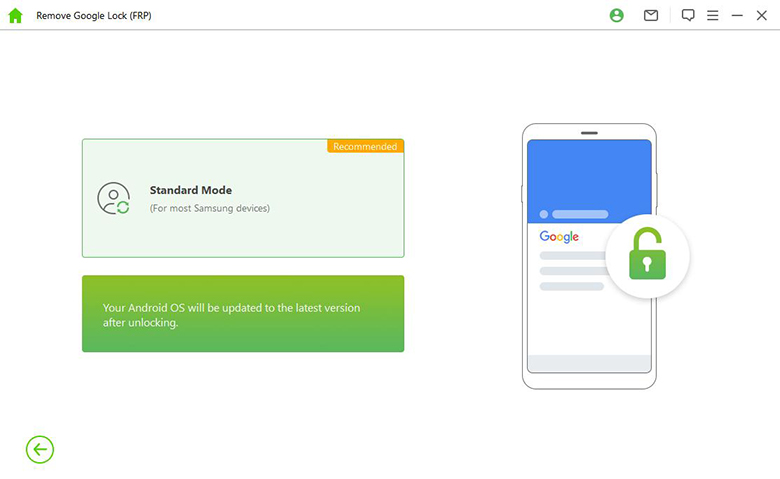
iDelock (Android) provides 2 modes for users to remove Google lock (FRP), namely the Standard Mode and Advanced Mode.
Advanced Mode only supports limited Samsung devices and will upgrade the system version to the latest.
Standard Mode supports most of Samsung devices and your system version will stay the same after unlocking. This mode is much more recommended for most users.
Standard Mode
Step 1: Choose Standard Mode
Download and install iDelock (Android) on your PC and select "Standard Mode" .
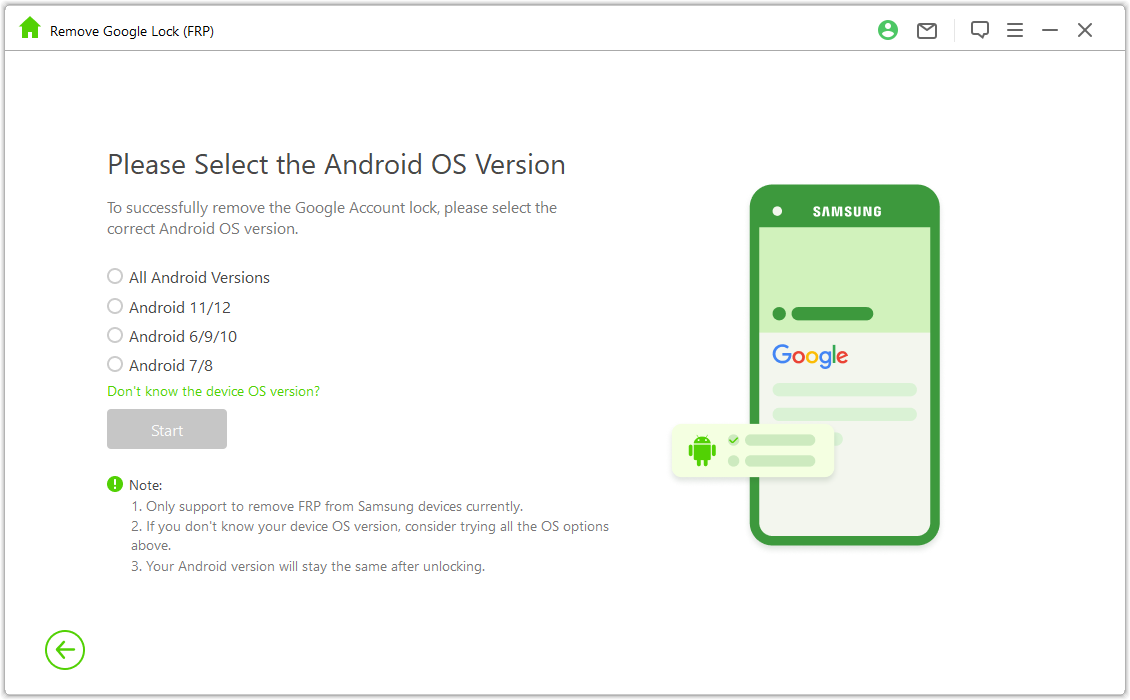
Step 2:Select Device System Version
Select your system version and click "Start" . If you don't know the Android version on your device, click "Don't know the device OS version?" to seek help.
Step 3:Remove Google Lock (FRP)
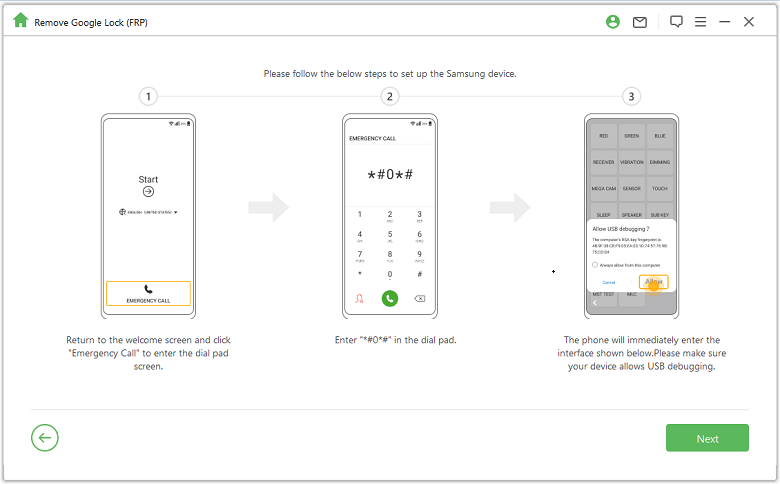
Situation 1: For Android All Versions
Check the on-screen notes, and once confirmed, click on "Confirm" to proceed. Then connect your device to the computer using a USB cable.

Wait a few seconds for a pop-up window with instructions to appear. Use the password to access the hidden Samsung Diagnostics menu, ensuring that your device allows USB debugging.
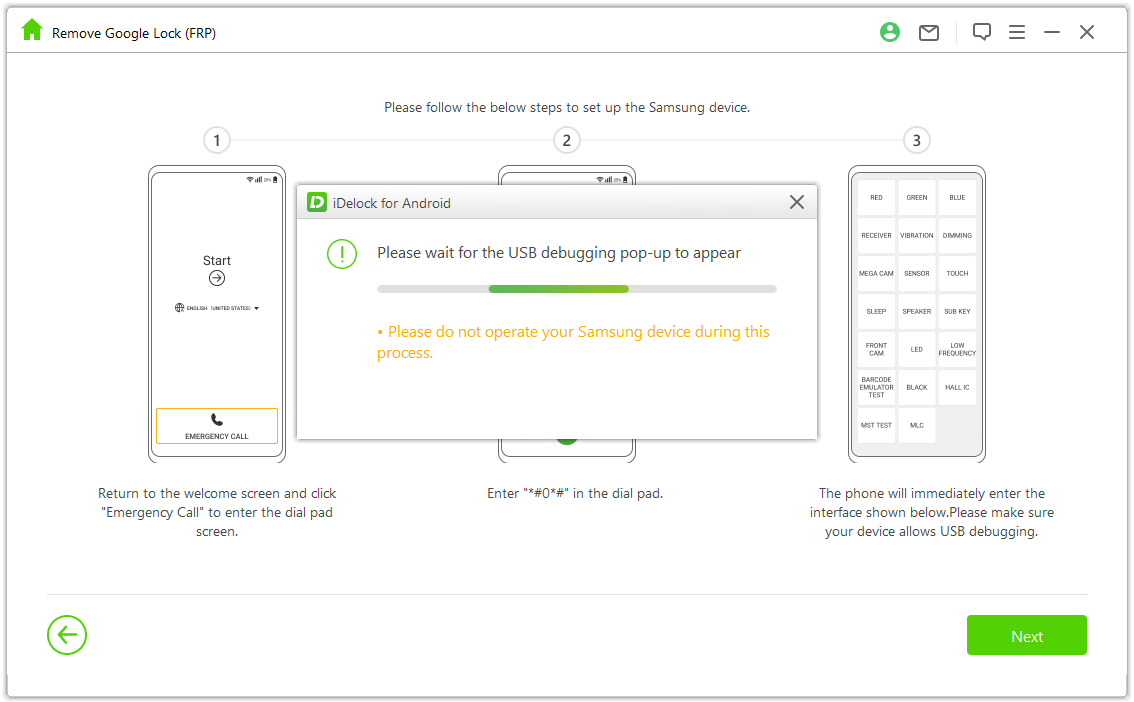
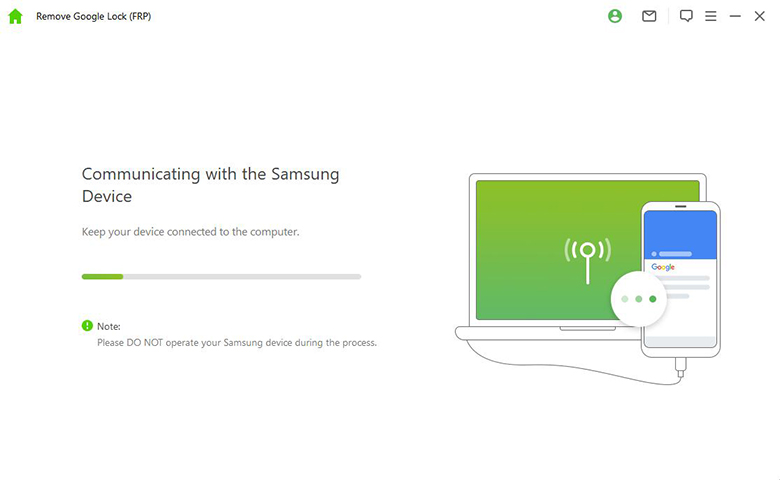
Please keep your Samsung phone turned on, and there is no need to keep it connected to the computer during this process.
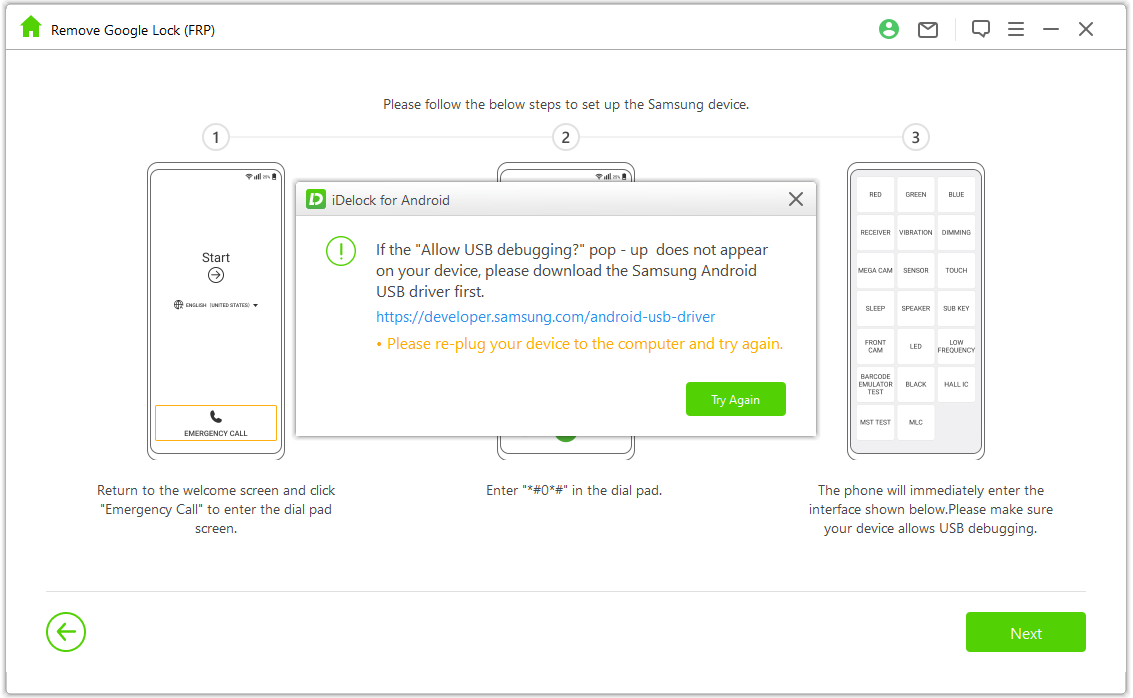
If the USB debugging pop-up does not appear on your device, please reconnect your device to the computer. If the debugging pop-up window still does not appear, it might be a device-related issue. In that case, you can download the Samsung USB driver and install it manually.
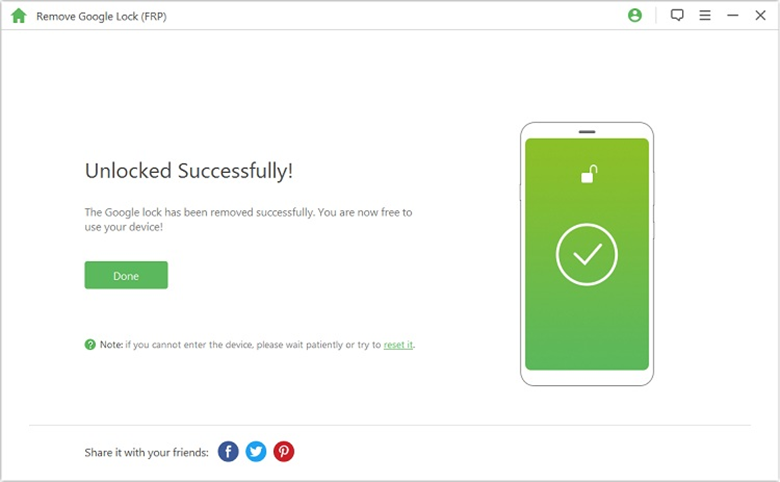
During the process of removing the Google lock, please wait patiently for a few minutes. Avoid using your Samsung device while this operation is ongoing. It is normal to notice the screen blinking after the removal process; simply restart your device to complete the procedure.
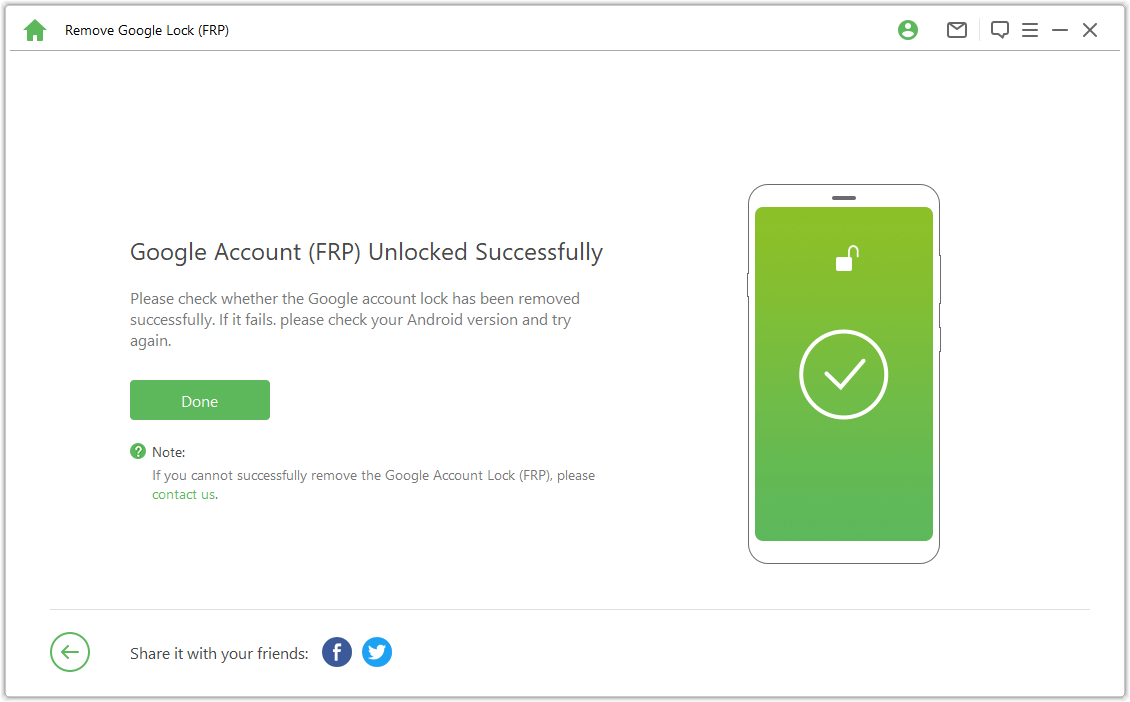
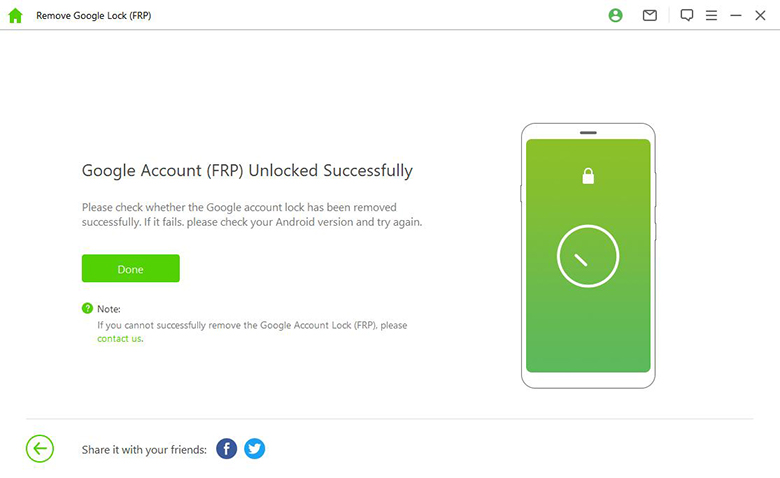
After restarting your device, the Samsung FRP lock will be completely removed.
Situation 2: Below Android 11
Check and confirm the on-screen notes. Then connect your device to the computer with a suitable USB cable.
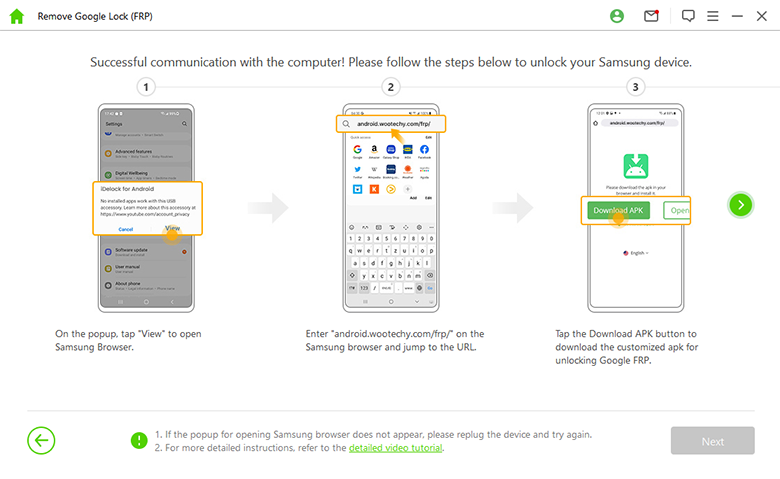
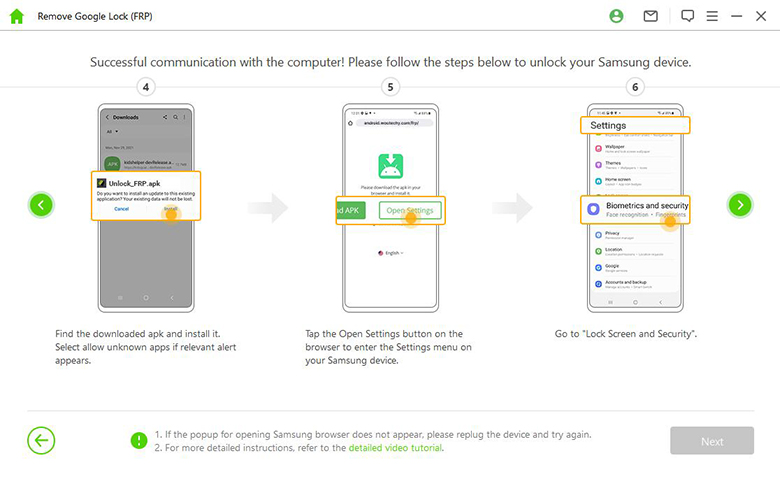
Tap "Review" option on your Samsung phone to enter Galaxy Store. Type the android.wootechy.com/frp/ in the browser and choose "Download APK" to get the needed apk for Google FRP unlocking. After the download is ready, install it.
Choose "Go to Settings" on the browser and you will enter the Samsung menu. Then, choose "Lock Screen and Security" or "Biometrics and security".
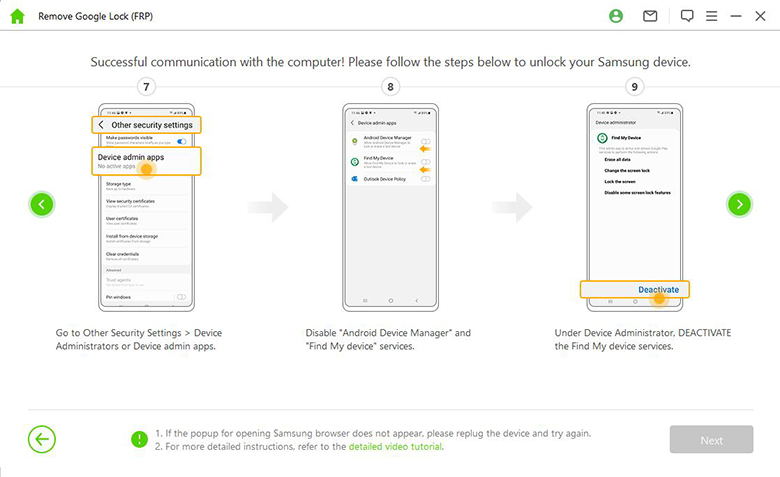
Go to Other "Security Settings > Device Administrators/Device admin apps." Next, turn off "Android Device Manager" and "Find My device". Don't forget to deactivate the Find My device under Device Administrator.
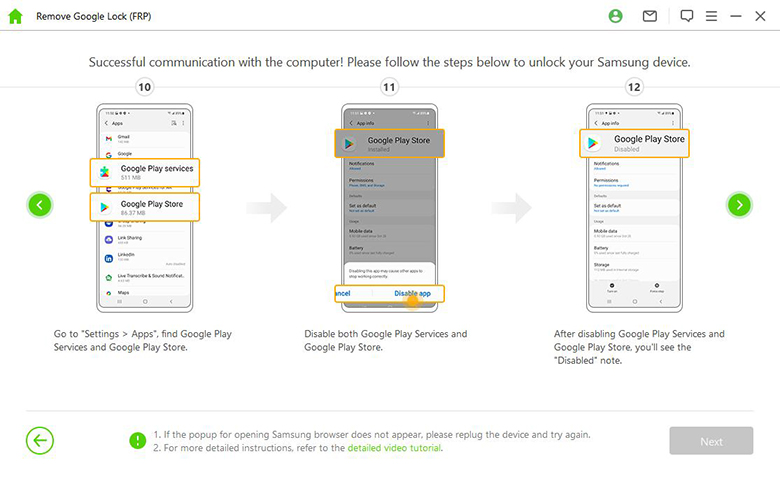
Go to "Settings > Apps." Locate "Google Play Services" and "Google Play Store" and disable both of them. After that, you'll see a "Disabled" note there.
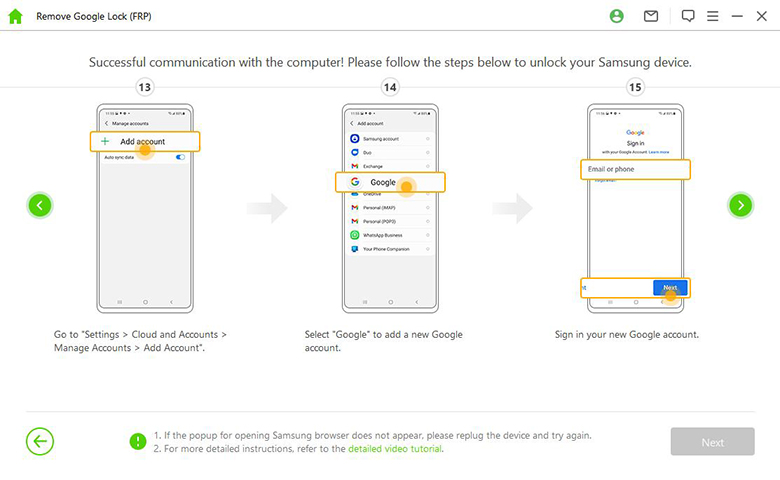
Go to "Settings > Cloud and Accounts > Manage Accounts > Add Account", and select "Google" to add a new Google account.
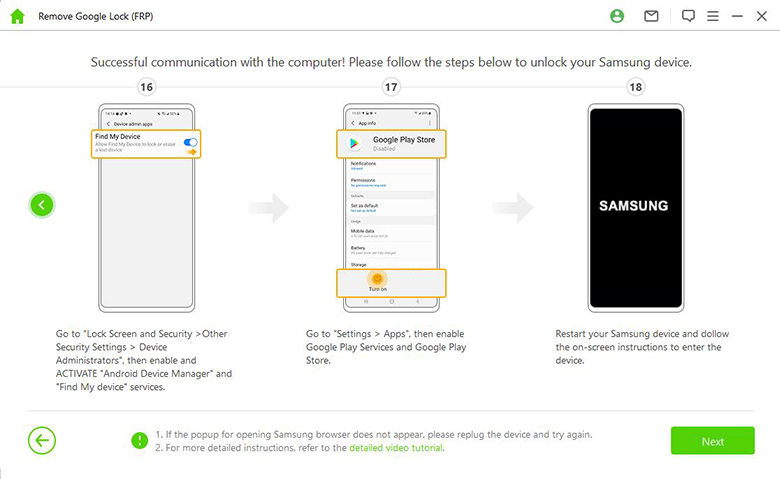
Go to "Lock Screen and Security > Other Security Settings > Device Administrators." Activate "Android Device Manager" and "Find My device". Next, go to "Settings > Apps" to enable the Google Play Services and Google Play Store.
Step 4:Unlock and Set Up Your Phone
After the unlocking, you can sign in the device with a new Google account to enjoy it seamlessly.
Advanced Mode
Step 1: Choose Advanced Mode
Launch WooTechy iDelock (Android) and choose "Remove Google Lock (FRP) > Advanced Mode"
Click "Start" and connect your Android phone to the computer using a USB cable.
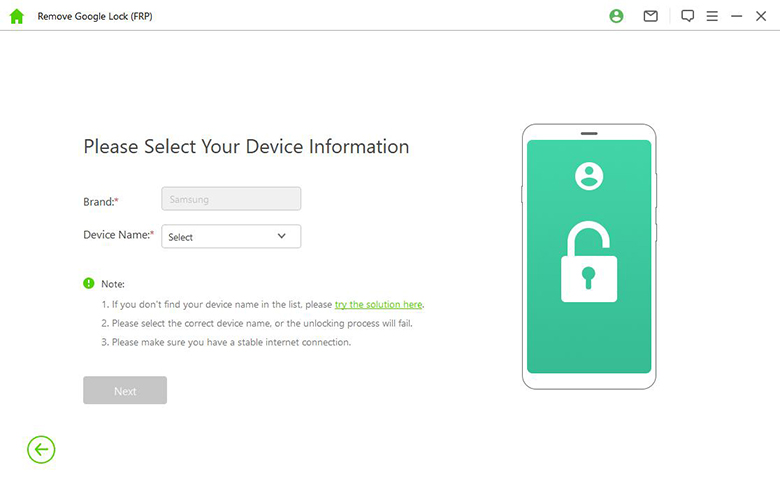
Step 2: Choose and Confirm Device Information
WooTechy iDelock (Android) will detect your device information automatically. If there are any errors, please correct them manually. When everything is alright, click "Next" to proceed.
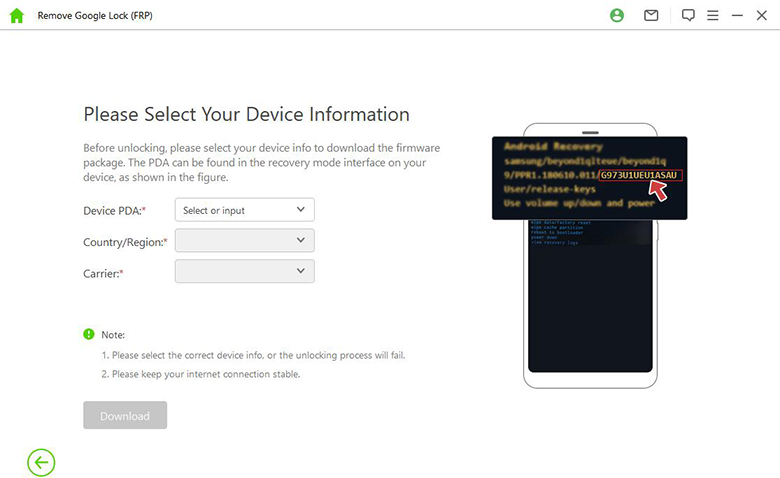
Put your device into recovery mode by following the prompt on the screen. Next, choose your device PDA, Country and Carrier. After entering all these details, click "Download" to proceed.
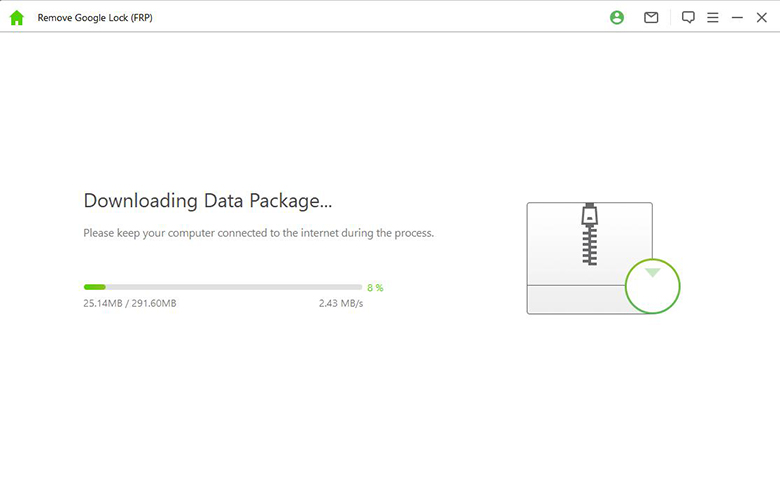
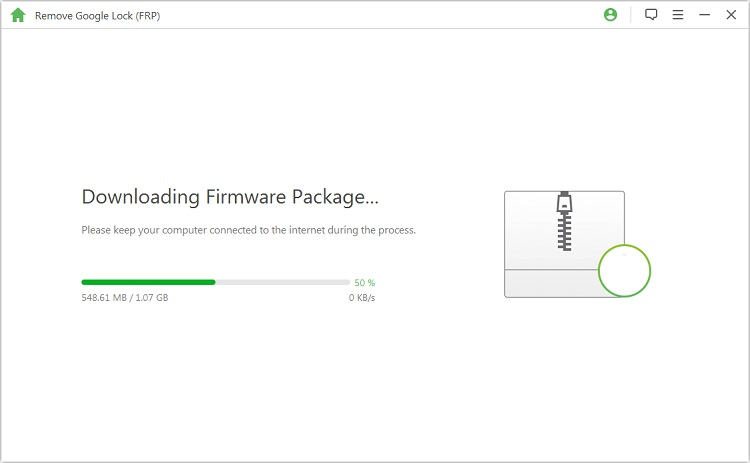
iDelock will begin search and download the most suitable data package for your Android phone.
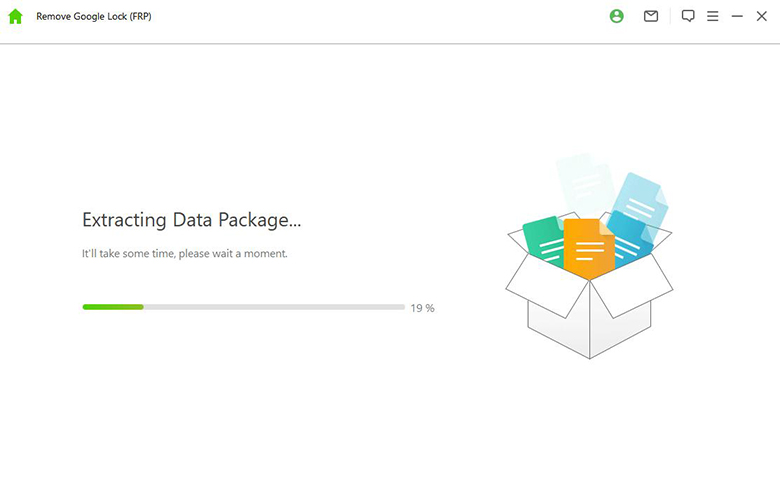
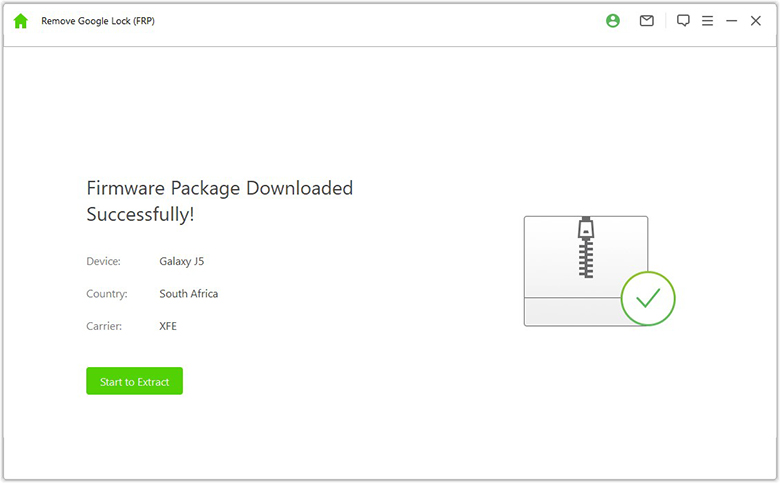
When it finishes, click "Start to Extract" to unpack the package.
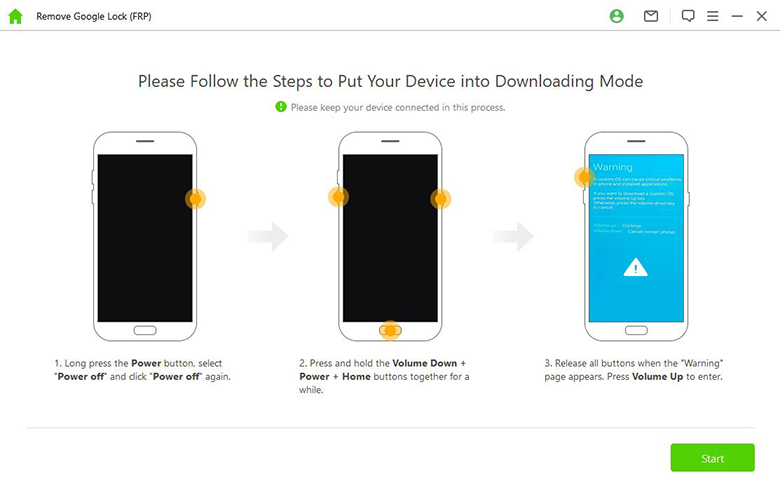
After that, you need to follow the on-screen prompts to put your device into Downloading Mode and then click "Start".
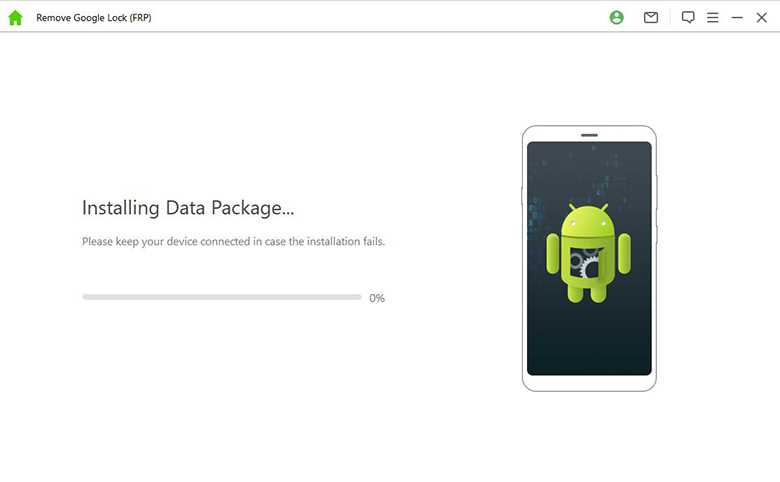
Confirm your action by entering "000000". Then iDelock will begin installing the data.
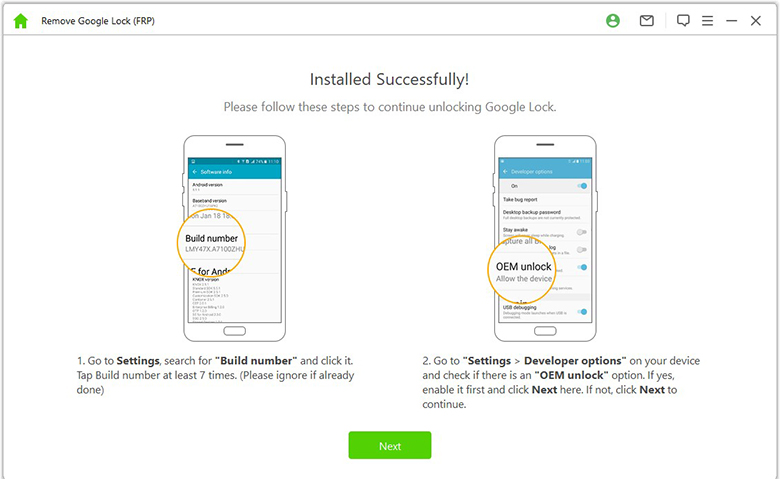
Once the installation succeeds, follow the guide on the screen to enable the "USB debugging" and "OEM unlock" on your phone. Then confirm the OEM lock again.
Reset your phone by following the on-screen instructions. After that, put your device into Downloading Mode once again to download the firmware package for your phone.
Click "Start to Extract" when the package is ready.
When the extraction is done, iDelock will start unlocking the Google lock on your device. Please wait patiently.
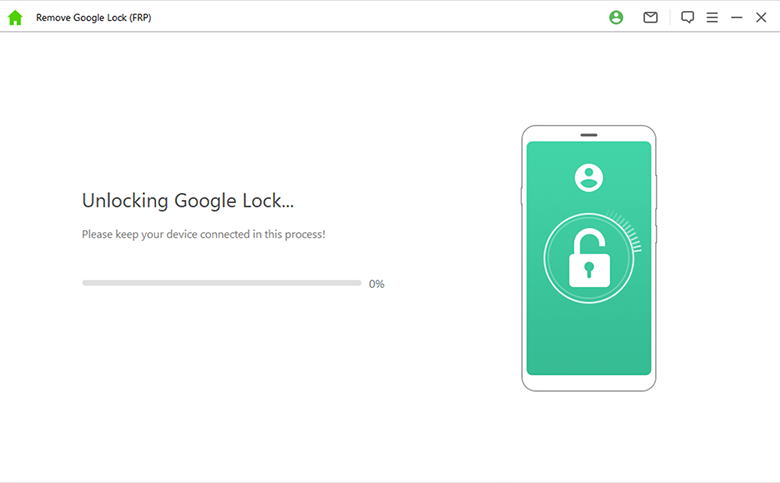
After several minutes, the Google lock will be bypassed successfully. Now you can use your device without any limitation and log onto it with a new account!
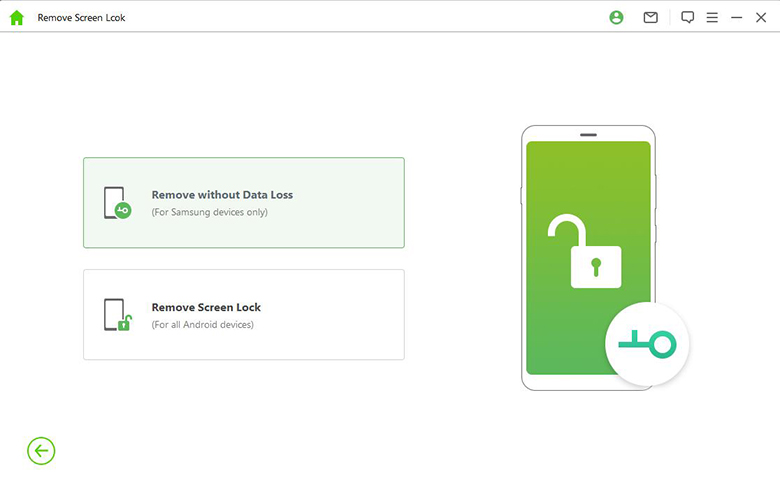
Mode 2. Unlock Android Screen Passcode
There are also 2 modes under Unlock Android Screen Passcode function. One is "Remove without Data Loss (For Samsung devices only)", and the other is "Remove Screen Lock (For all Android devices)."
Mode 1. Remove without Data Loss
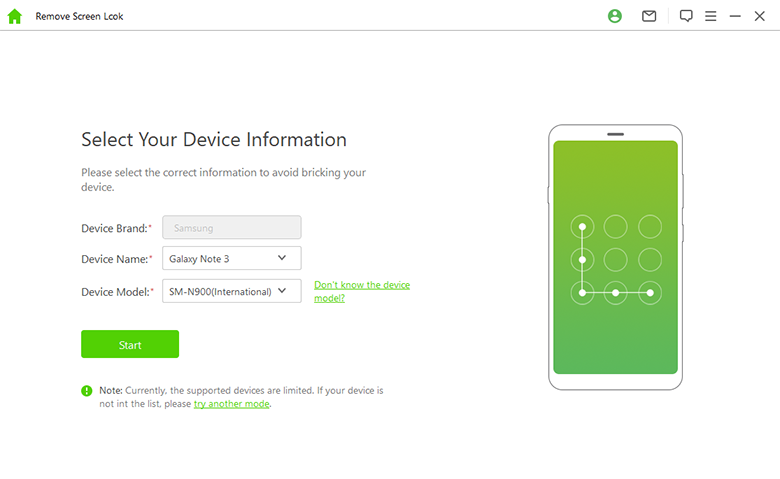
Step 1. Choose and Confirm Your Device Information
Download and launch WooTechy iDelock (Android), then choose "Remove without Data Loss" on the main screen to start.

Choose your device name and model on the next screen. You'll see a pop-up window for confirmation. Click "Confirm" to continue.
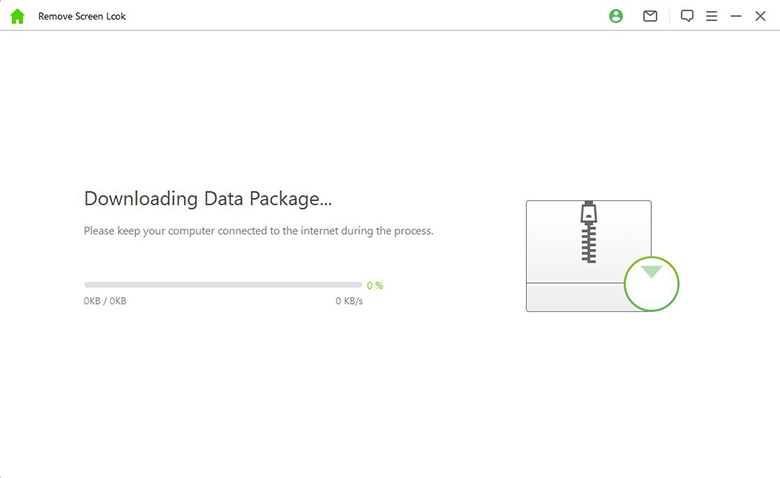
Step 2. Download and Extract Firmware Pacakge
iDelock will begin downloading the data package for your phone.
When the package is ready, click "Next" to continue.
Step 3. Put Your Device into Downloading Mode
Now, connect your phone to the computer using a USB cable.
Follow the instructions on the next screen to put your device into Downloading Mode. When it is in that mode, click "Start to Unlock".
Step 4. Unlock Your Android Phone
Then, iDelock will start to bypass the screen lock on your Android phone. Please wait for several minutes.
Congratulations! The screen lock has been removed from your device! And none of your data gets lost!
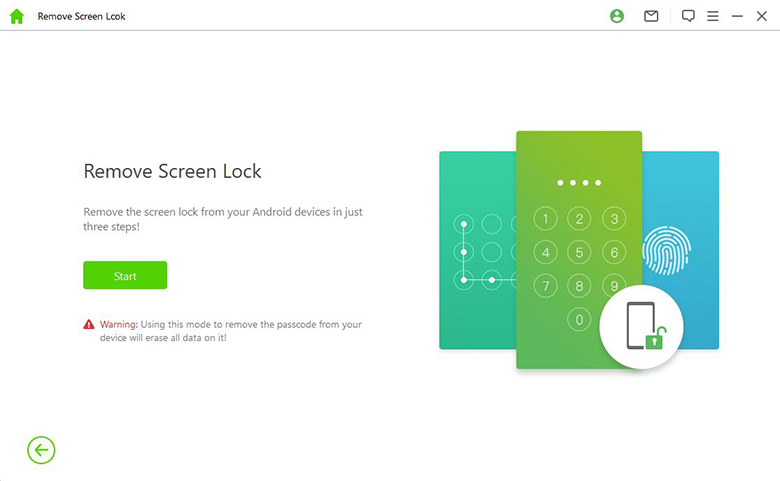
Mode 2. Remove Screen Lock
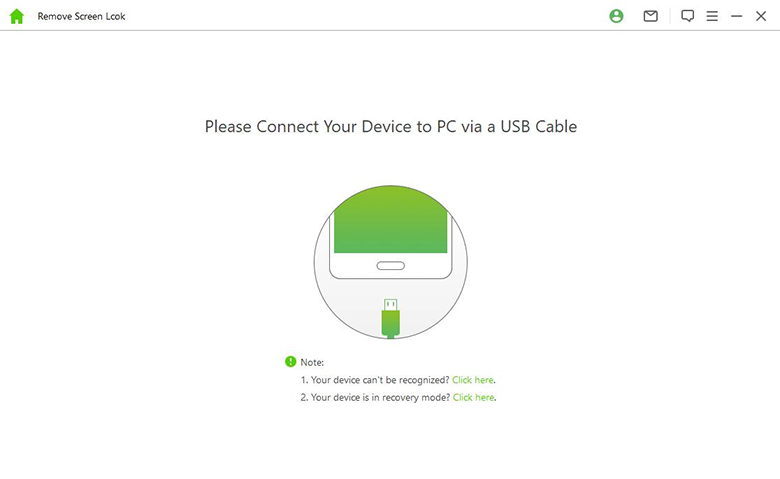
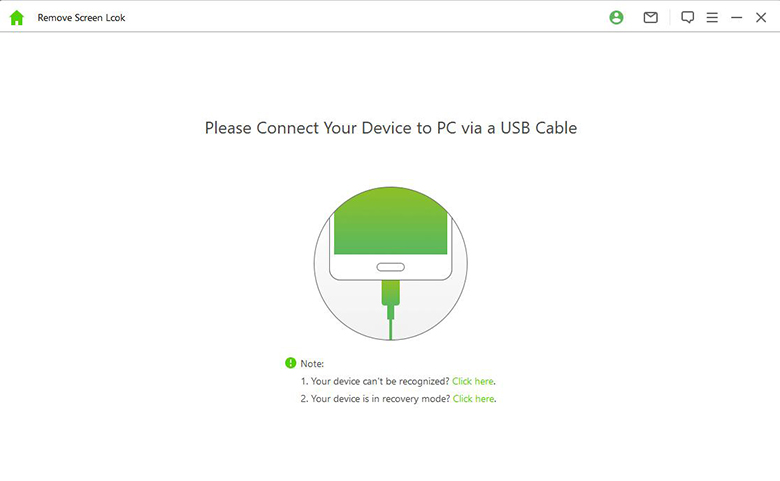
Step 1:Connect Your Device
Launch iDelock on your PC and select "Remove Screen Lock" mode to initiate.
Connect your device to the computer using a USB cable and wait for it to load your device information.
Step 2:Confirm Your Device Information
Confirm the information on your screen is right and then click "Start to Unlock".
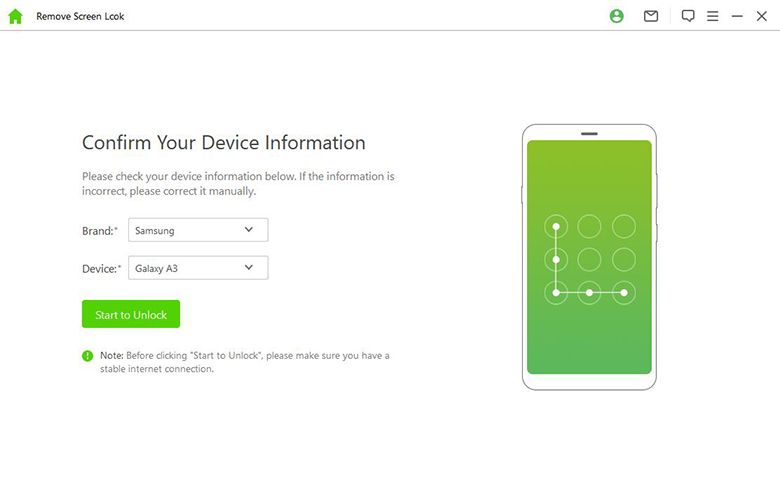
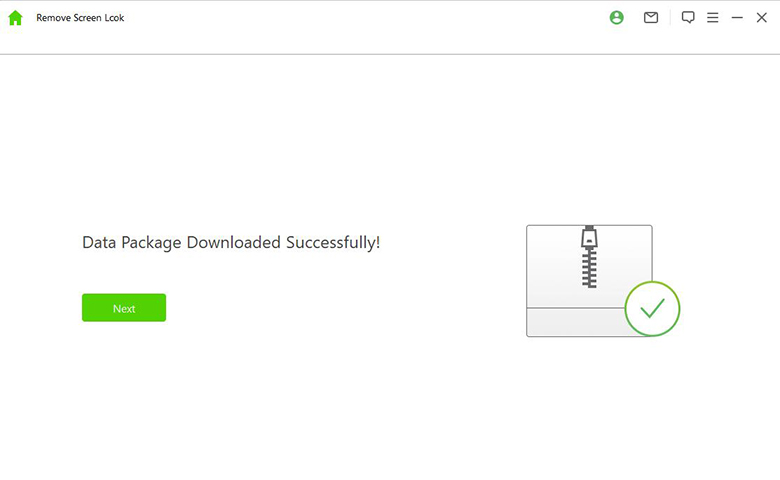
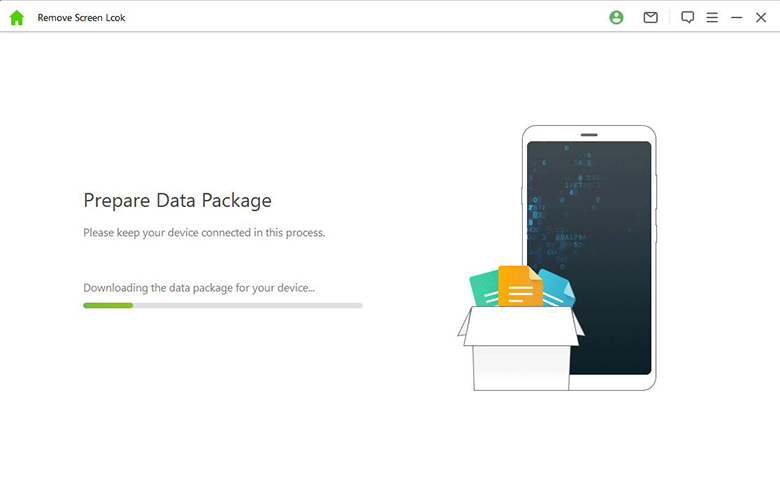
iDelock will begin download the most suitable data package for your phone.
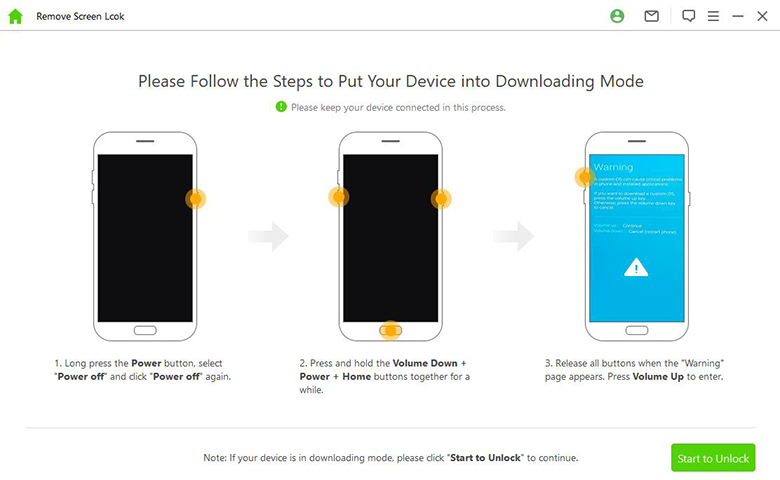
Step 3:Start to Remove the Screen Lock
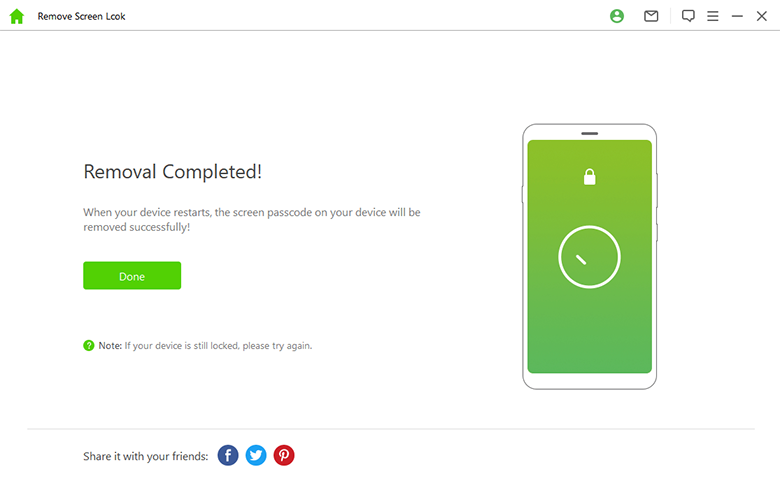
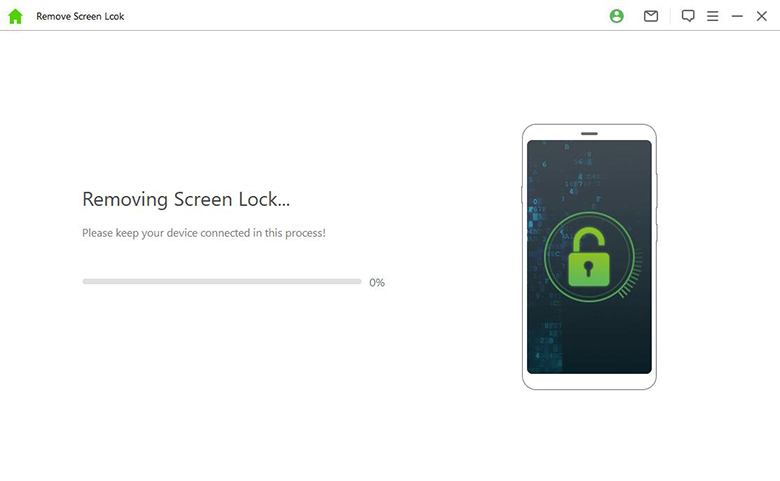
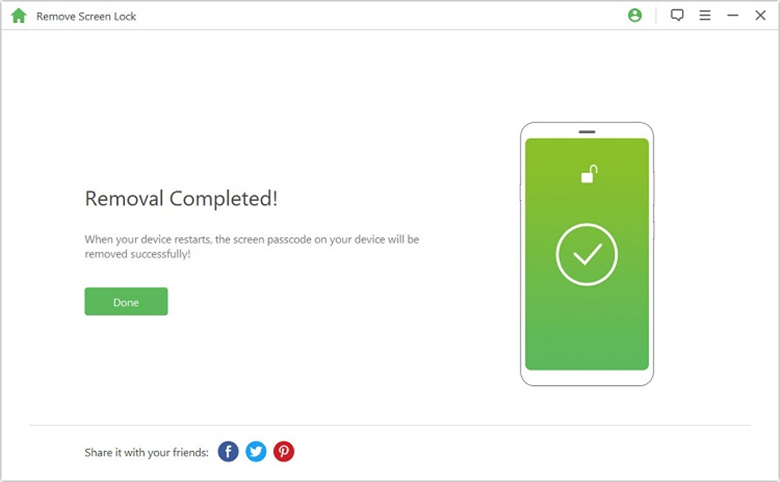
After the data package is ready, follow the onscreen instructions to reset your device. Then iDelock will begin removing the screen lock from your phone.
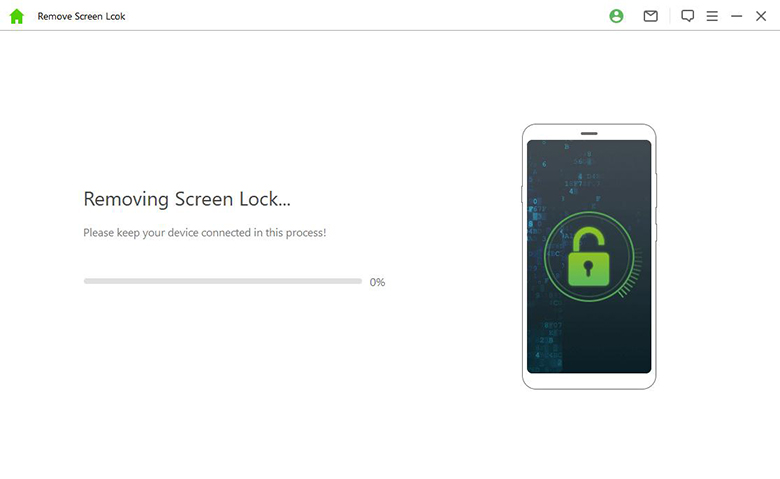
The whole process will take a few minutes. Please wait patiently.