User Guide Of iMaster
As a wonderful tool designed for downgrading and upgrading iOS devices, whenever you want to revert or update to a supported iOS version, iMaster will easily do it for you. Also, iMaster supports iOS data backup to ensure your data safety from any risks. Here you will learn how to upgrade or downgrade your current iOS version to the one you love and back up your iOS data.
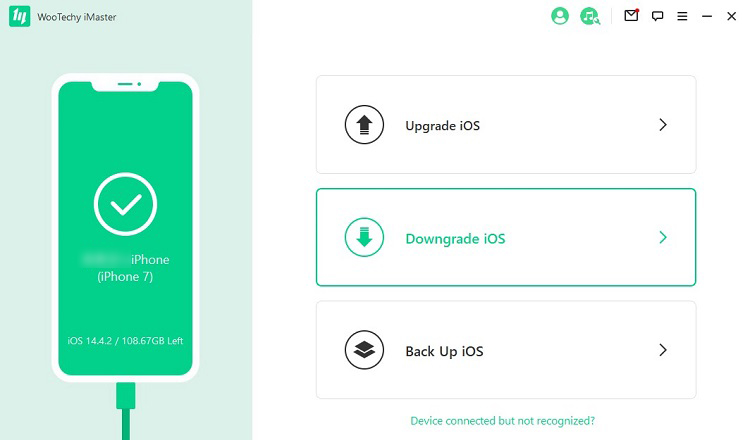
Mode 1. Upgrade iOS
Step 1: Launch WooTechy iMaster and Connect Your Device
Download and install WooTechy iMaster on your PC.
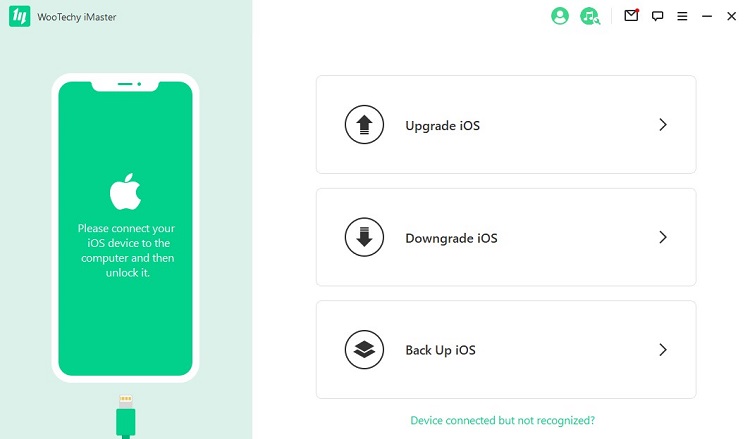
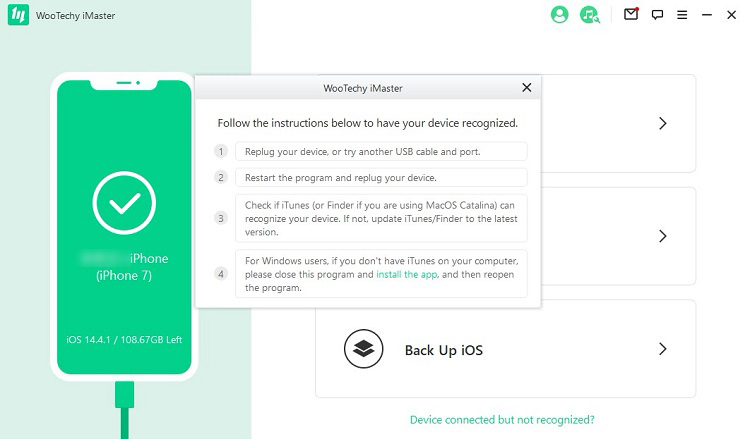
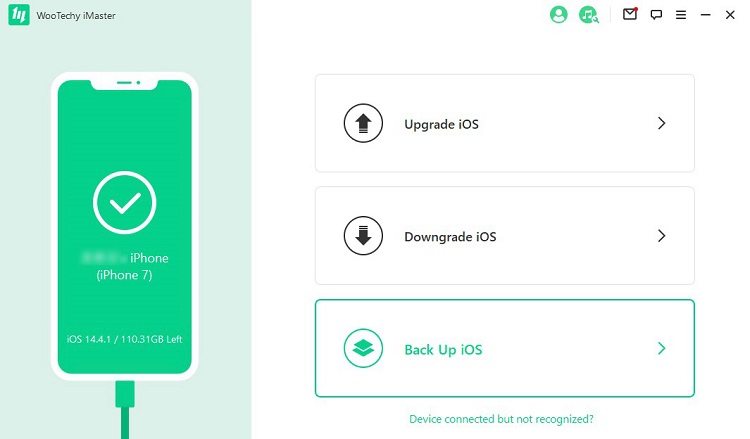
Connect your iOS device to the computer. If you've connected your device to the computer but it’s not recognized by the program, click on the link that says “Device connected but not recognized?”. Follow the on-screen instructions to fix it.
Step 2: Upgrade iOS
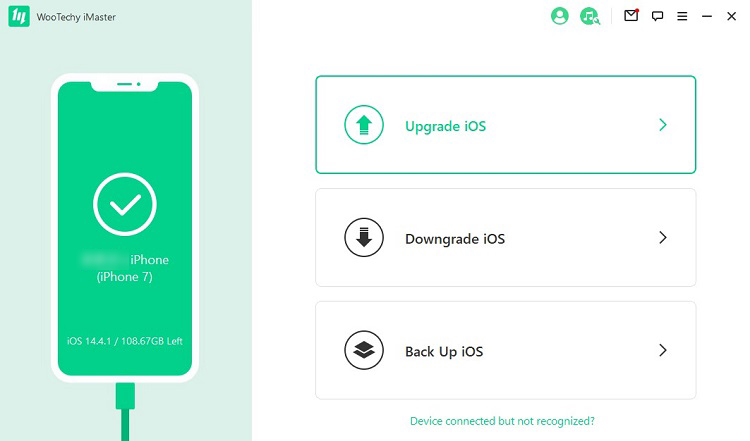
Choose the “Upgrade iOS” mode after your device is connected and recognized. This mode is for users who want to update their devices smoothly without data loss.
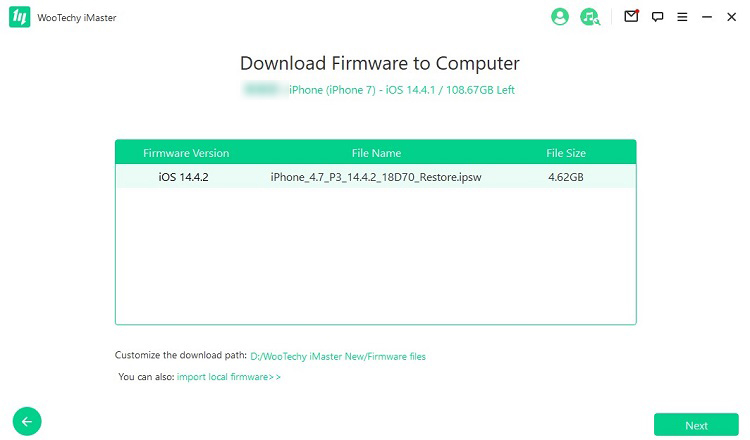
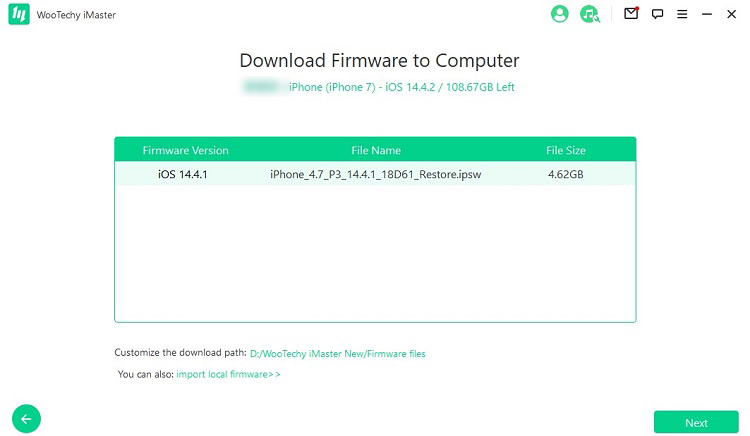
Step 3: Download Firmware to Computer
The program will then prompt you to choose a firmware version you need. Note that you can customize the firmware download path here. Click “Next” to start downloading the firmware to computer.
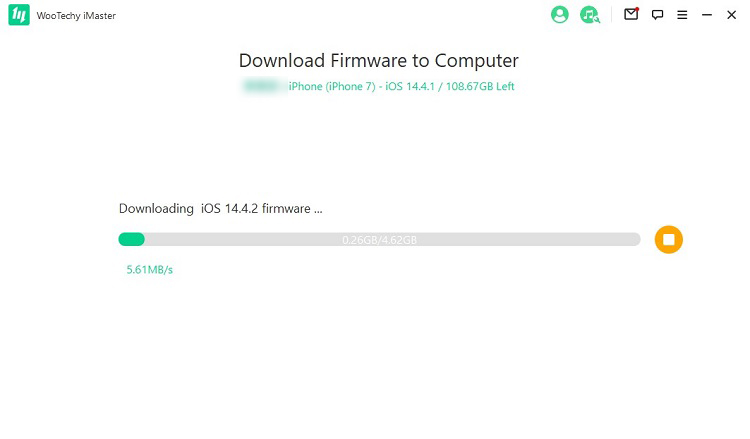
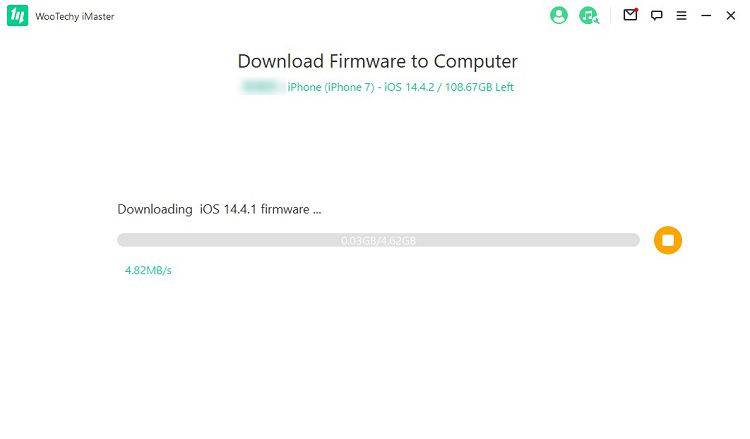
The program will take some time (mainly depending on your internet speed) to download the firmware. After that, it will automatically proceed to verify and extract the firmware, which will be relatively fast.
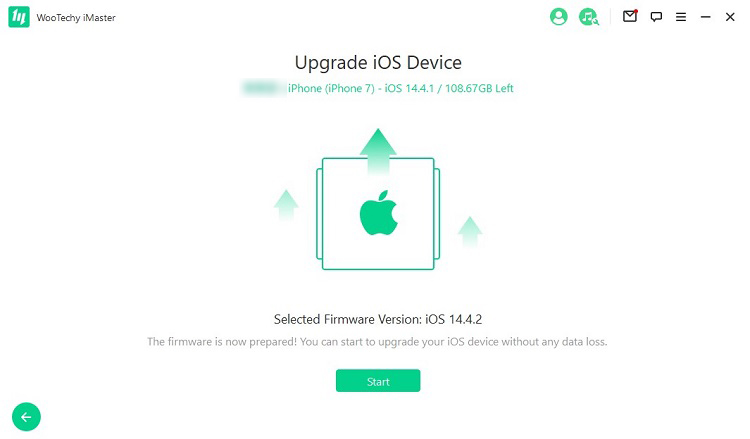
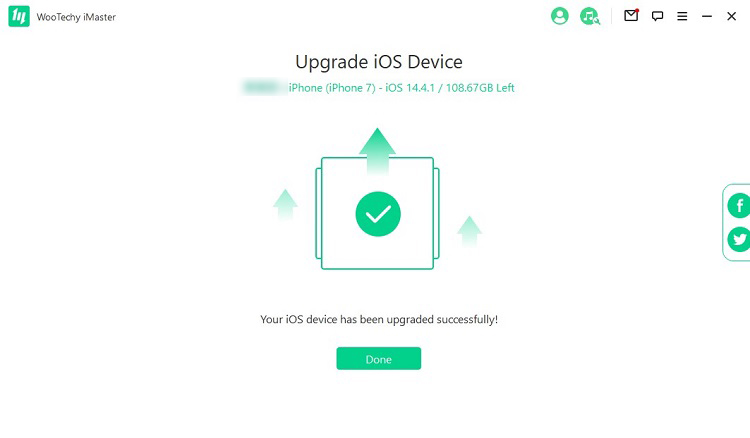
Step 4: Upgrade iOS Device
Now your device is well prepared for the iOS upgrade. Click “Start” and the program will start to upgrade your device immediately.
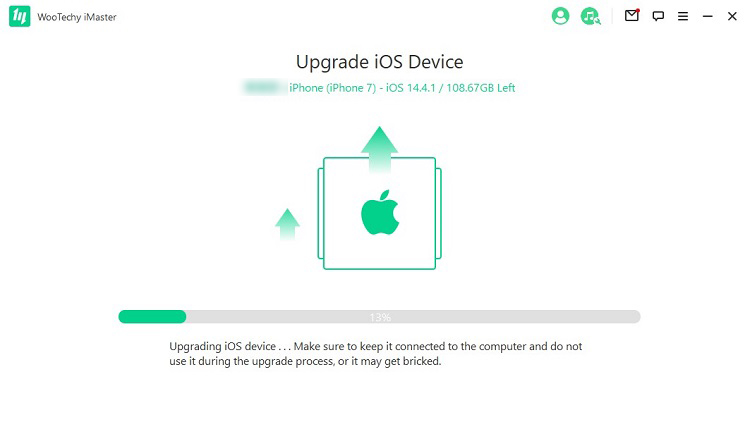
Then wait for the program to finish the task within a few minutes. Note that during this process, you should keep the device connected to the computer and do not use it.
Finally, you will see a prompt saying “upgraded successfully”. Just click “Done” to finish the upgrade process.
Mode 2. Downgrade iOS
Step 1: Launch WooTechy iMaster and Connect Your Device
Download and install WooTechy iMaster on your PC.
Connect your iOS device to the computer. If you've connected your device to the computer but it’s not recognized by the program, click on the link that says “Device connected but not recognized?”. Follow the on-screen instructions to fix it.
Step 2: Downgrade iOS
Choose the “Downgrade iOS” mode after your device is connected and recognized. This mode is for users who want to roll back their devices smoothly without data loss.
Step 3: Download Firmware to Computer
The program will then prompt you to choose a firmware version you need. Note that you can customize the firmware download path here. Click “Next” to start downloading the firmware to computer.
The program will take some time (mainly depending on your internet speed) to download the firmware. After that, it will automatically proceed to verify and extract the firmware, which will be relatively fast.
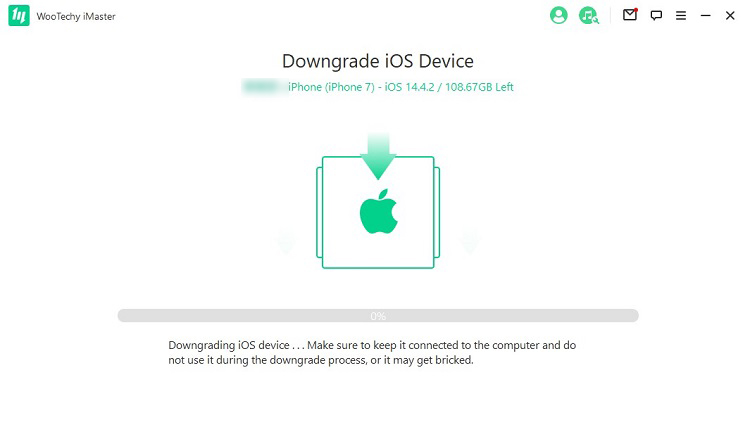
Step 4: Downgrade iOS Device
Now your device is well prepared for the iOS downgrade. Click “Start” and the program will start to downgrade your device immediately.

Then wait for the program to finish the task within a few minutes. Note that during this process, you should keep the device connected to the computer and do not use it.
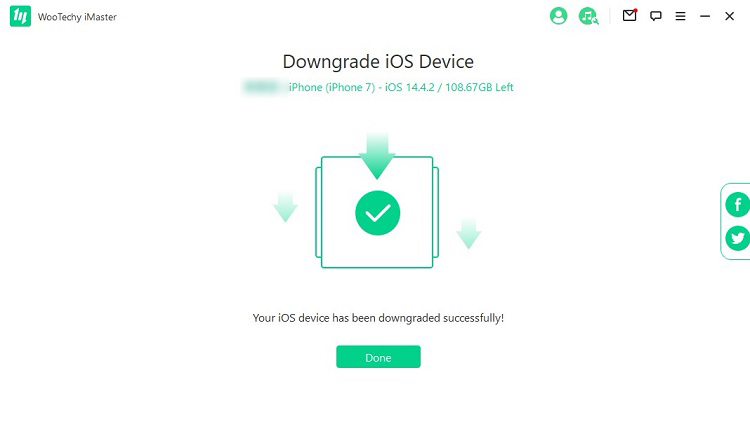
Finally, you will see a prompt saying “downgraded successfully”. Just click “Done” to finish the downgrade process.
Mode 3. Back Up iOS
Step 1: Launch WooTechy iMaster and Connect Your Device
Download and install WooTechy iMaster on your PC.

Connect your iOS device to the computer. If you've connected your device to the computer but it’s not recognized by the program, click on the link that says “Device connected but not recognized?”. Follow the on-screen instructions to fix it.

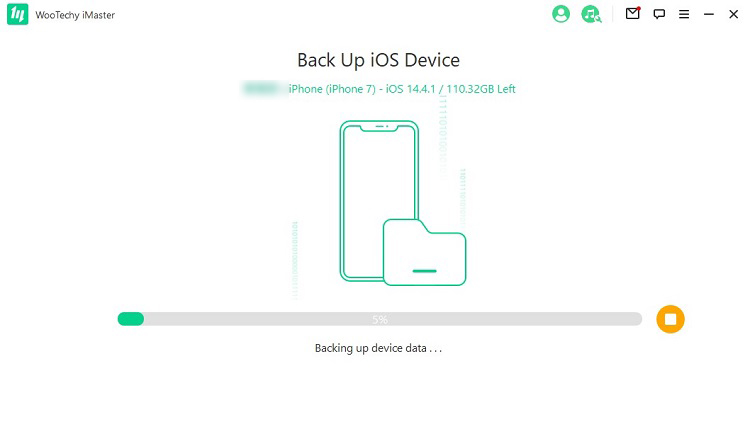
Step 2: Back Up iOS Data
Choose the “Back Up iOS” mode after your device is connected and recognized. This mode is for users to make a local device data backup on computer.
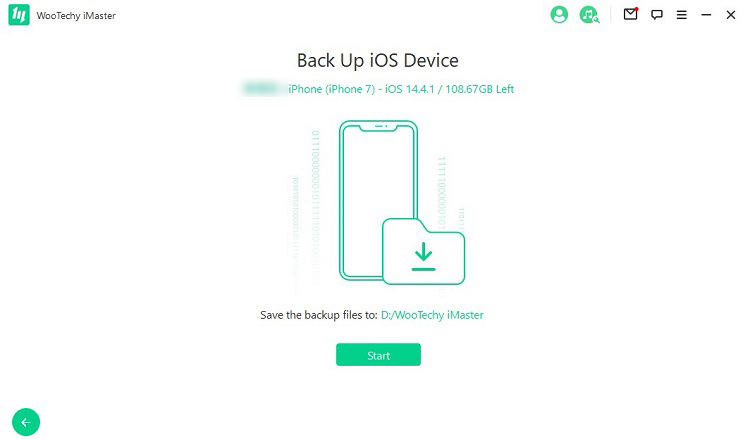
Choose a storage location to save the backup file, and then click “Start” to back up data.
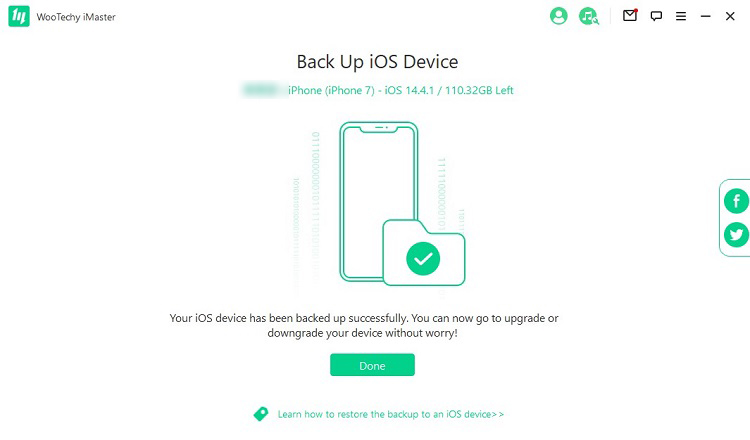
Step 3: iOS Backup Successfully
iMaster will finish backing up your device data in a short time.
Finally, click “Done” to complete the backup process.