Airdrop is one of the most famous features of iOS. It allows you to share files and data without any hindrances and also allows you to connect across any other iOS device you want. However, in a real-world scenario, problems are unavoidable. Hence if you are facing the issue of Airdrop not working on Mac, then don't stress out, I am going to introduce the perfect solution for your problem.

1.What is Airdrop?
Apple Airdrop is an iOS feature that allows you to share data across iOS devices with ease without the need for a wired connection between your devices.
You can send and receive movies, pictures, and even voice recordings as long as both of the devices run on iOS or other Apple-related Operating Systems.
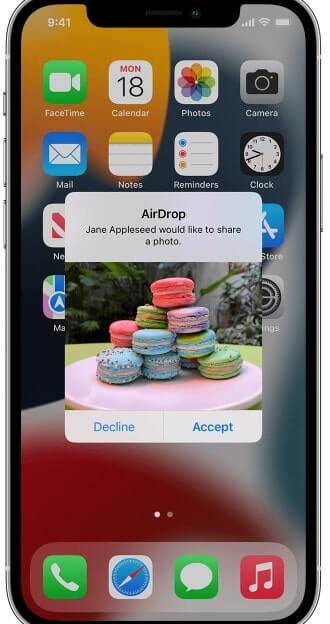
Just simply tap “Accept” to allow receiving the Airdrop or “Decline” in case you want to refuse.
2.Reasons behind Airdrop not working on Mac?
Is your Airdrop not working on Mac? Don't worry; it's a pretty common issue. A lot of users have complained that their Apple Airdrop failed to work with their Mac. This can certainly be annoying for the users, especially if there is a need to send the data urgently.
So first, we will try to figure out the reasons behind your Airdrop not working on Mac and work our way by resolving those issues
Compatibility issues:
Airdrop is only compatible with MacBook models such as
2008 or later MacBook Pro
2010 or later MacBook Air
2008 or newer MacBook
2009 or newer iMac
2010 or later Mac Mini
2009 or newer Mac Pro
And all iOS devices that have a Lightning port and run iOS 7 or later. So, make sure the devices across which you are trying to Airdrop are compatible.
Reasons behind Airdrop not working on Mac
Disabled Wi-Fi and Bluetooth:
Both Wi-Fi and Bluetooth must be enabled for Airdrop to work. Go to settings and make sure your Wi-Fi is not disabled on your Mac or iPhone.
Do the same for Bluetooth. You can enable and then disable airplane mode to reset network settings quickly.
Latest updates installed:
Make sure both of your devices have the latest updates installed and running.
If not, then update your Mac and iPhone and try using the feature again after the update is finished.
Devices too far away:
Bluetooth work only within a range of 10 meters on the latest Apple devices. And since Airdrop uses Bluetooth, both of your devices must be in close range for the Airdrop feature to work. So make sure they are not too far away from each other.
“Everyone” option enabled:
Check the settings to see if you have enabled the “Allow me to be discovered” option to “Everyone” in the Finder on your MacBook. This can be done by going to the “’ Security and Privacy” panel in your MacBook Settings.
“Block all incoming connections” enabled:
Your Airdrop feature will also not function if you have the “Block All incoming Connections” enabled in the “Security and Privacy” panel of your MacBook.
Disable this option by going to Settings and then see if Airdrop failed to work or not.
Firewall:
Sometimes the firewall can also be a reason behind Airdrop not working on Mac, especially if you are using the built-in firewall of Mac OS, as it blocks incoming connections.
Disable the firewalls and then check to see if Airdrop works
Locked devices:
Make sure both of your devices are unlocked, as this can also be one of the reasons behind Airdrop not working on Mac.
3.Airdrop still not working on Mac?
Despite going through all of the above, your Airdrop still didn't work on Mac. Do not stress out, as we still have one neat trick remaining up our sleeves, The Wootechy iPhixer.
Wootechy iPhixer can fix practically all of the iOS-related problems without any data loss. Not only it is reliable, but it also supports the latest iOS versions.

How to Fix Airdrop not Working on Mac using Wootechy iPhixer?
Here are a few easy steps on how to resolve the “Airdrop not working” issue using Wootechy iPhixer.
STEP 1: Download and install Wootechy iPhixer.Go to Wootechy iPhixer website. Click on the Free Download button to download it.Run the Wootechy iPhixer Application to install it and wait for the installation to finish.
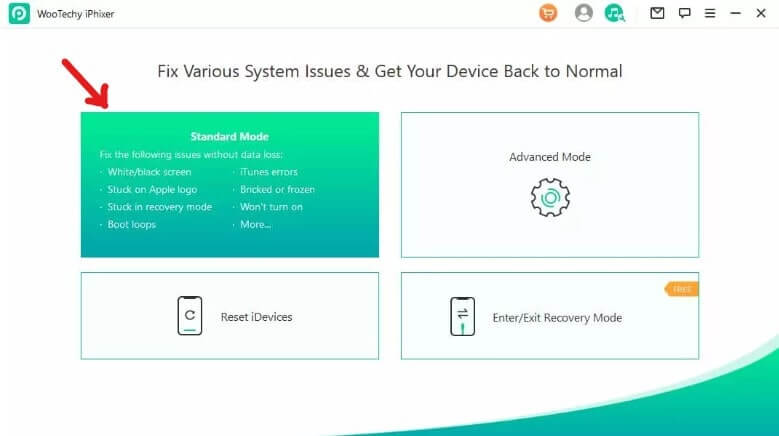
STEP 2: Launch Wootechy iPhixerAfter the application has finished installation, run it.A menu showing different options will appear. Select the Standard Mode.
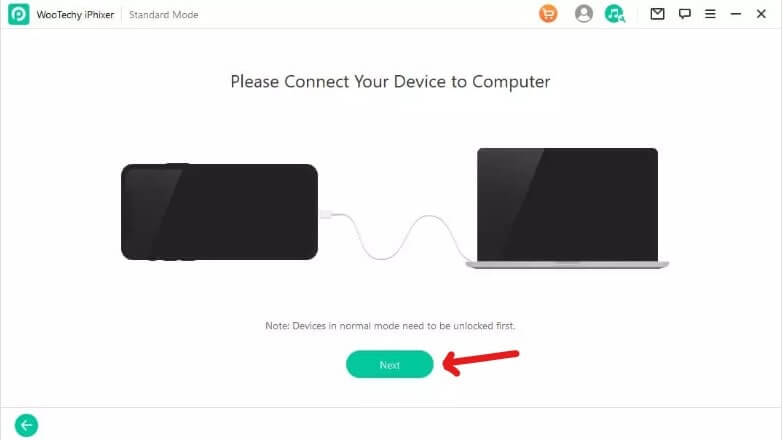
After selecting the Standard mode, a screen will appear asking you to connect your device. Connect your device and click “Next” to continue the procedure.
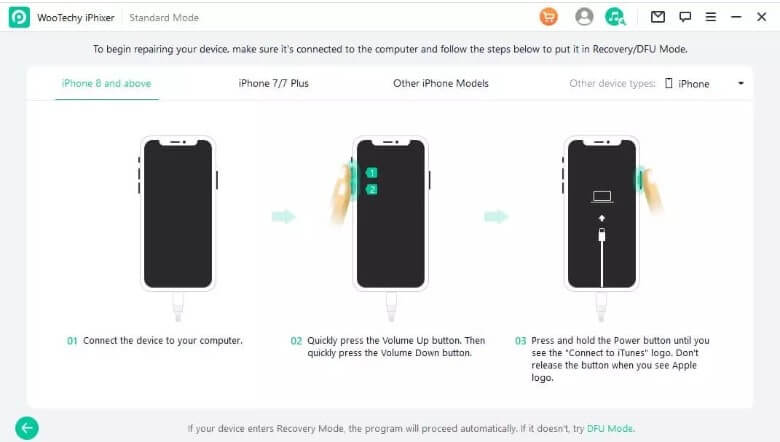
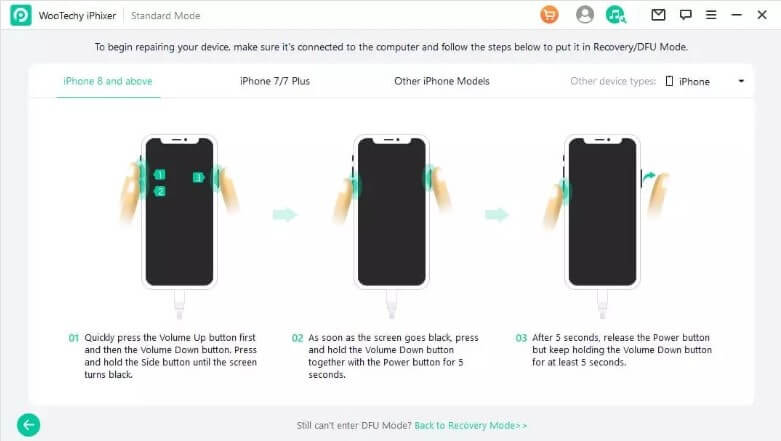
The screen will show a procedure to put your device either in Recover mode or DFU mode.To put your phone in Recovery, follow the instructions shown.
To put your phone in DFU mode, do the following.
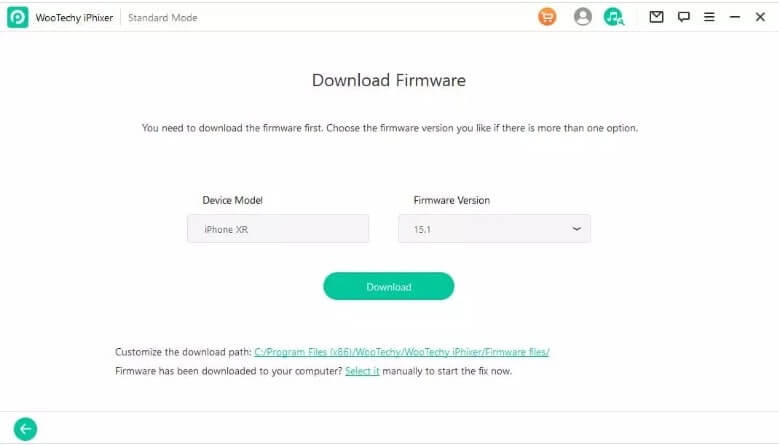
To repair your iPhone iOS, you will need to download the firmware by clicking on the download button.The app will show you the firmware suited for your device, but you can also choose some other firmware as well.
Click "Start" to start repairing the device. Do not operate your iPhone or disconnect during the process, as it will cease to function.
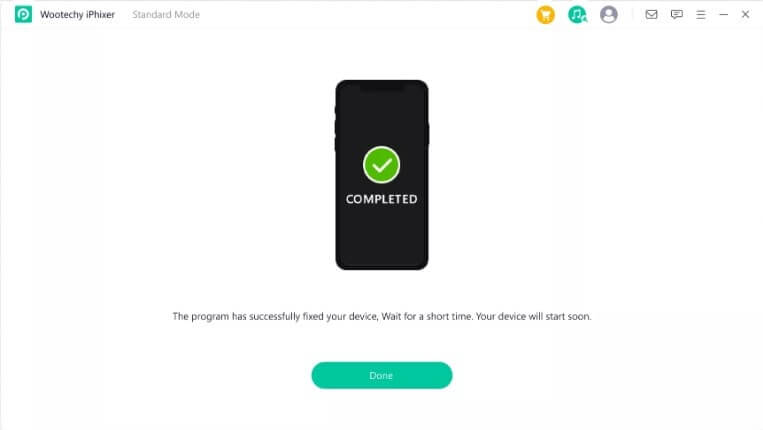
After this process is completed, your device has been fixed. You can now restart your device and use it normally.
Conclusion:
Apple Airdrop is one of the most used Apple features. So, it can be pretty stressful when you want to send data to your MacBook but can’t do so as you just found your Airdrop not working on Mac.
Even if you have tried all the possible solutions and can’t resolve the issue, we have the perfect solution for your problem, the Wootechy iPhixer.
Download the software by following the steps listed above in this article and fix all your iOS-related issues.
Key Features of iPhixer

75.000.000+
Downloads
- Resolve all iOS update problems such as iPhone stuck on preparing update, iPhone stuck on update requested and iPhone freezing during update without data loss.
- Support all models of iPhone/iPad/iPod touch/Apple TV and iOS versions.
- With a high success rate, iPhixer brings your device back to normal via a few clicks.
Free Download
Secure Download


