User Guide of iSeeker (Windows Version)
• Go to iSeeker (Mac Version) >>
Have accidentally deleted important files from your iPhone? Or your device is factory reset and everything is gone? With iSeeker in hand, all lost data will be back like you've never lost them in the first place.
iSeeker provides different data recovery options. Follow the simple steps below and recover your files in no time.
Mode 1. Recover Data from iOS Device
Step 1: Connect Your Device
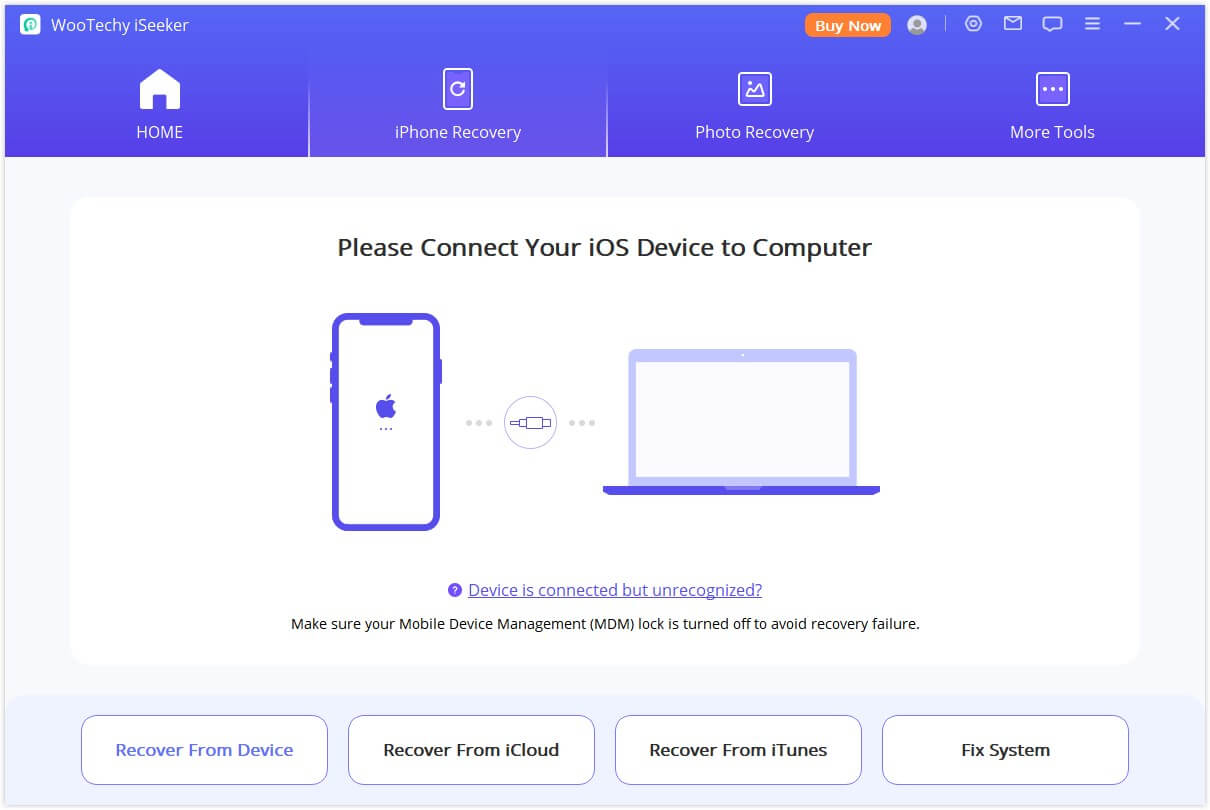
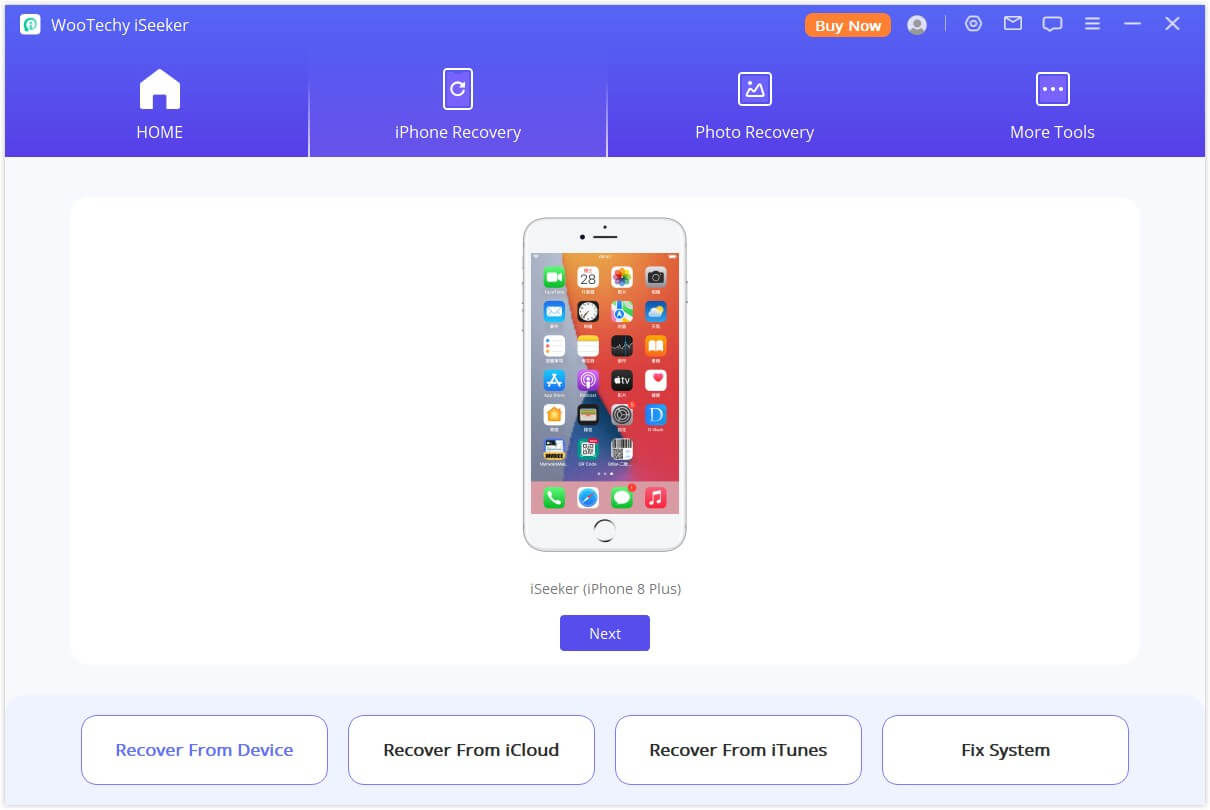
After opening this recovery software, choose the Recover from Device option, then connect your Apple device to the computer. Once your device is detected, click "Next" to continue.
Step 2: Scan for Lost Data
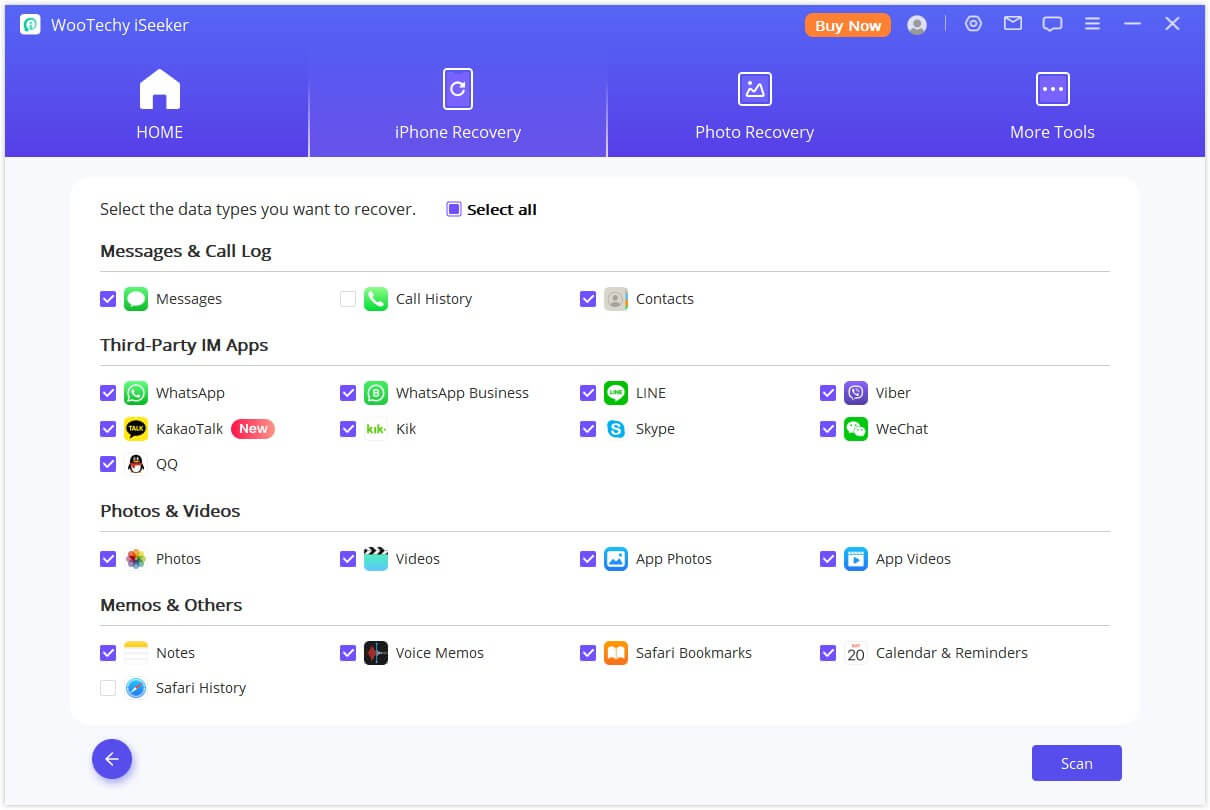
Select the file types you want to recover, then click the "Scan" button. The program will perform a thorough scan on your device to search for lost data.
Step 3: Preview and Recover Data
Once the scan is complete, all recoverable data will be neatly organized, as depicted in the image below. Click on each tab to view all files. For precise and swift data recovery, utilize the funnel icon in the upper right corner to filter by file status and dates.
If you prefer to recover your data to your computer:
Choose the files you wish to recover, then click "Recover to Computer" located at the bottom right corner.
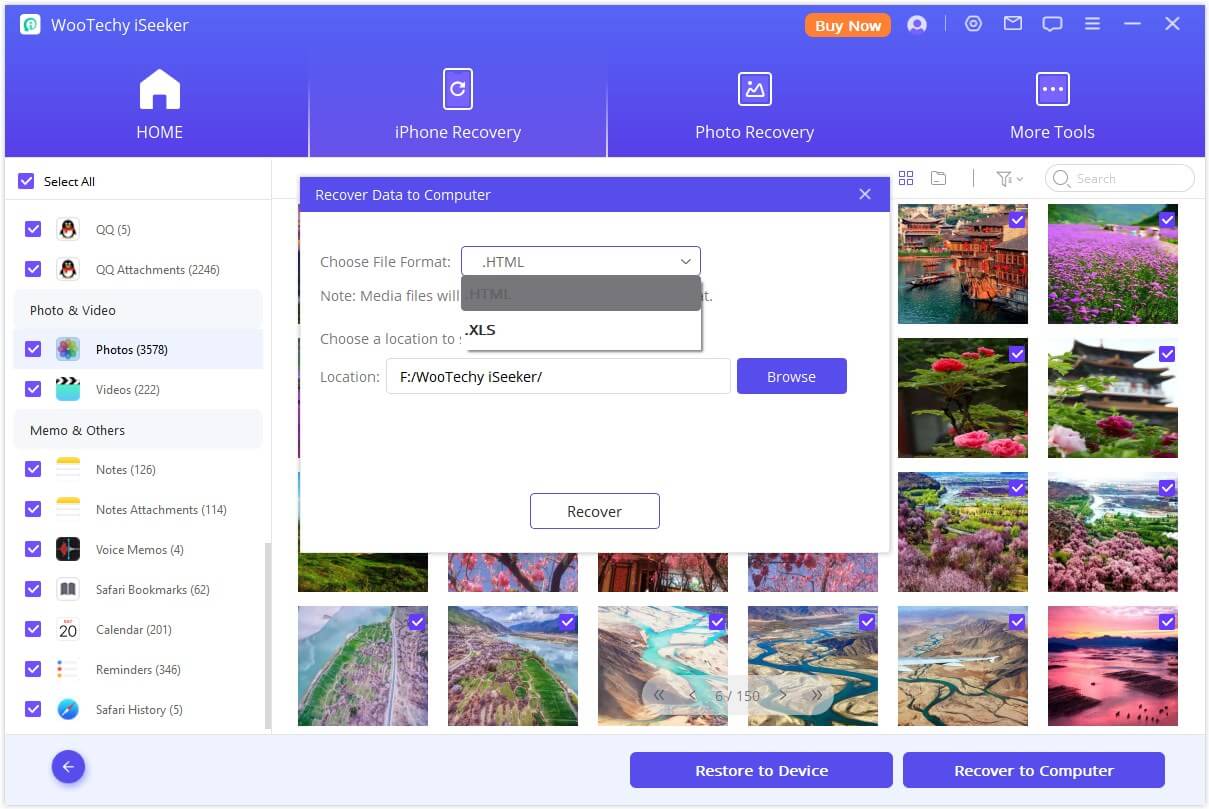
A pop-up window will appear, allowing you to choose the location to store the recovered files. The recovery process will only take a few minutes to complete.
If you prefer to recover your data to your mobile device:
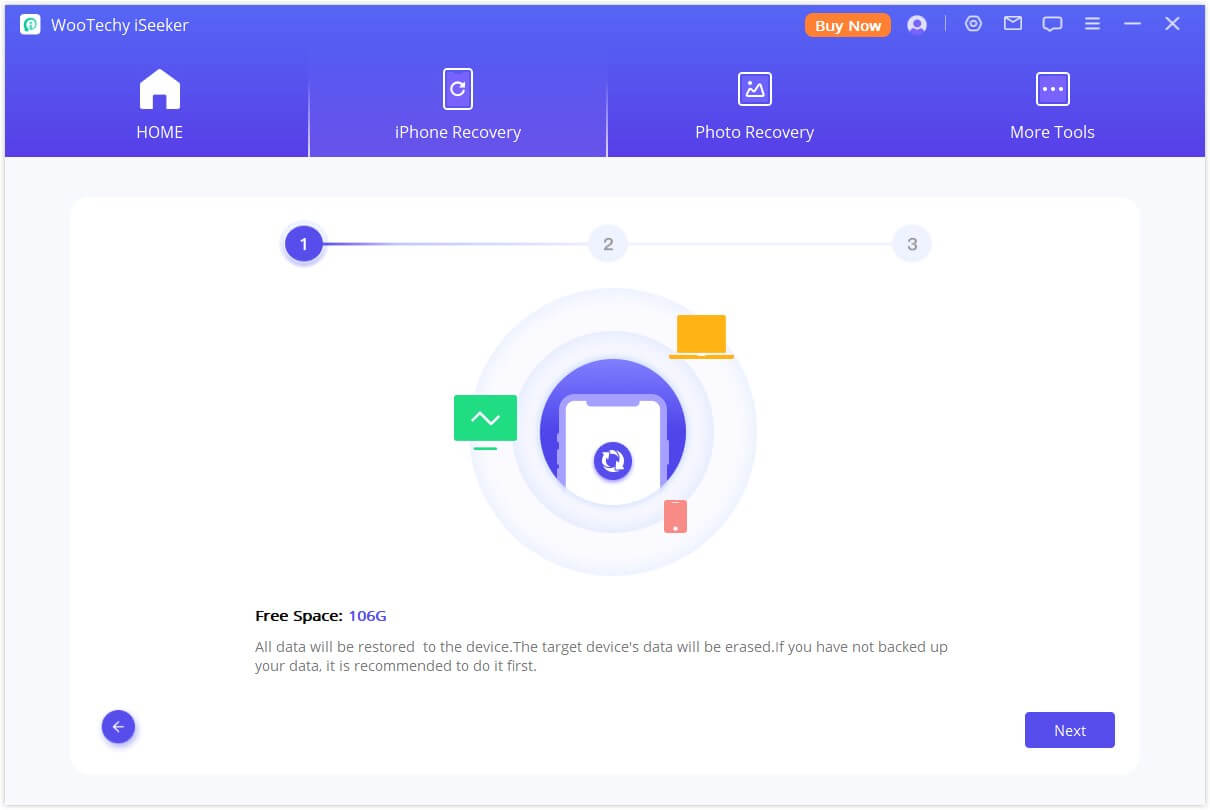
Ensure your target device is connected, then proceed by tapping on the "Next" button. Please ensure that your device has sufficient space to accommodate the restored data, as the restoration will fail otherwise.
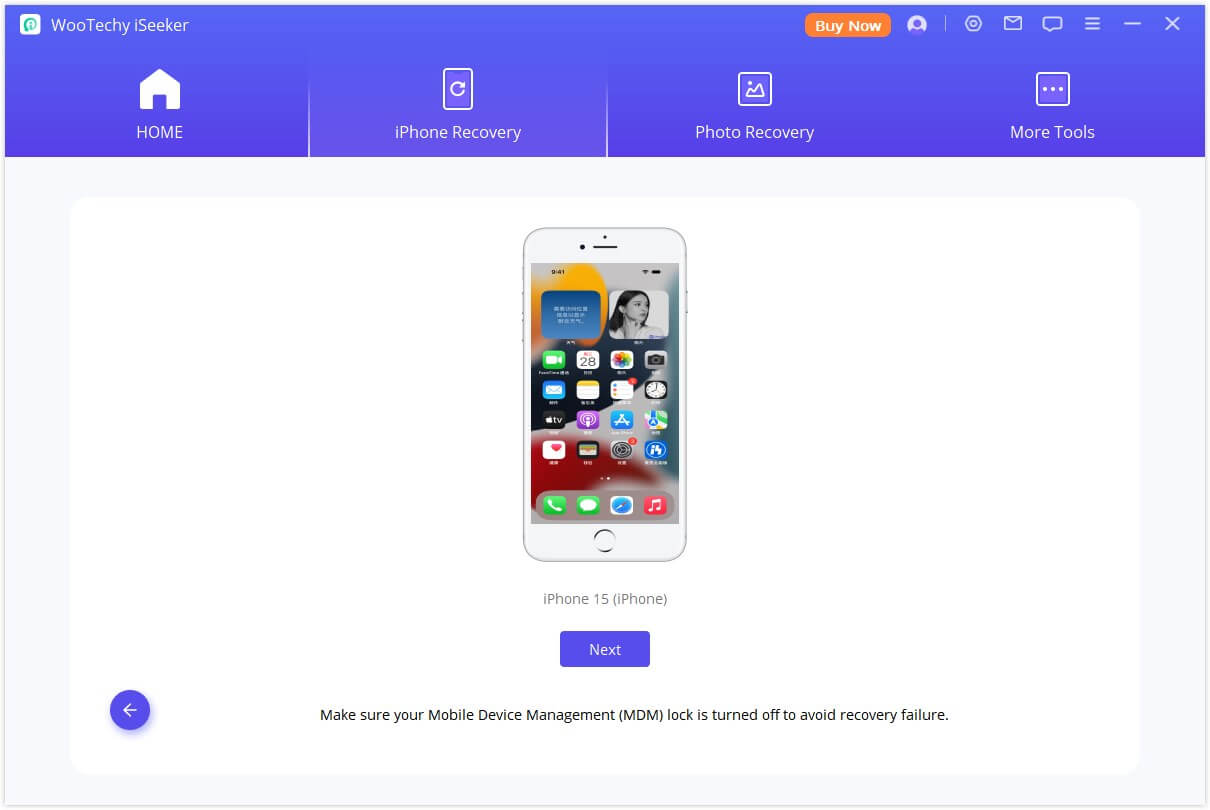
The program will now commence the recovery process.
Notes:
The program only supports restoring backups to a device running the same or newer iOS versions. You may need to upgrade your device to the latest iOS version before trying again.
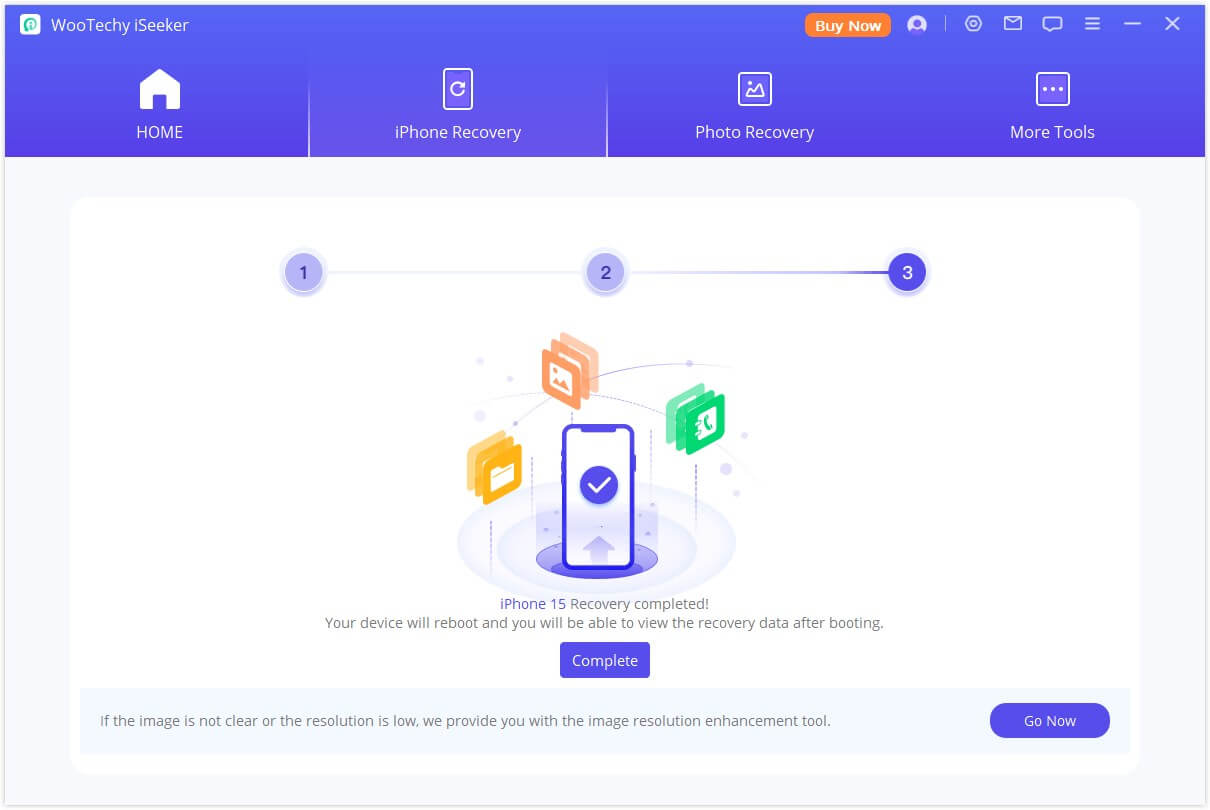
Shortly, your data will be successfully recovered to your iPhone.
Mode 2. Recover Data from iTunes Backup
Step 1: Choose an iTunes Backup for Scanning
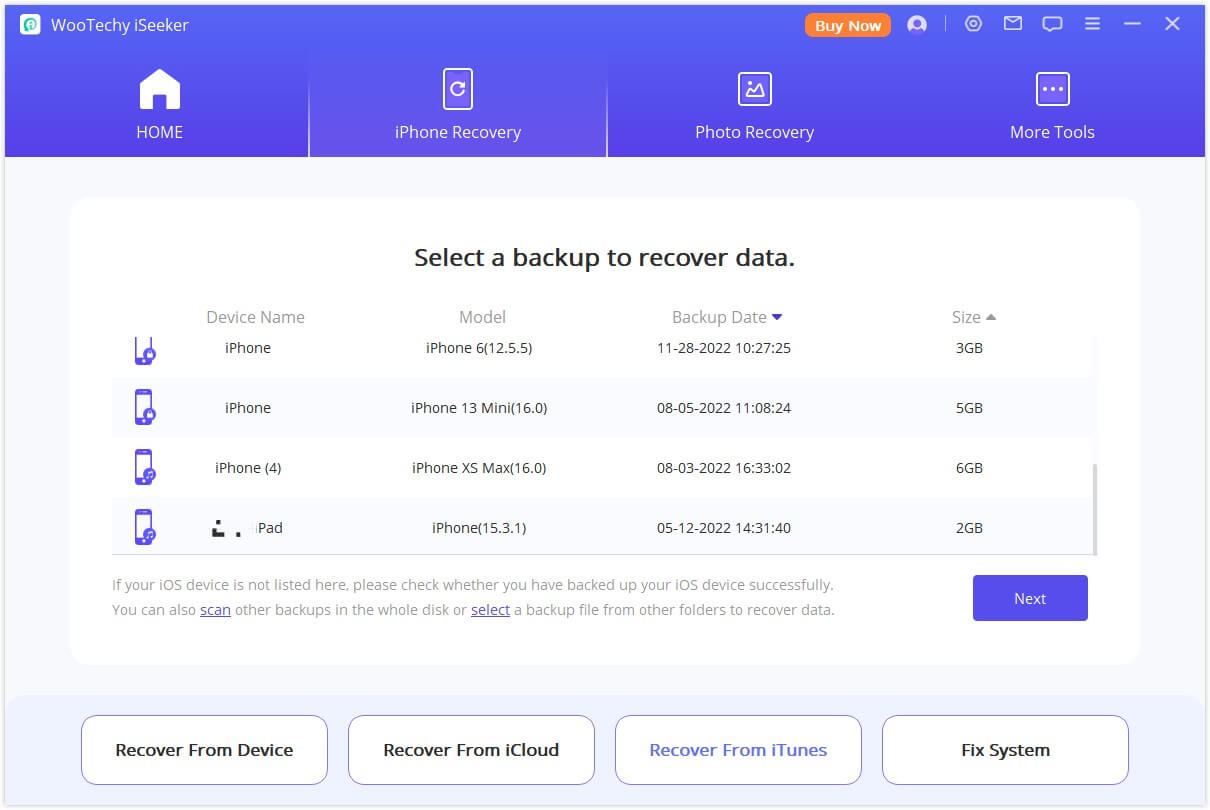
Select the Recover from iTunes Backup option from the main interface, then choose the exact iTunes backup from which you want to recover data. Click "Next".
Notes:
- iSeeker also supports scanning and recovering data from iTunes backups that you've made with other programs on your current computer.
- To recover data from an encrypted iTunes backup, please enter the password for decryption first.
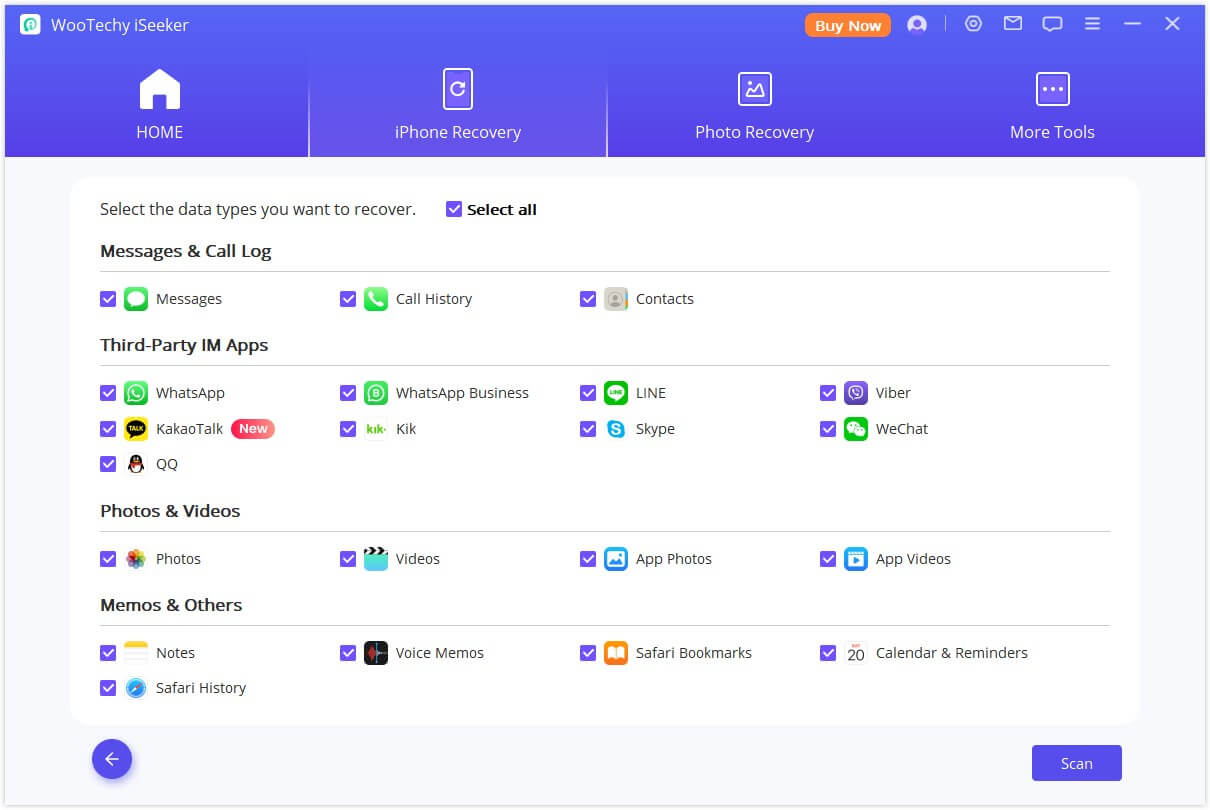
Select the data types to be recovered and click the "Scan" button. An all-round scan will be conducted to extract data from the iTunes backup.
Step 2: Preview and Recover Desired Data
The search results will be clearly displayed on the interface. To locate the data you wish to recover accurately and swiftly, you can click on the funnel icon located in the upper right corner to filter by file status and dates.
You'll need to select or create a folder as the recovery destination. iSeeker will then proceed to recover the data to the specified folder, which you can access after the recovery process is complete.
Restore to Computer
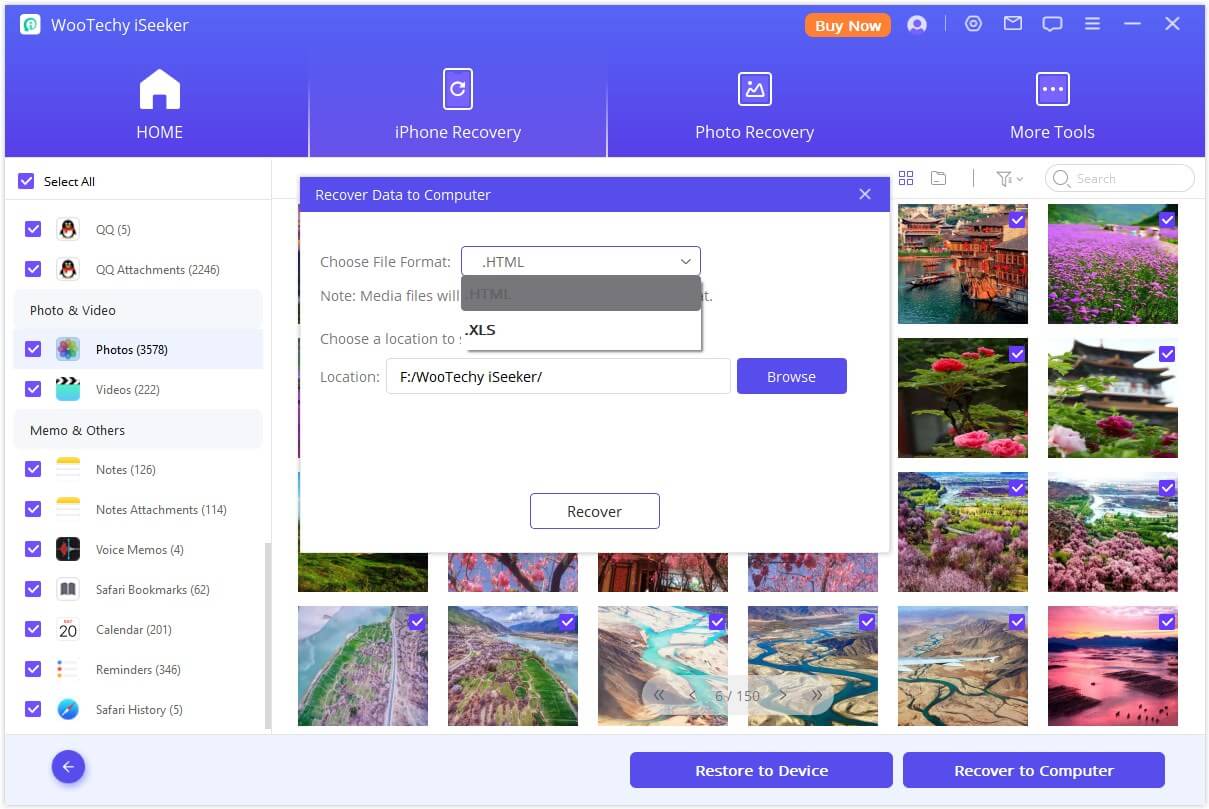
If you prefer to recover your data to your computer:
Choose the files you wish to recover, then click "Recover to Computer" located at the bottom right corner.
Restore to Device
If you prefer to recover your data to your mobile device:
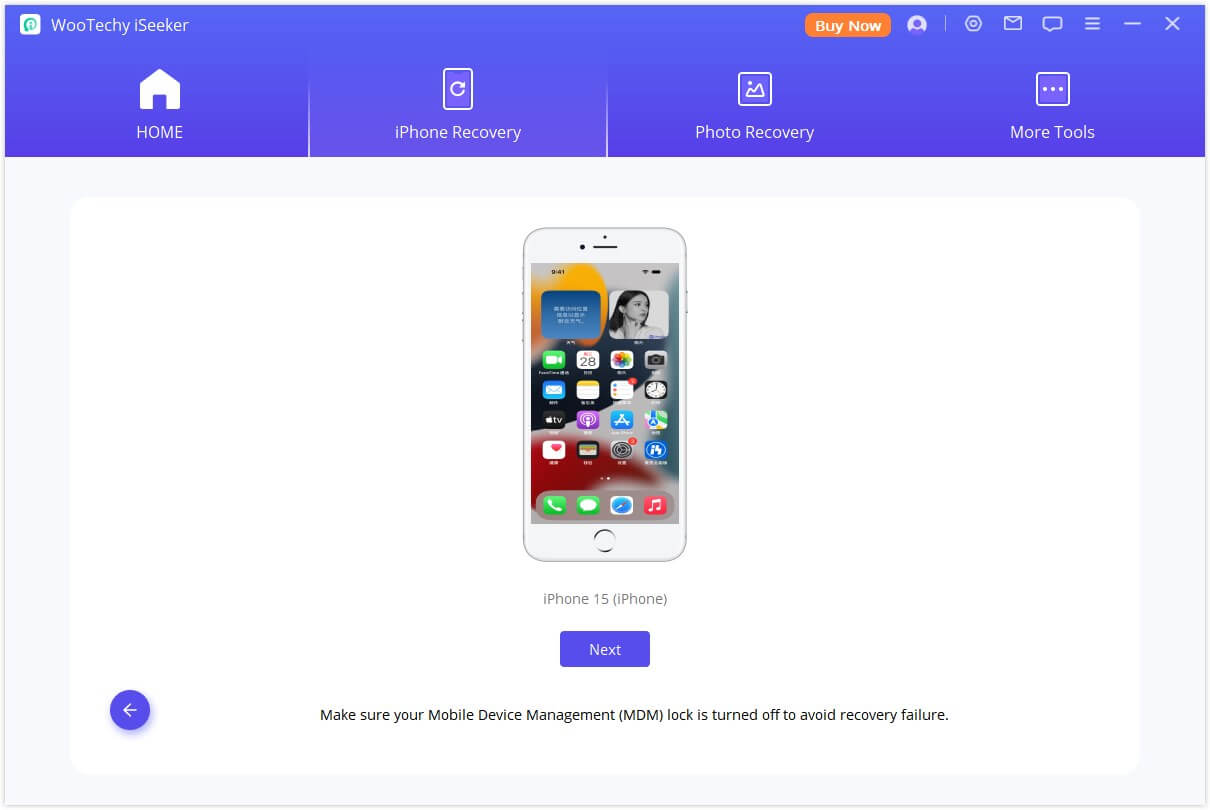
Ensure your target device is connected, then proceed by tapping on the "Next" button.
The program will commence the data recovery process, but please be aware that this action will overwrite the original data on the device.
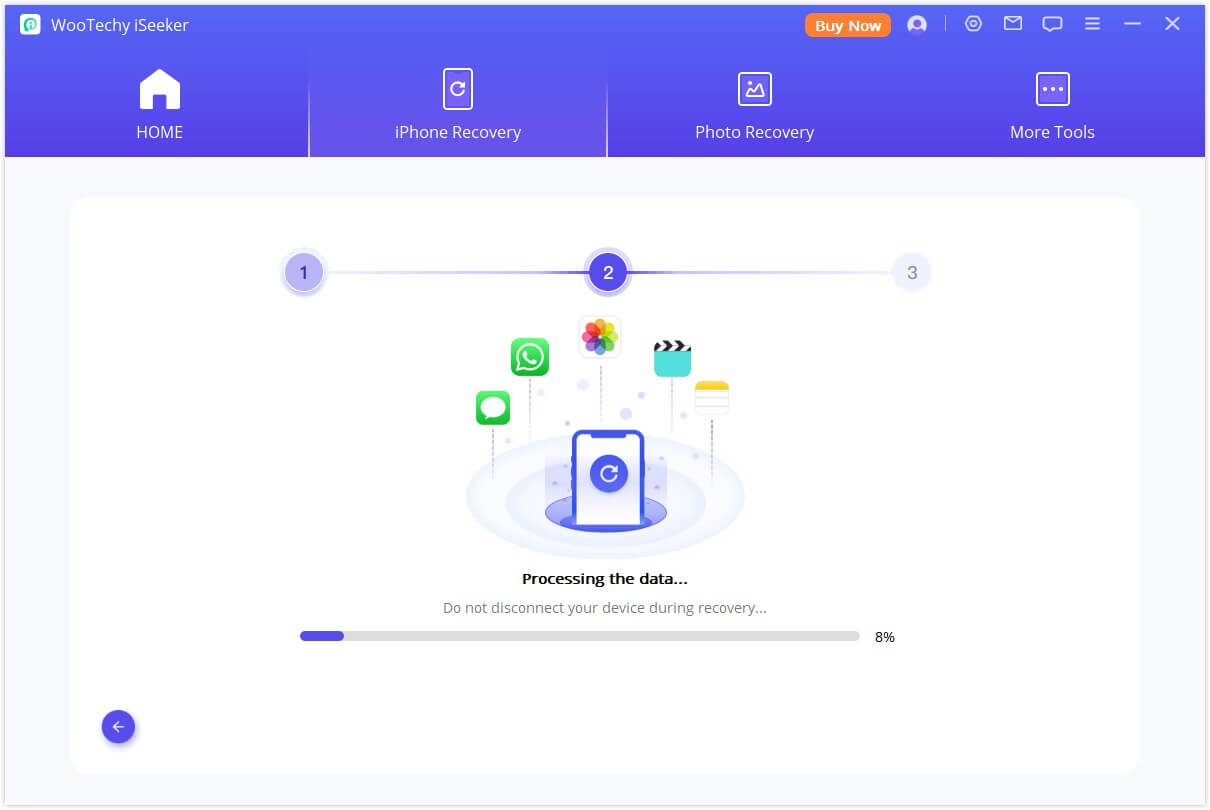
After a brief period, your data will be successfully recovered onto your device.
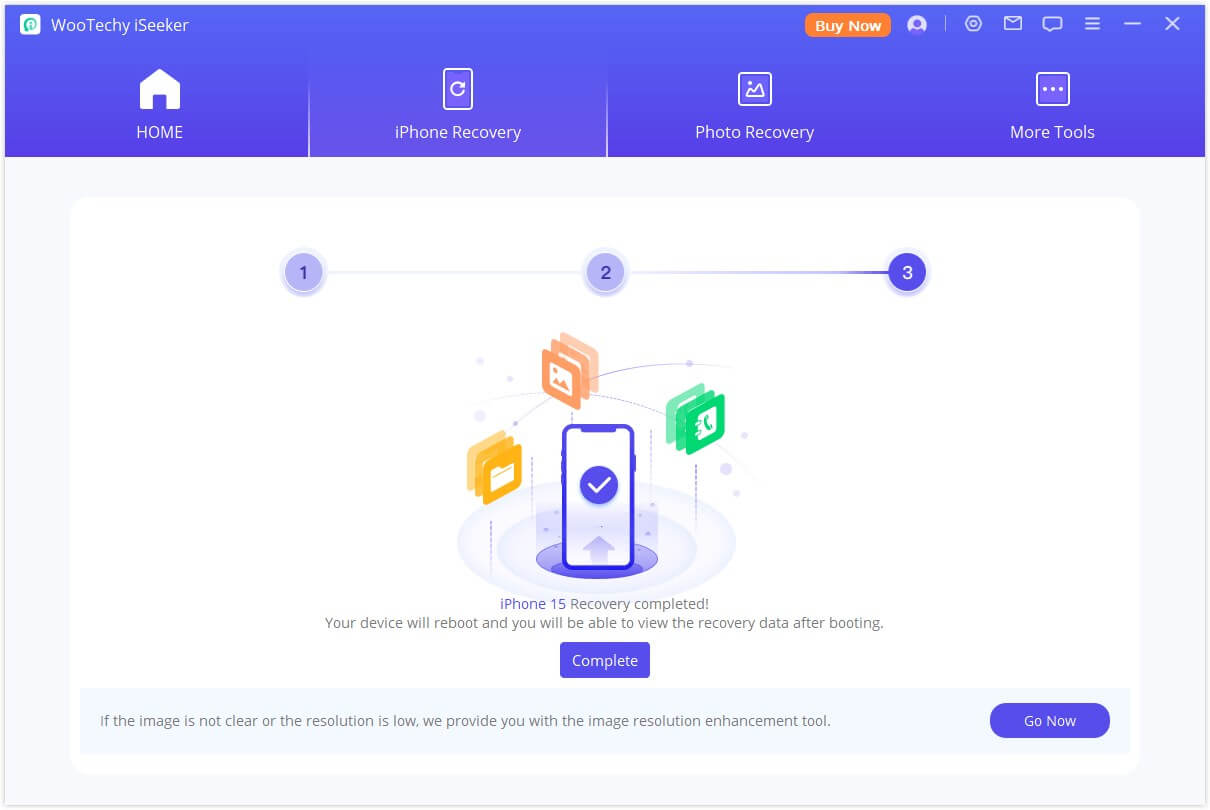
Mode 3. Recover Data from iCloud
iSeeker iCloud recovery software offers two options to recover data:
• If you have signed in to an iCloud account on your iOS devices and the data is automatically synced to iCloud, go to Option 1: Directly Recover from iCloud Account
• If you have manually backed up your data, go to Option 2: Recover from iCloud Backup
Option 1: Directly Recover from iCloud Account
Step 1: Sign In to Your iCloud Account
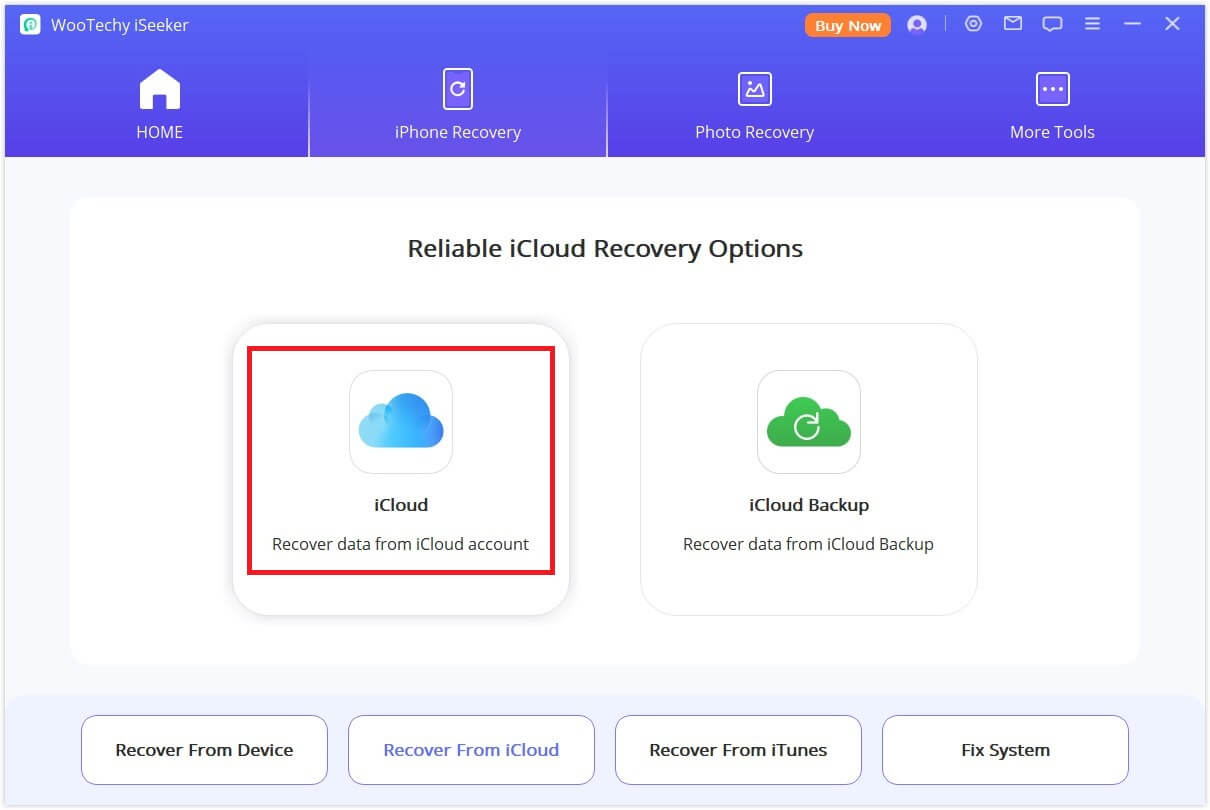
Lanuch iSeeker and select Recover from iCloud, then choose to recover data from your iCloud account.
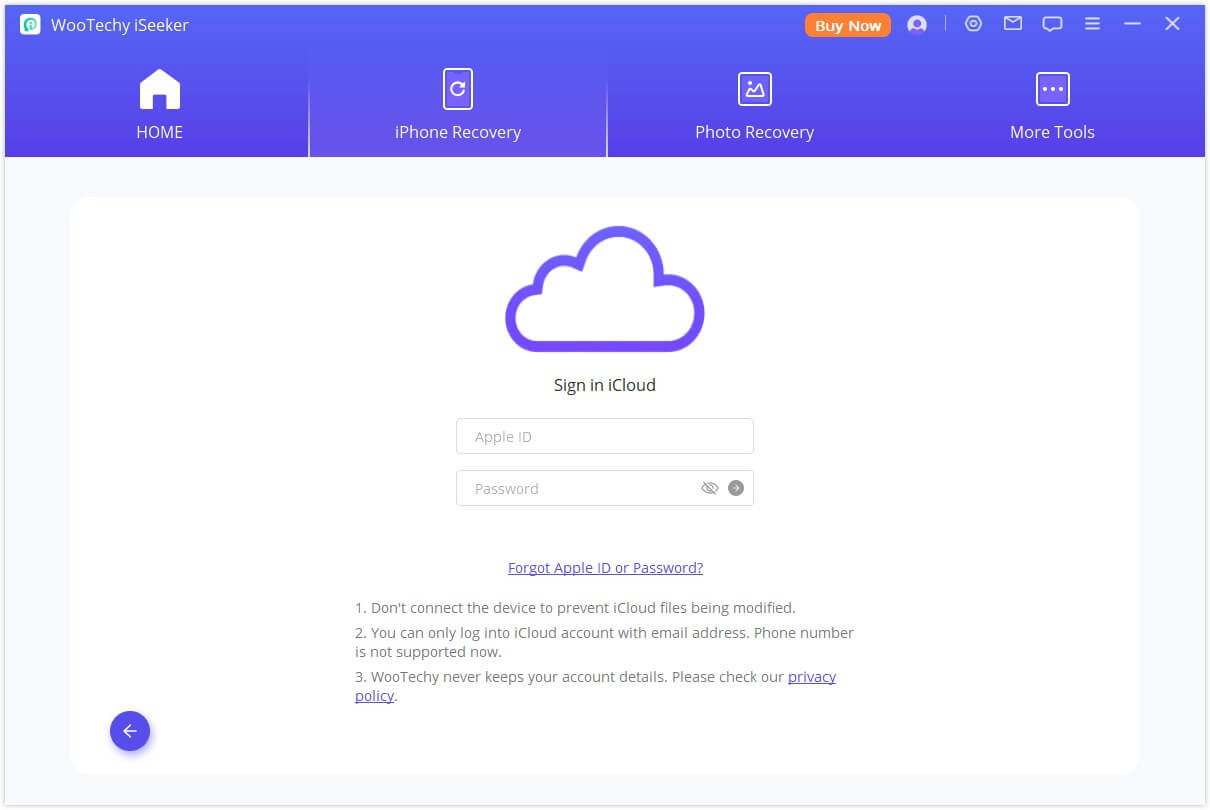
Sign in to the iCloud with your Apple ID and password. This process is 100% safe: WooTechy will never keep a record of your personal info.
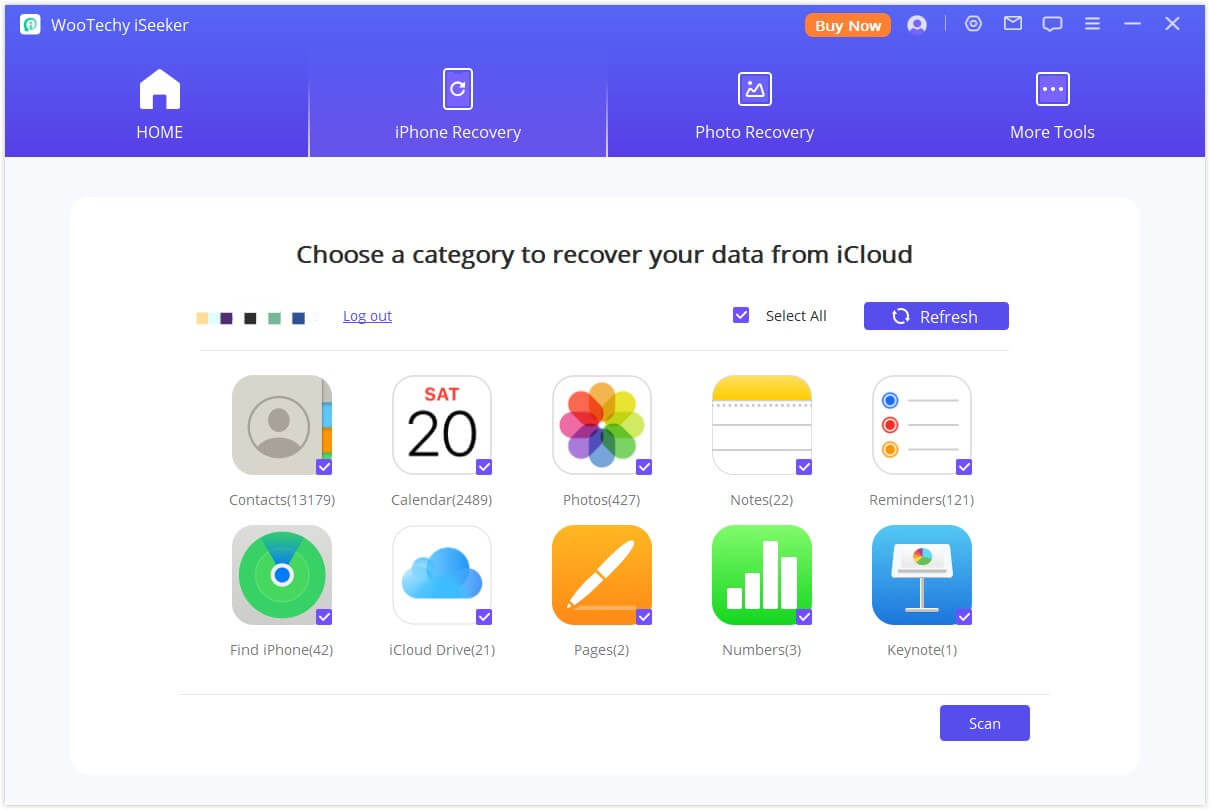
Step 2: Select Data Types and Scan
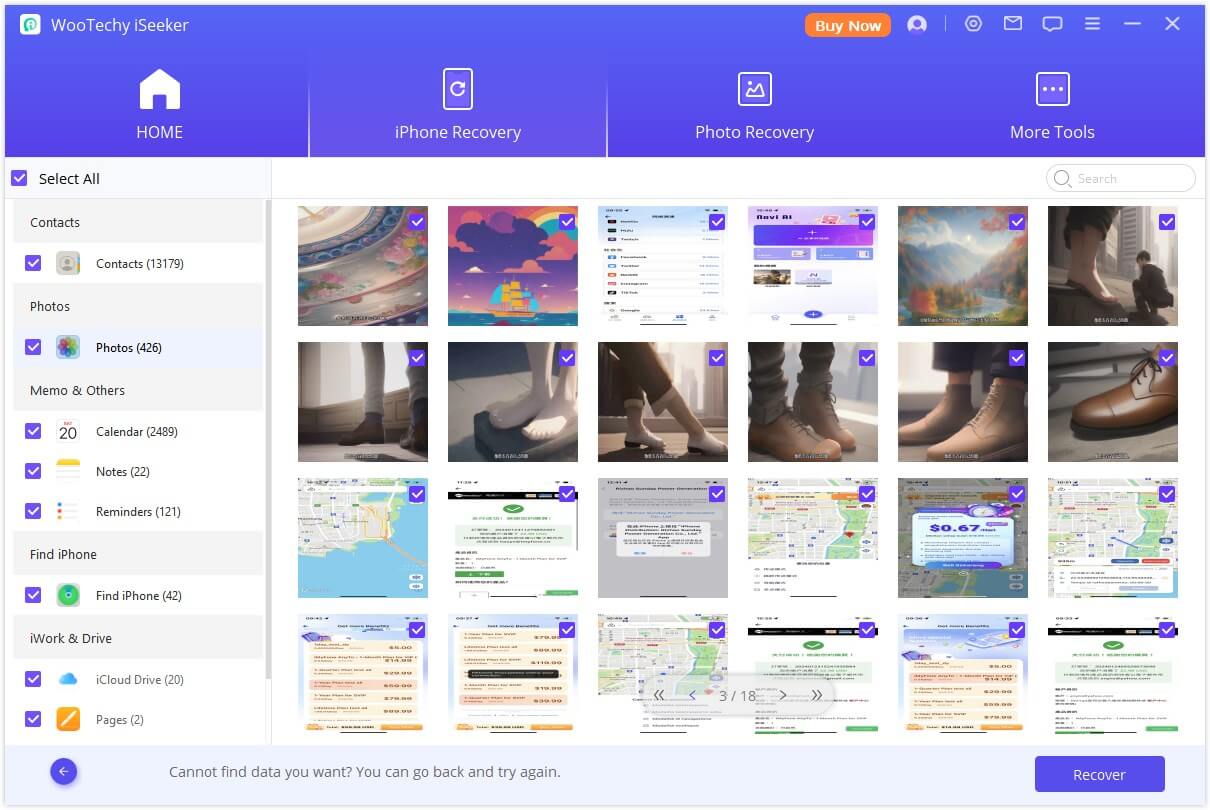
Choose the file types you want to restore from your iCloud account, including but not limited to contacts, photos, notes, and calendar, then tap the "Scan" button in the lower right corner.
Step 3: Preview and Recover Data
After the scan is completed, you can look through the results and get a preview of the content. Choose the files you need and click "Recover". Congratulations! Your files have been successfully recovered.
Option 2: Recover from iCloud Backup
Step 1: Select iDevice Status
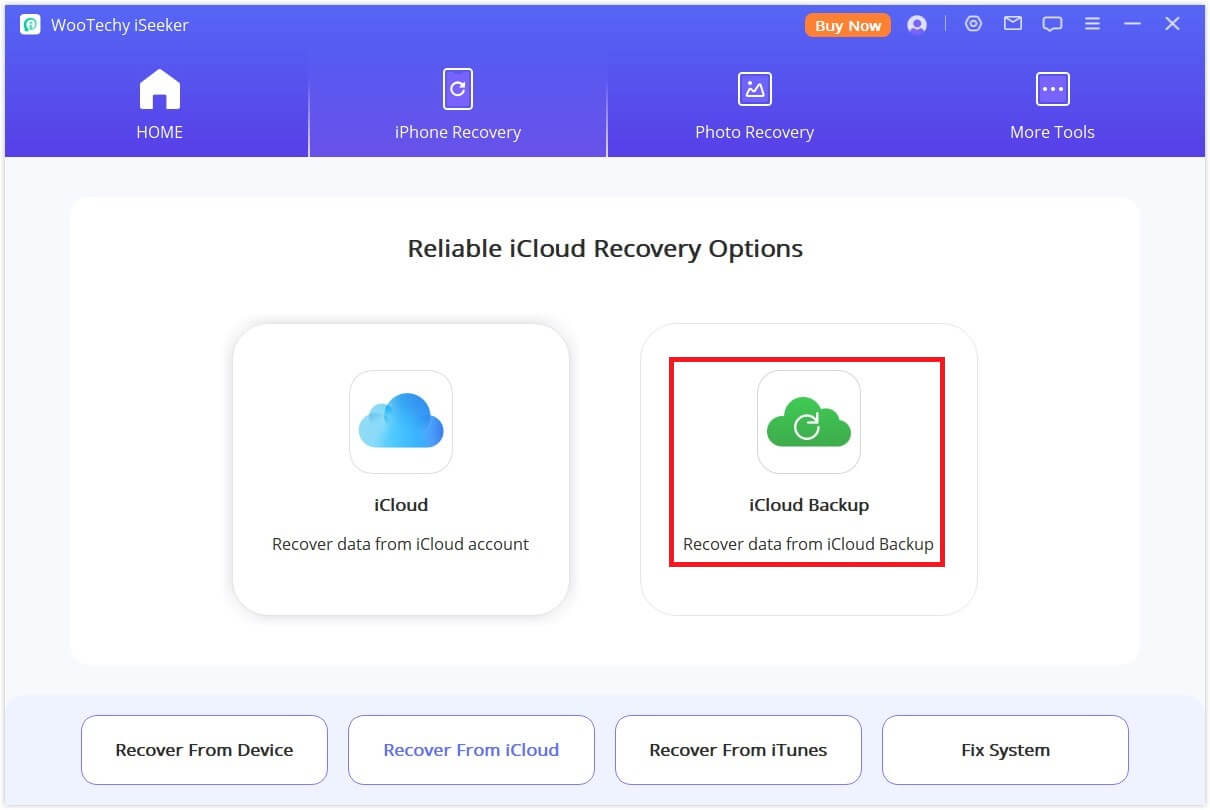
Navigate to the "Recover from iCloud" module and select "iCloud Backup."
Step 2: Choose iPhone Type
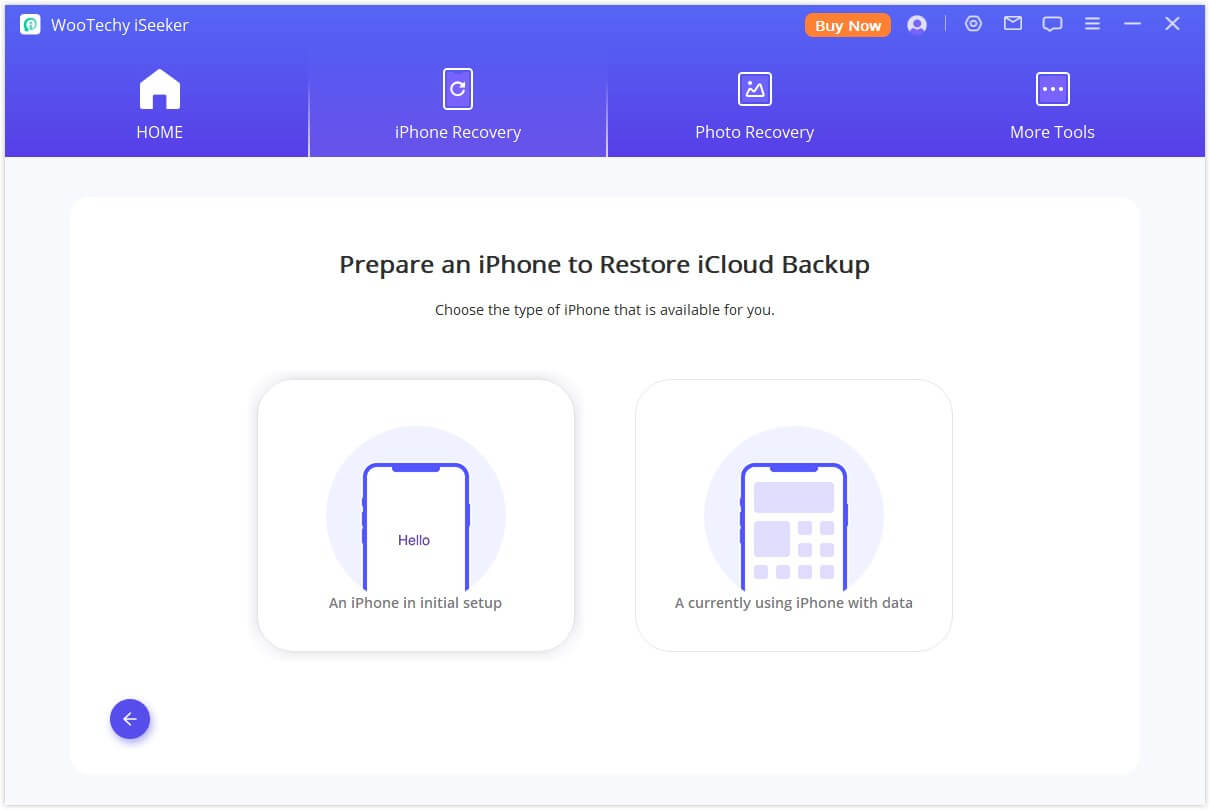
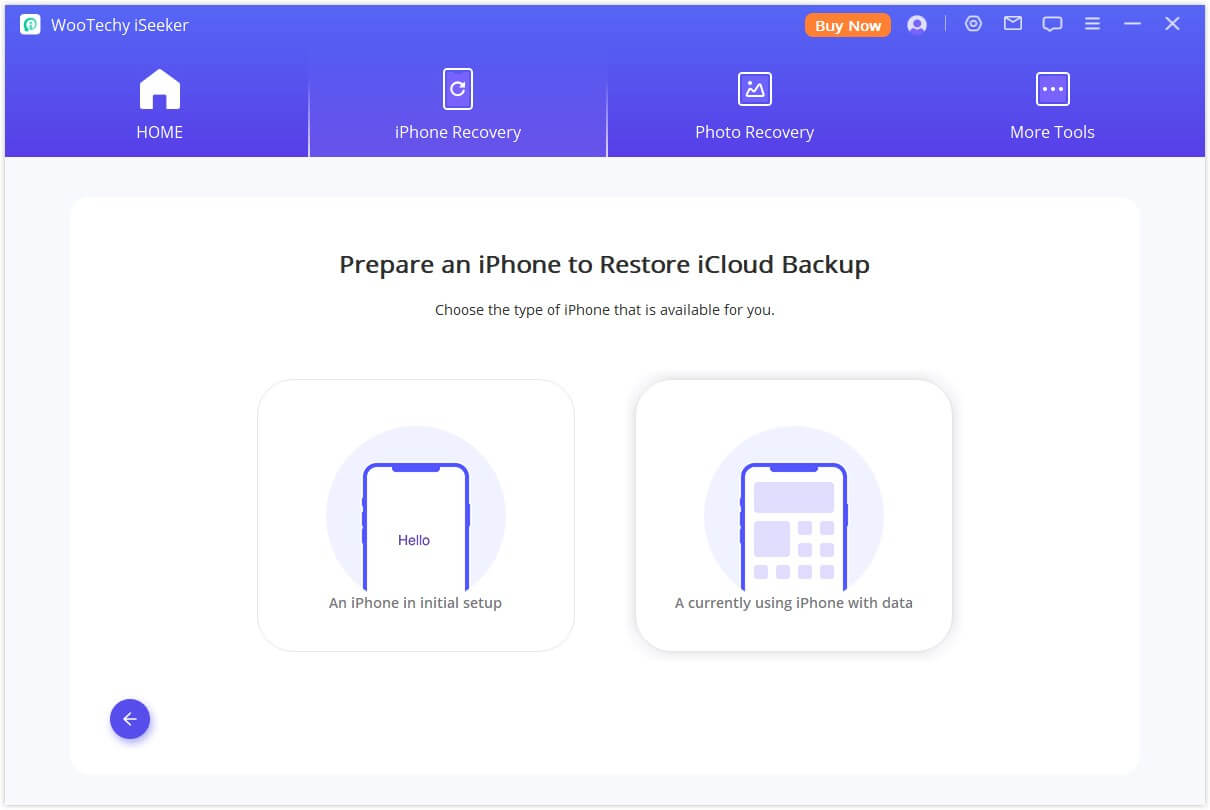
Depending on your iDevice status, follow the appropriate instructions. There are 2 types of iCloud backup recovery:
A currently using iPhone with data
An iPhone in initial setup:
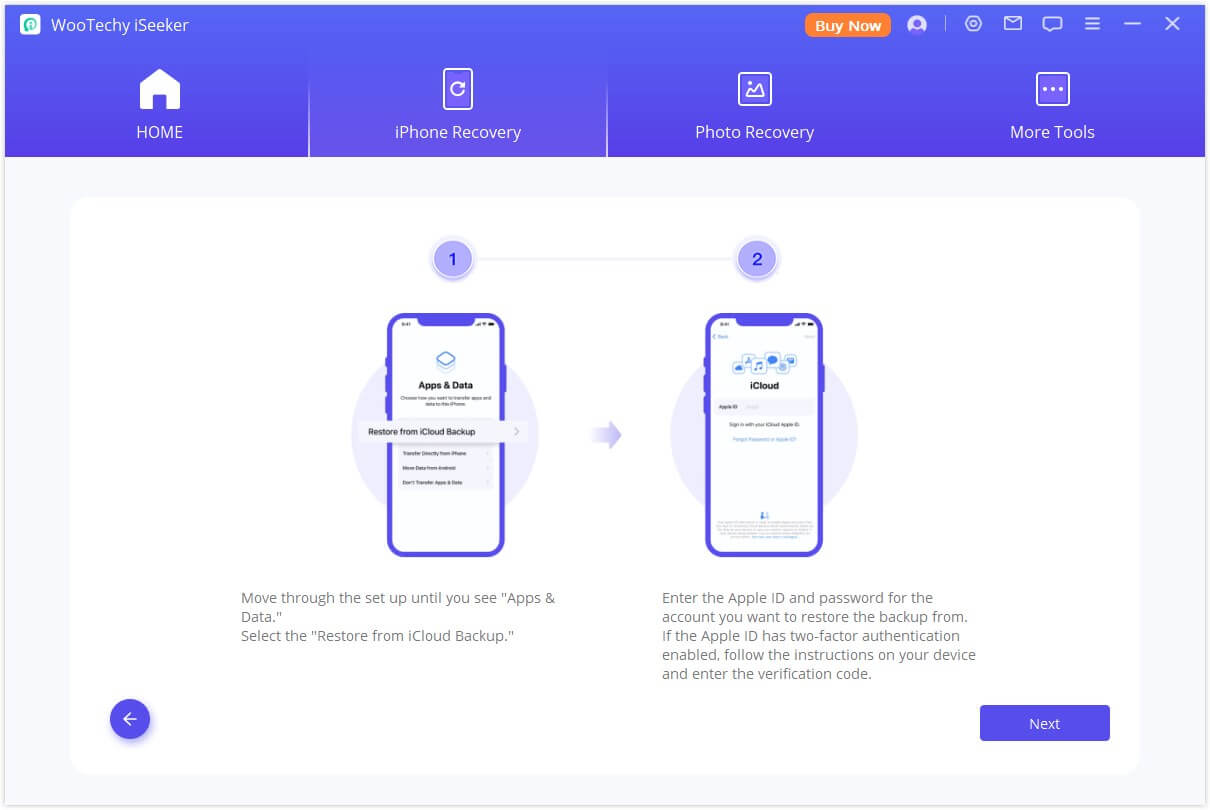
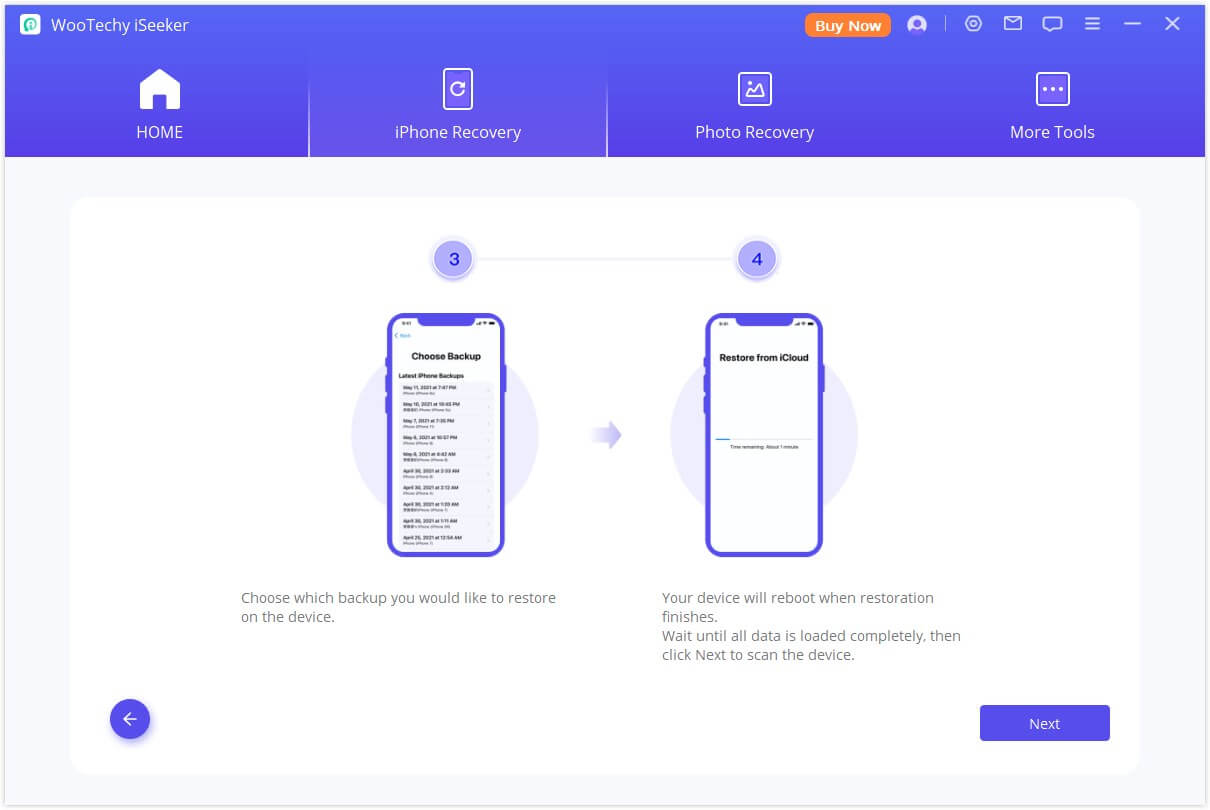
Follow the provided instructions to restore the iCloud backup to your device. Afterward, connect the device to your computer for scanning.
A currently using iPhone with data:
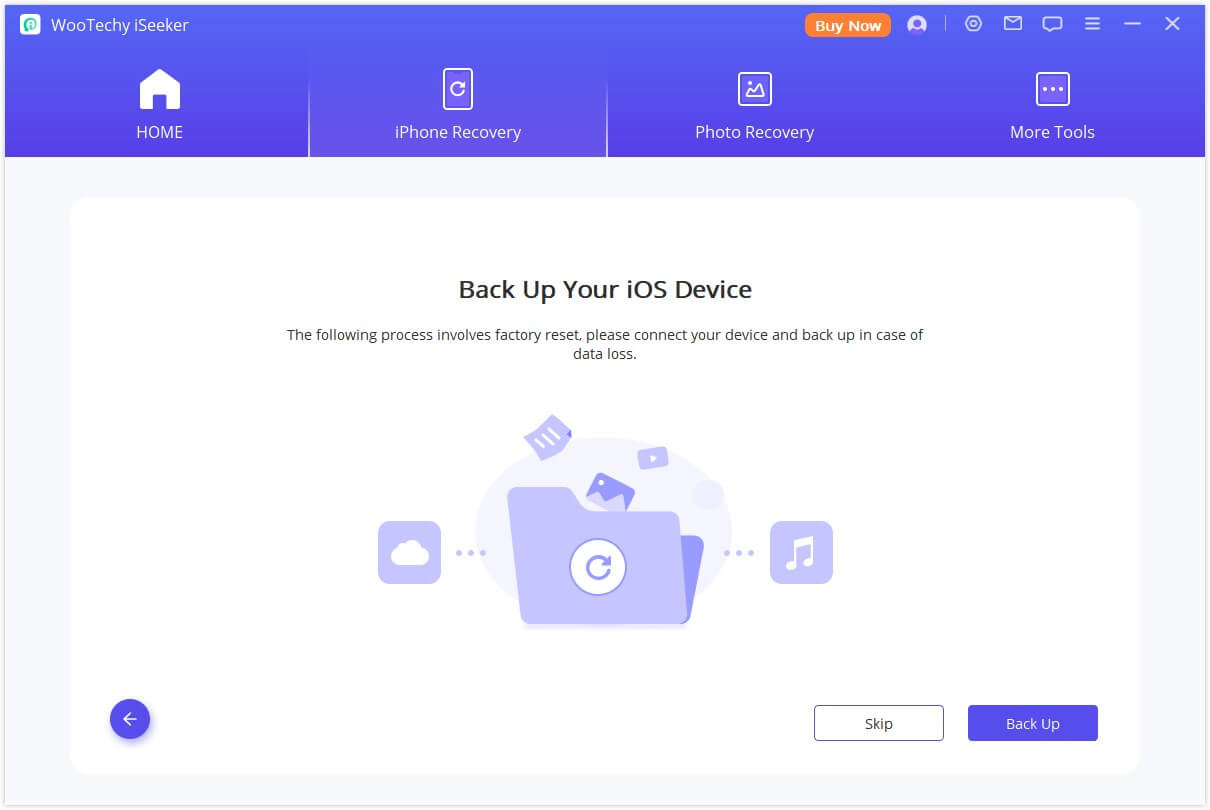
Since restoring factory settings will erase all data on the device, users must decide whether to back up device data. Click "Skip" if no backup is needed.
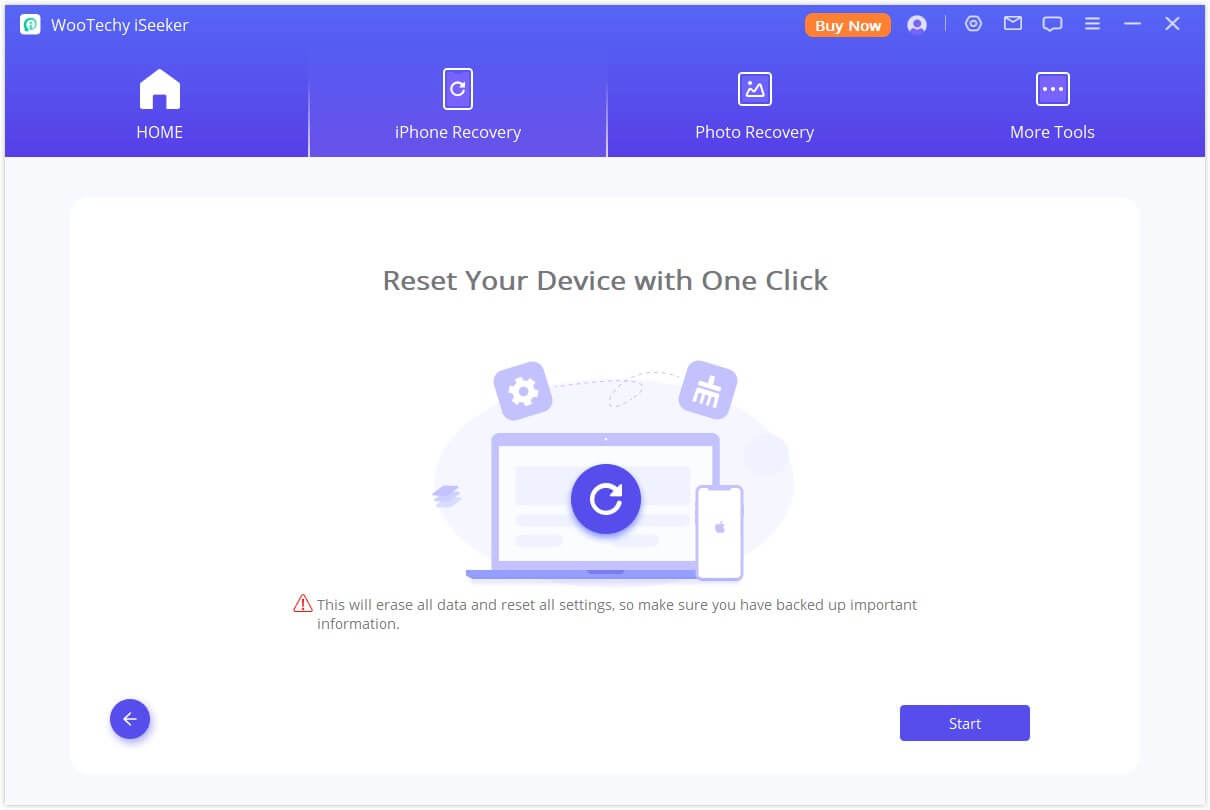
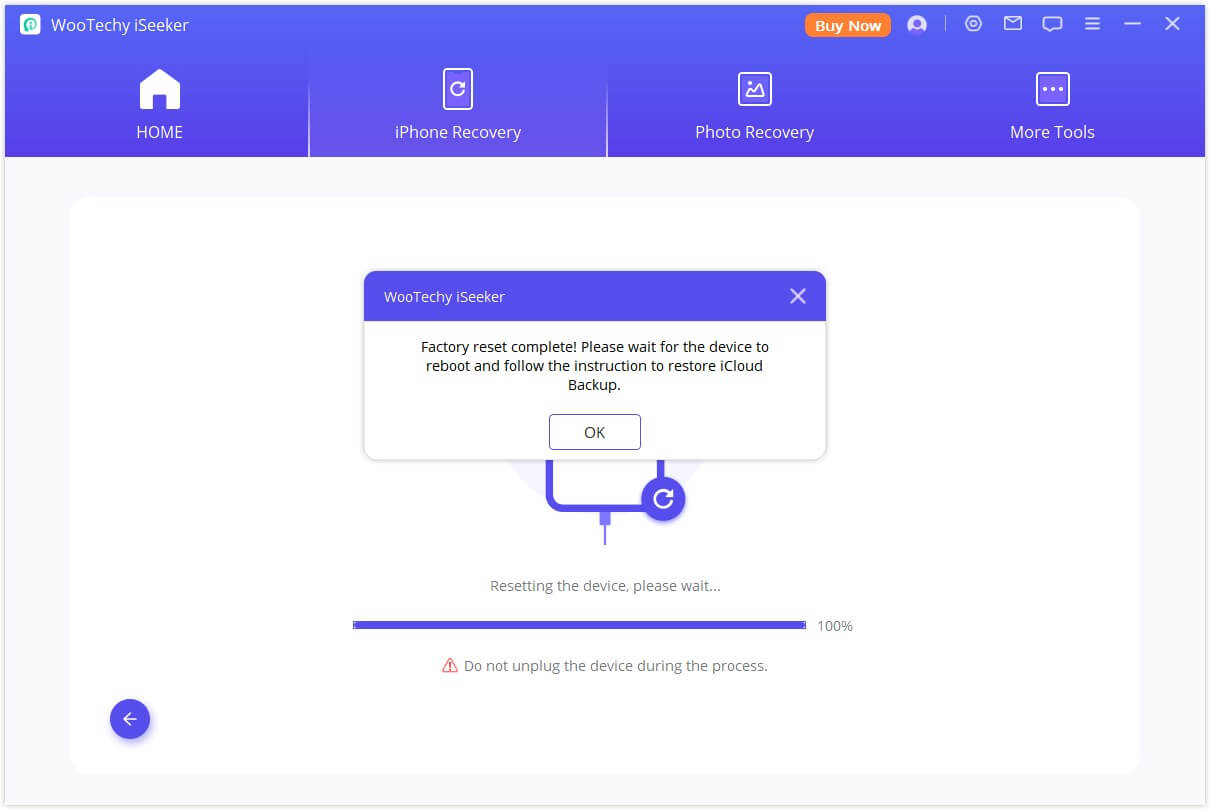
Once the backup is complete, the program will commence resetting the device. Confirm the reset by clicking "Start."
To prevent encountering Activation Lock in later steps, the program checks whether Activation Lock is turned off on the user's device after initiating the reset. If not disabled, a prompt page will appear.
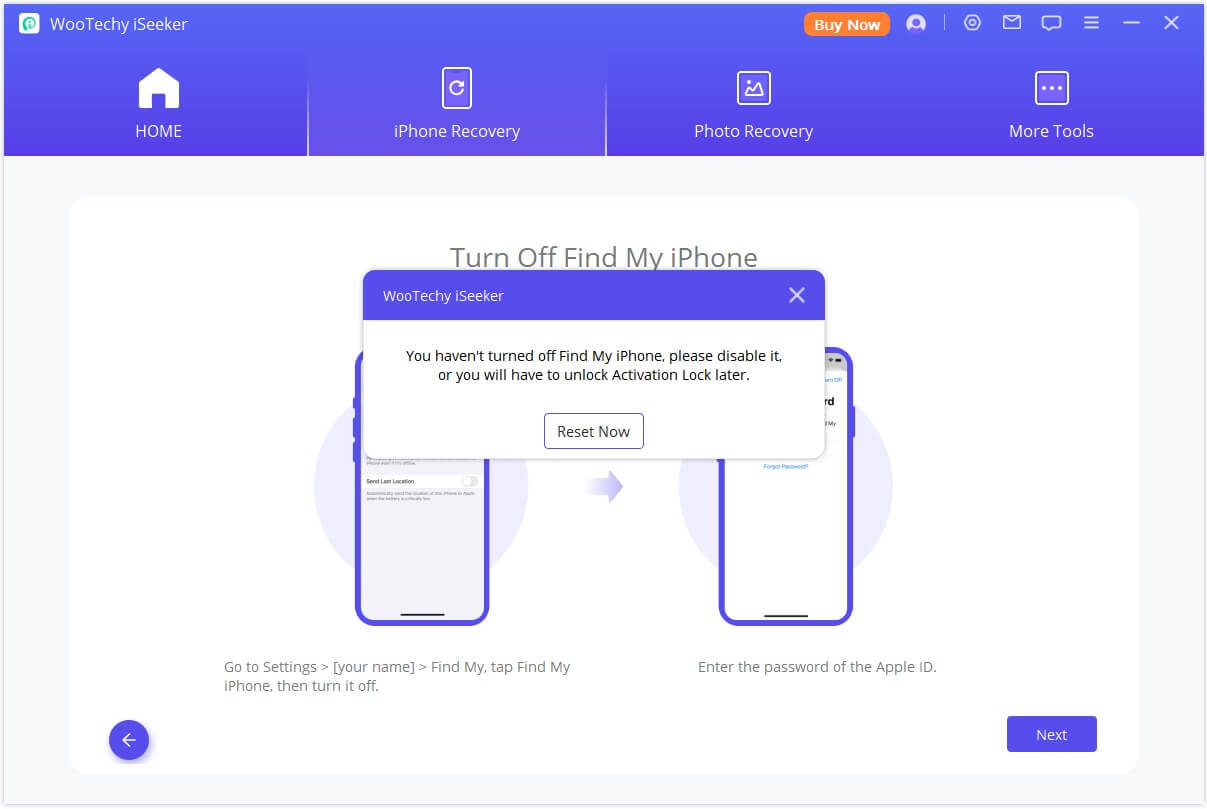
Upon completion of the reset, users can proceed step by step according to the provided prompts.
Mode 4. Fix Various iOS Issues
iSeeker iOS repair software offers three modes to fix your iOS issues:
• If your iPhone/iPad faces common issues like being stuck on Apple logo/DFU mode, white screen, black screen freezing devices, not turning on, etc., go to
Standard Mode
• If you want to enter Recovery Mode quickly or device is stuck in Recovery Mode, go to Enter/Exit Recovery Mode
• If Standard Mode cannot fix the issue, go to Advanced Mode
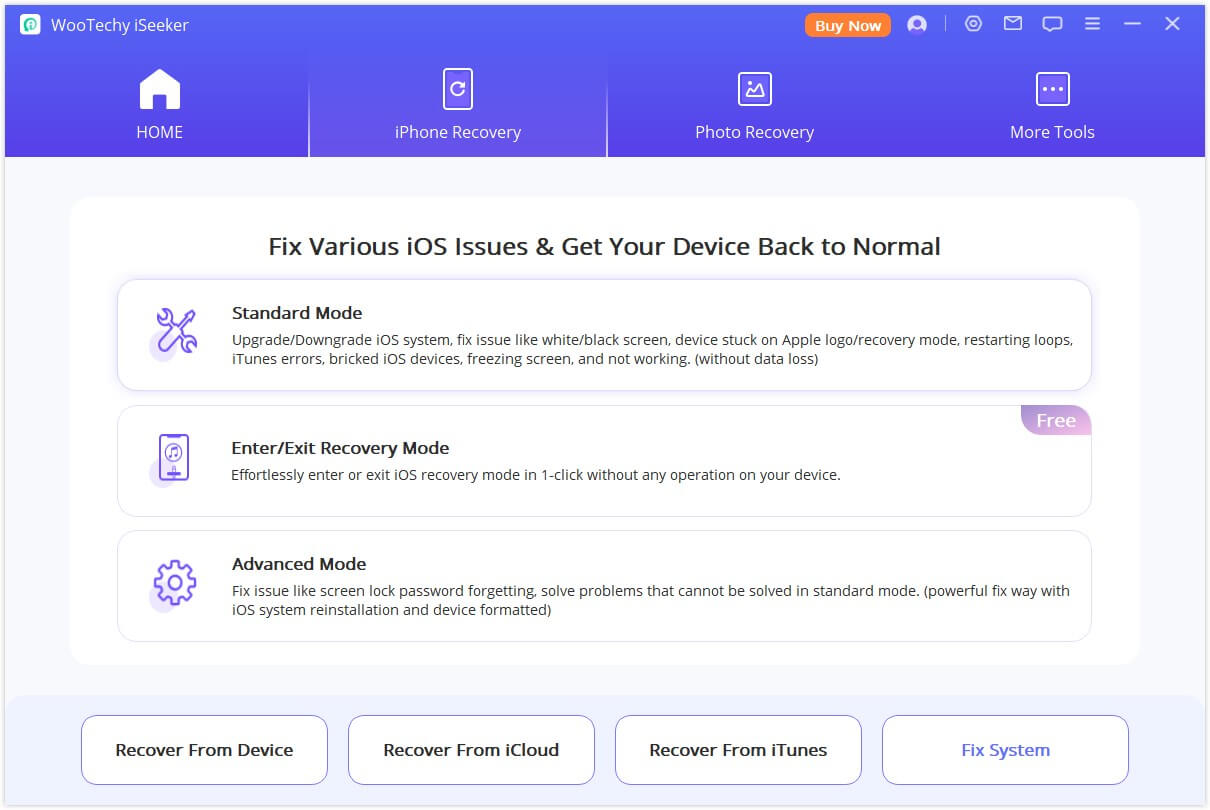
Notes:
- After using iSeeker, your device will be updated to the latest iOS version and any Jailbroken device will be restored to the default mode.
- Standard Mode and Exit/Enter Recovery Mode will not affect the data on your device, but Advanced Mode will erase all your data.
Option 1: Use Standard Mode to Fix iOS Issues Without Data Loss
Step 1: Connect Your Device
Choose "Standard Mode" on the interface, then connect your iDevice to the computer via a USB cable and click "Next".
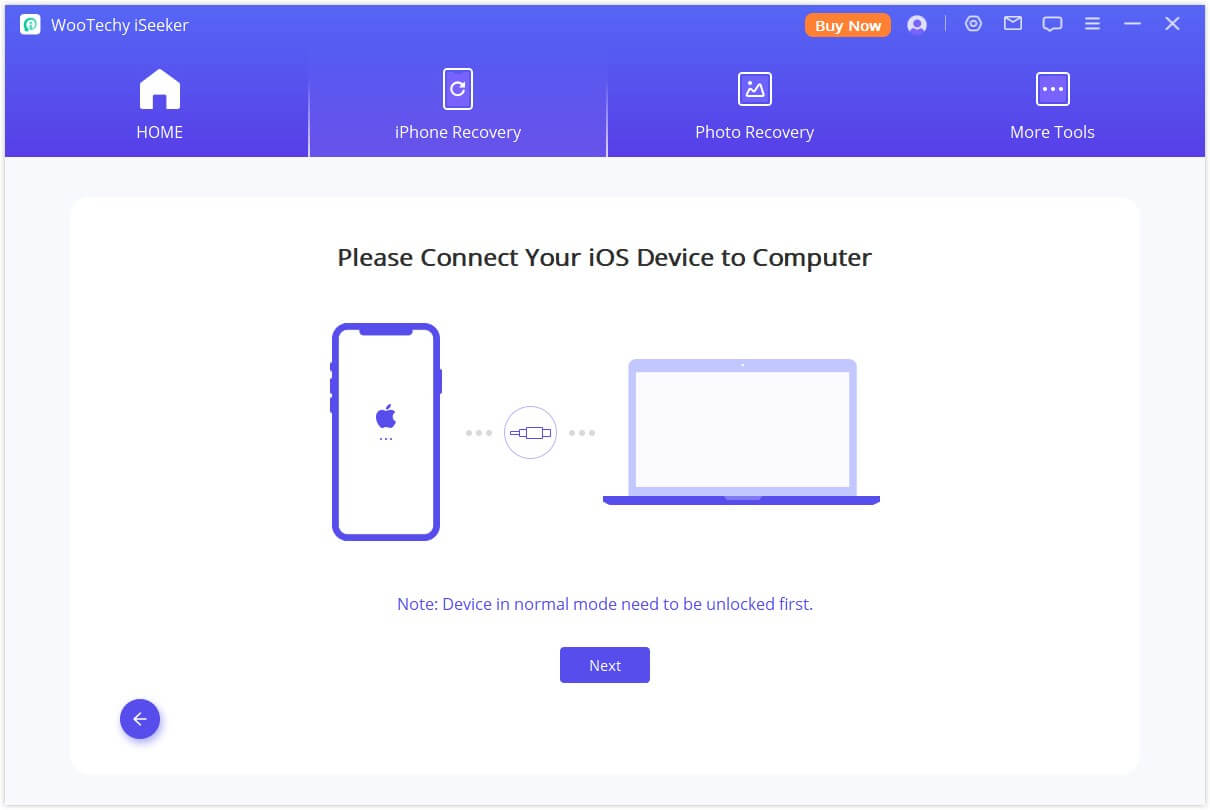
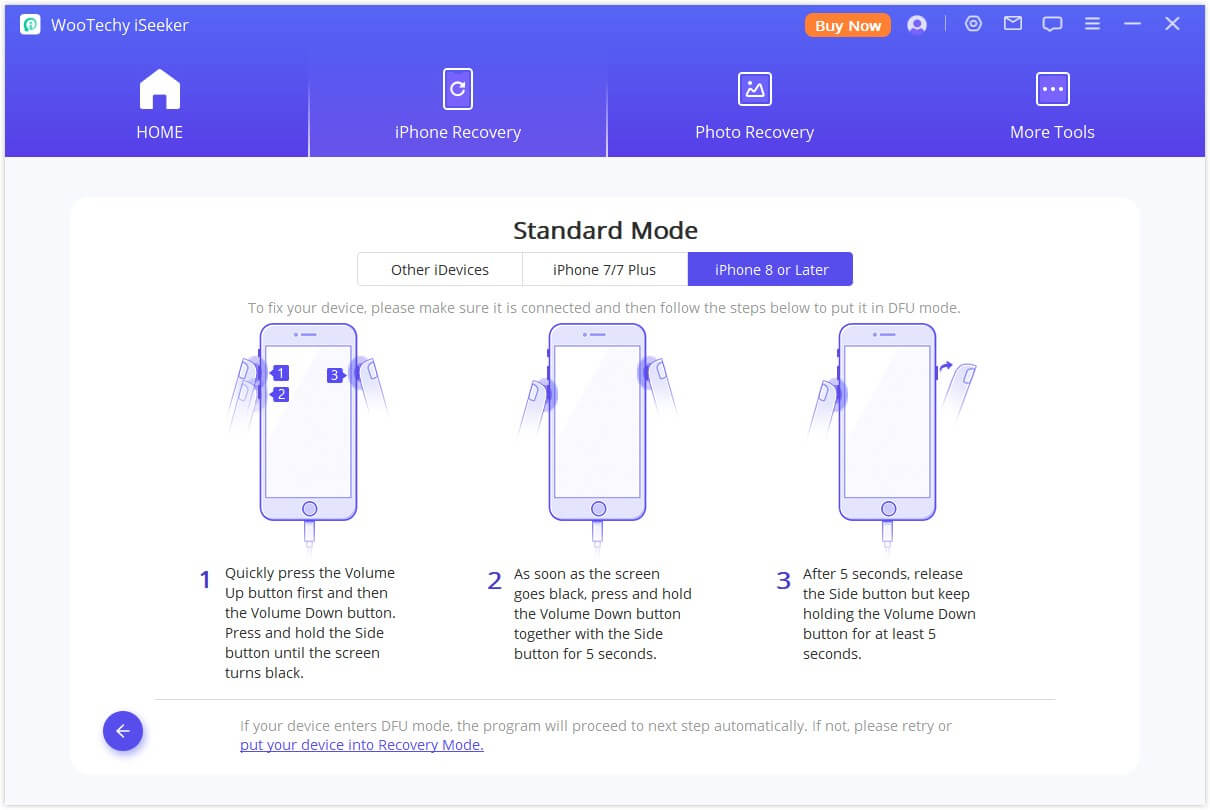
If your device is recognized, go to Step 2. If not, follow the on-screen instructions to put your device in DFU or Recovery Mode.
Step 2: Download Firmware
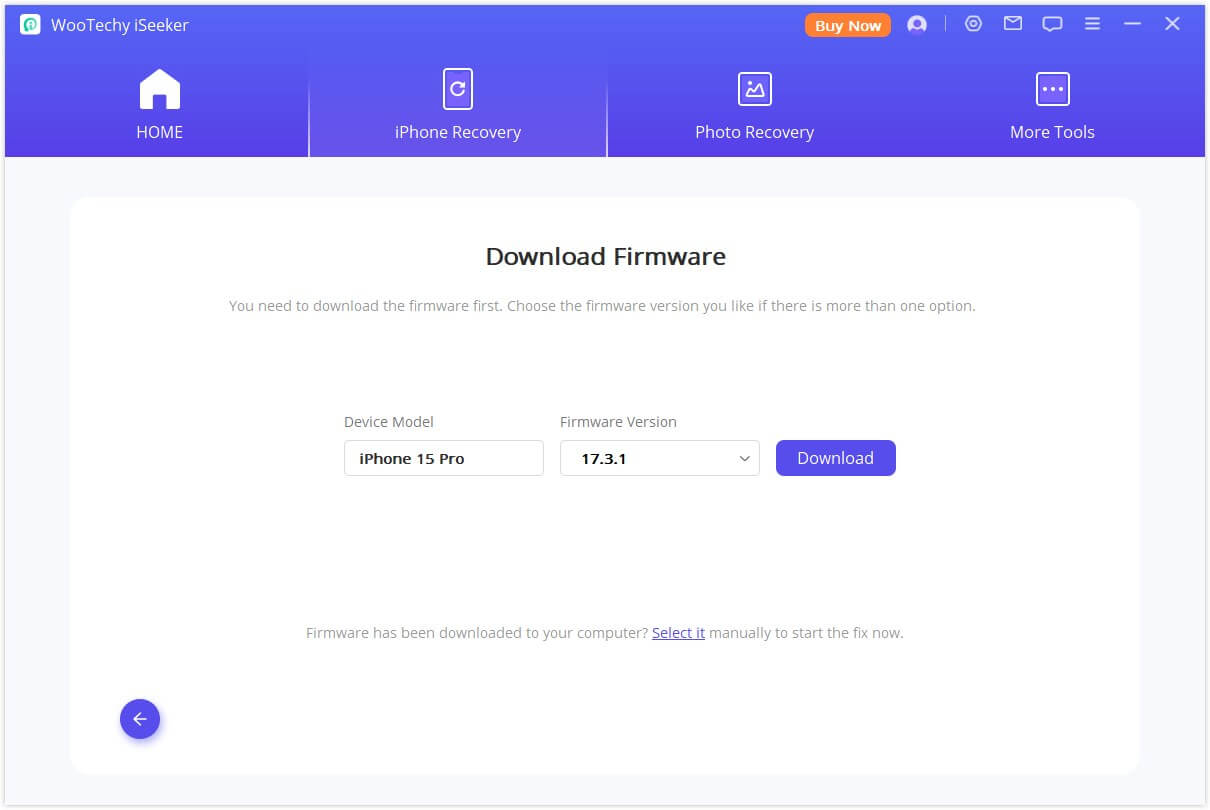
The program will detect your device model and show you the available firmware versions. Choose the version you prefer, then click on "Download" and wait for the process to complete.
Step 3: Fix the iOS Device
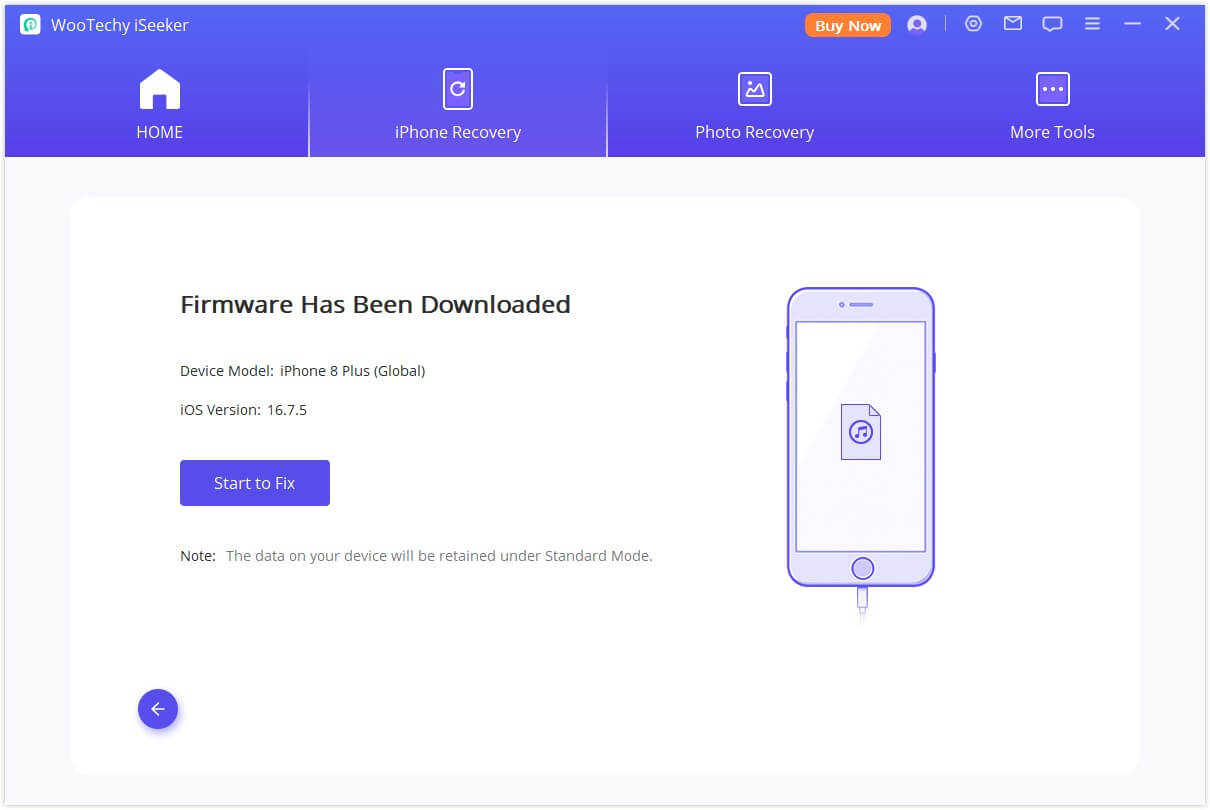
Once the firmware has been downloaded, click on "Start to Fix" to verify and extract the firmware. After that, the program will start to fix your iOS automatically.
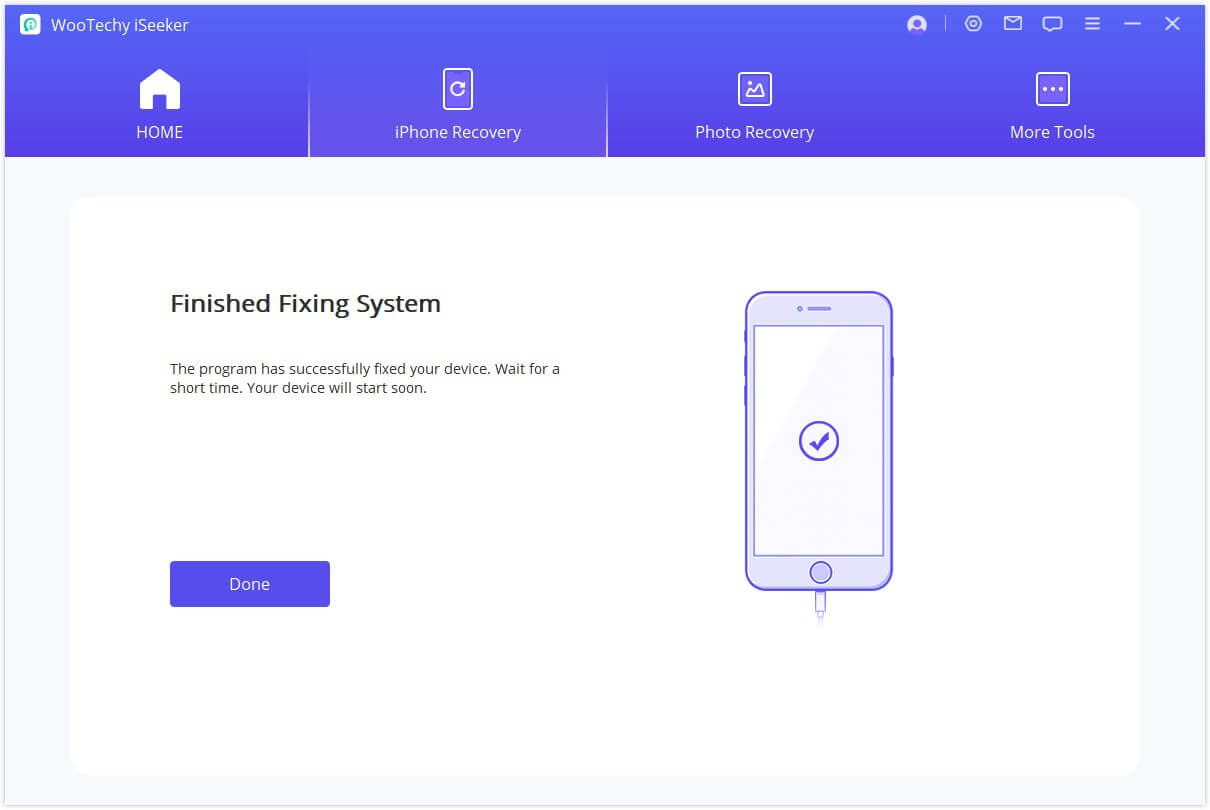
Once the fixing process is finished, please check whether your device can operate normally now. If the fixing has failed, you can retry Standard Mode or use Advance Mode instead.
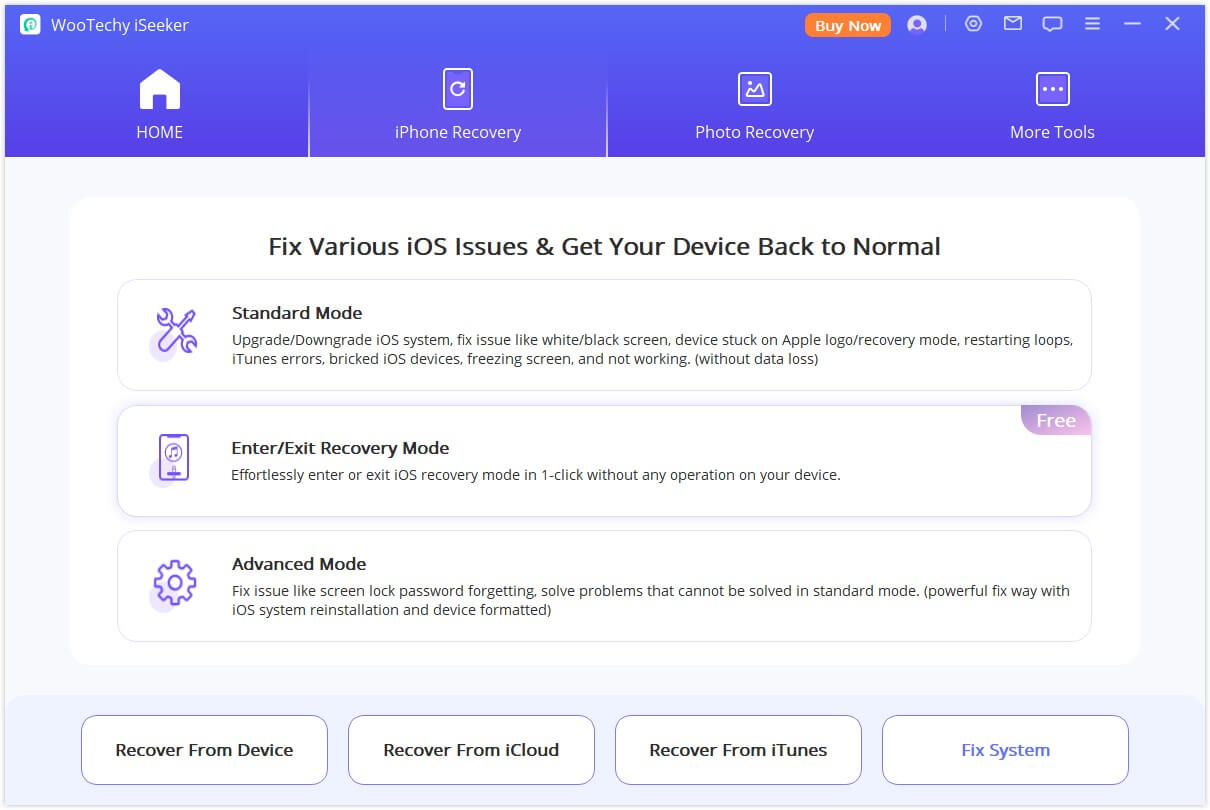
Option 2: Enter/Exit Recovery Mode in One Click
Choose Enter/Exit Recovery Mode from the main window.
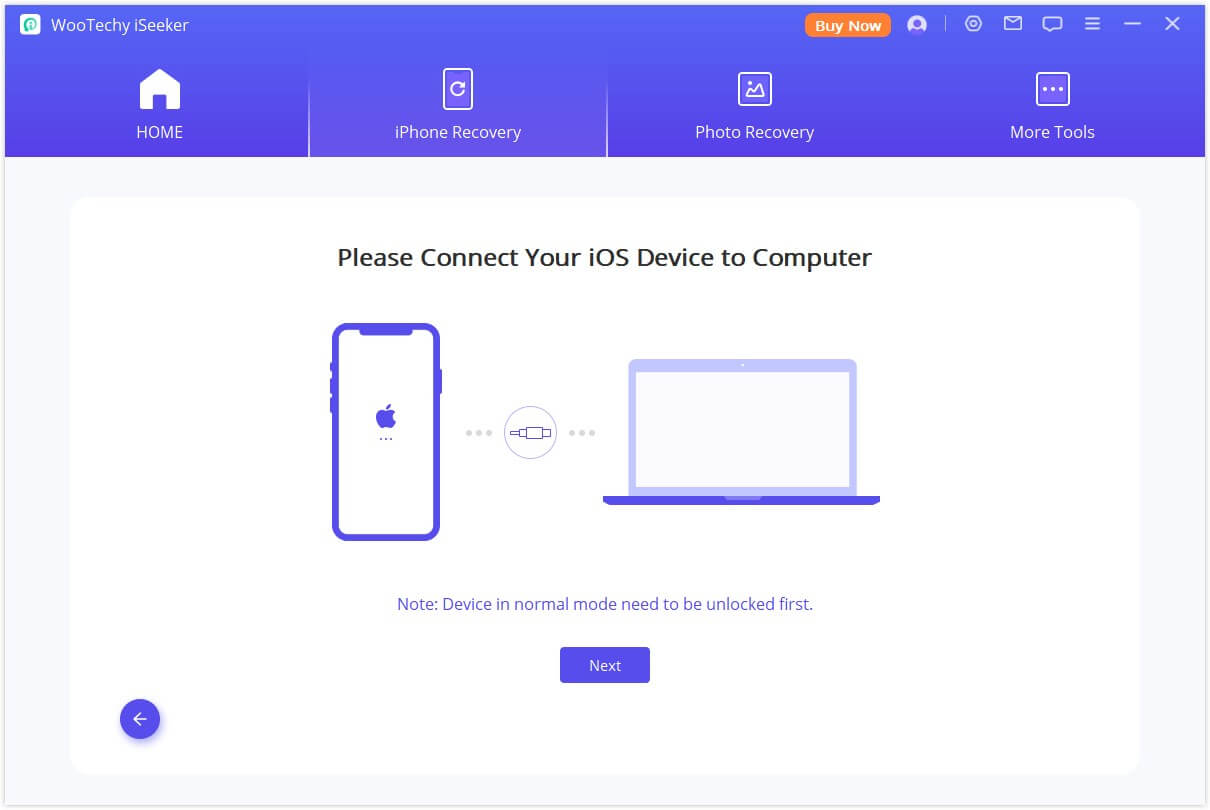
Step 1: Connect your device
Connect your device to the computer and click "Next".
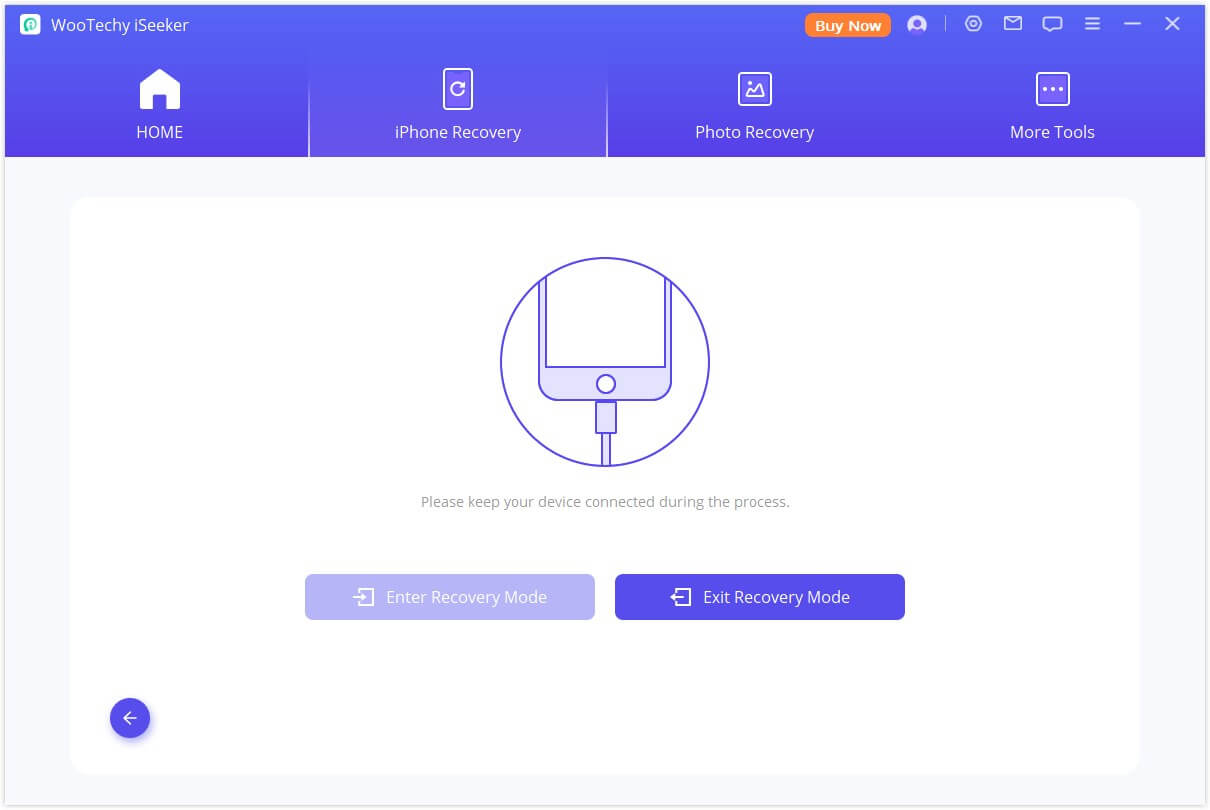
Step 2: Enter/Exit Recovery Mode
Choose "Enter Recovery Mode" or "Exit Recovery Mode" from the interface. It will be done within a few minutes.
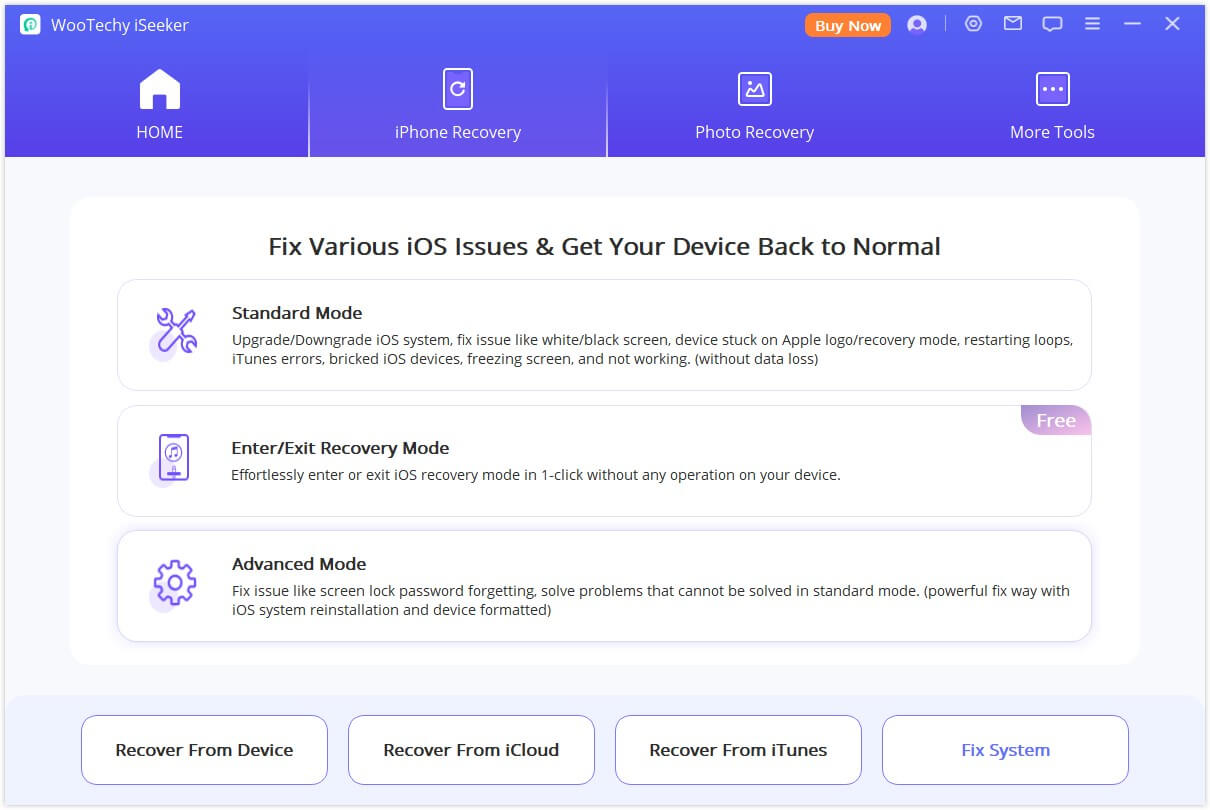
Option 3: Use Advanced Mode to Reinstall Your iOS
If Standard Mode cannot fix the your Apple device, you can turn to Advanced Mode - just select this mode from the main window. Please not that iOS reinstall will lead to data loss; make a backup of your important data first.
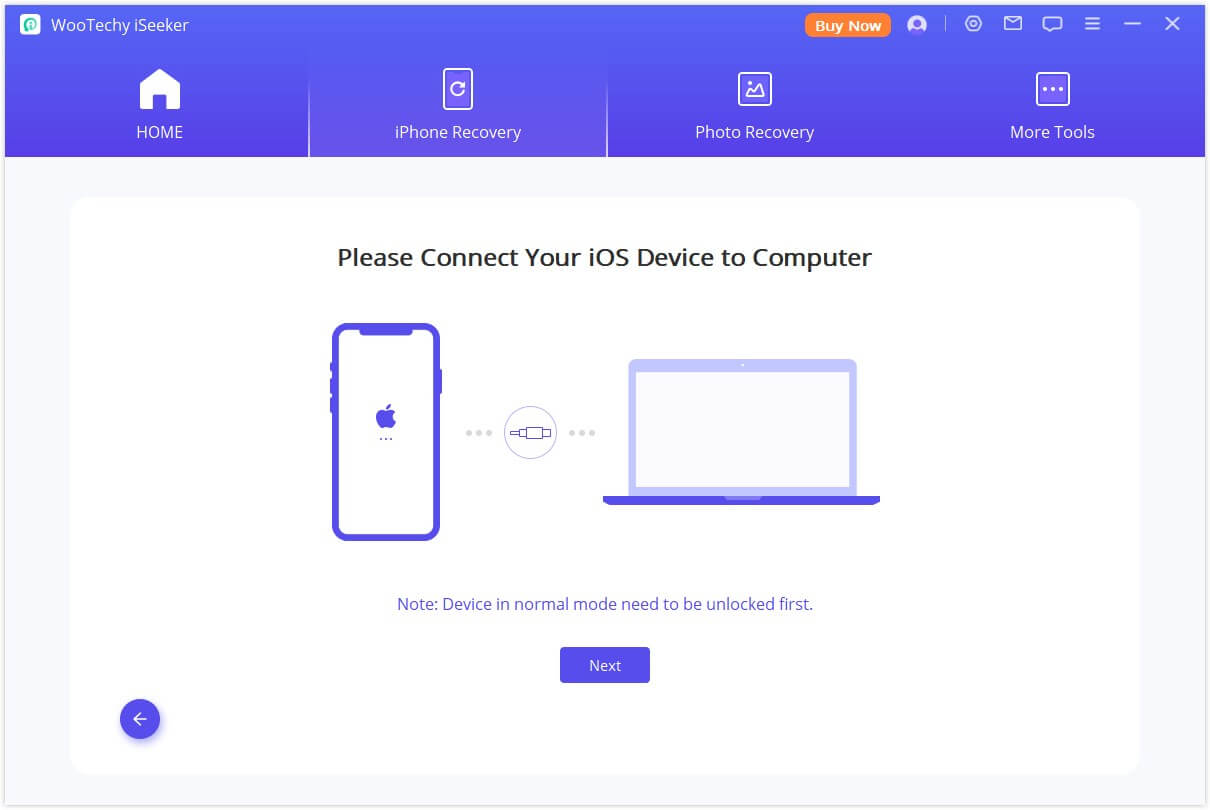
Step 1: Connect Your Device to Computer
Connect your iOS device to the computer and click "Next".
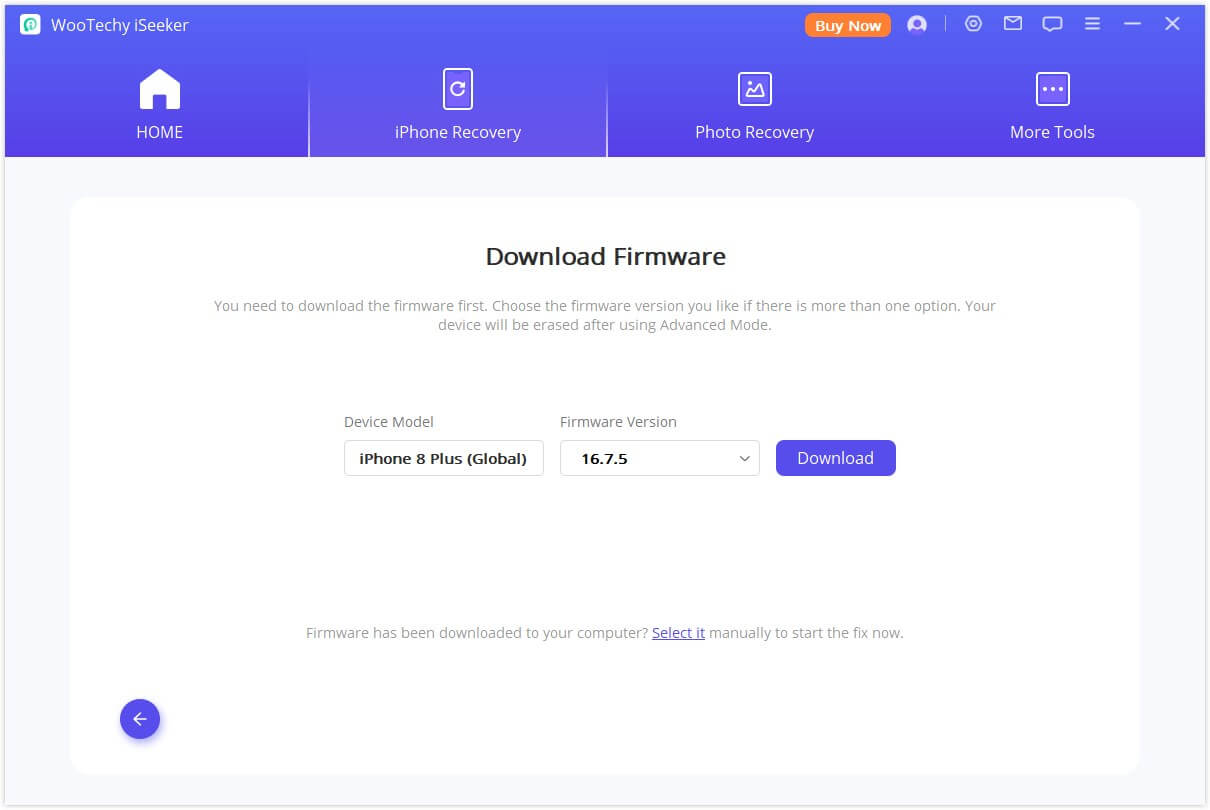
Step 2: Download the Firmware
Download the corresponding firmware for your device.
Step 3: Fix the iOS Issue
Verify the downloaded firmware and start to fix the issue.

Photo Recovery
Are photos compromised due to blurriness, low resolution, or poor lighting conditions? Are photos zoomed or cropped causing details become less clear or pixelated?
If that's the cese for you, then come and check out iSeeker's new feature - photo clarity, helping enhance overall quality of an image.
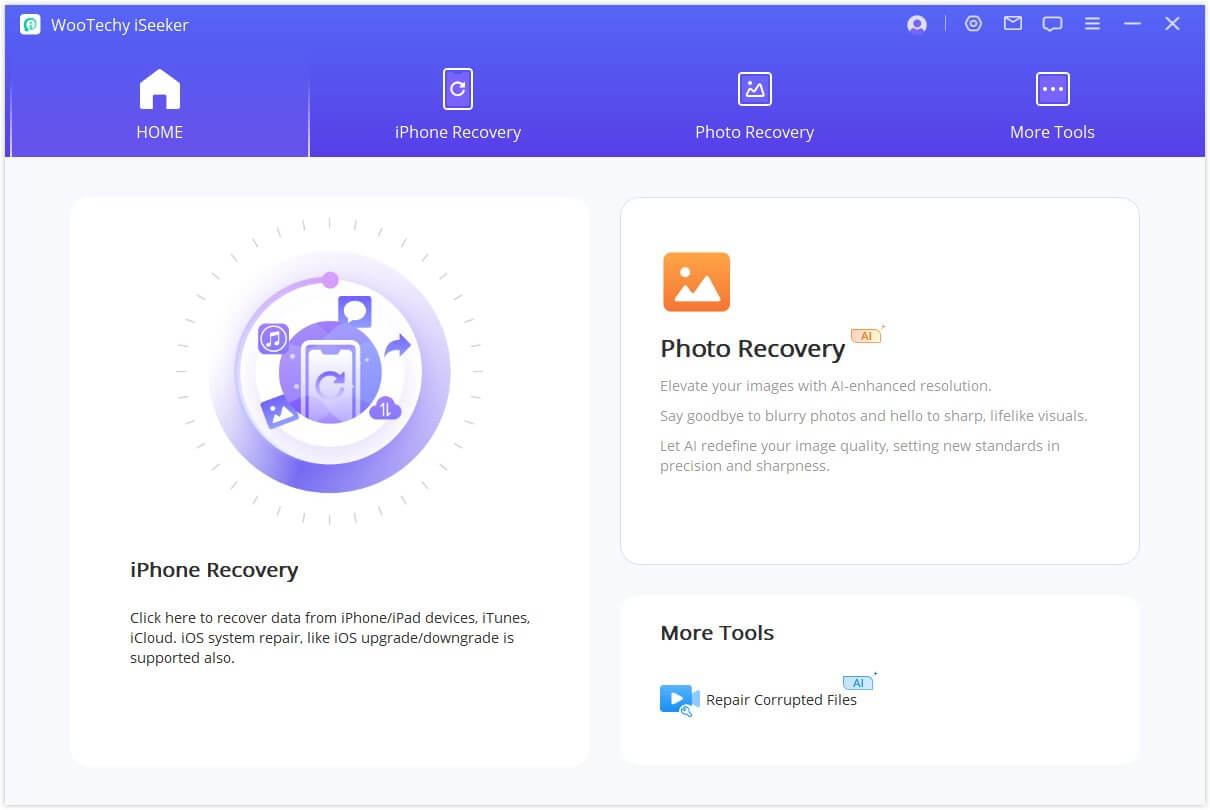
Step 1: Select Photo Recovery
Open iSeeker, select Photo Recovery section on the interface to enter Photo Clarity feature.
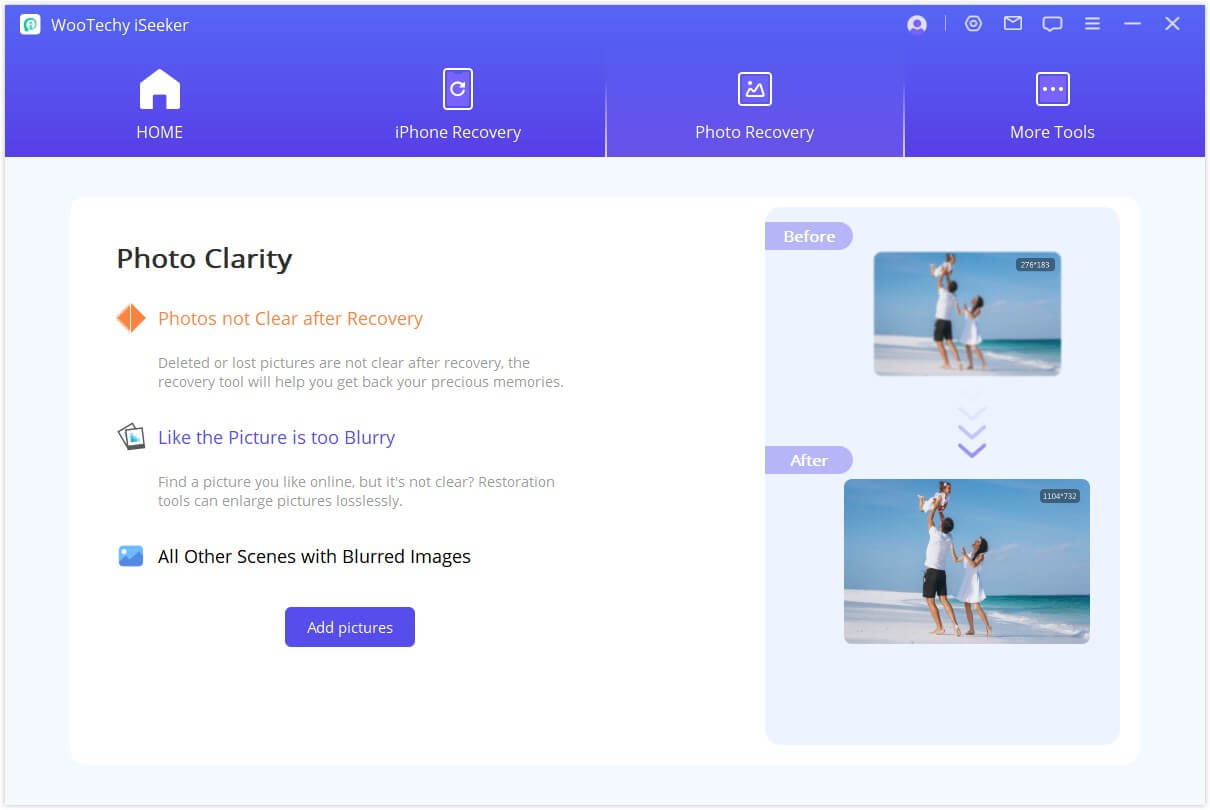
Step 2: Select the Blurry Image
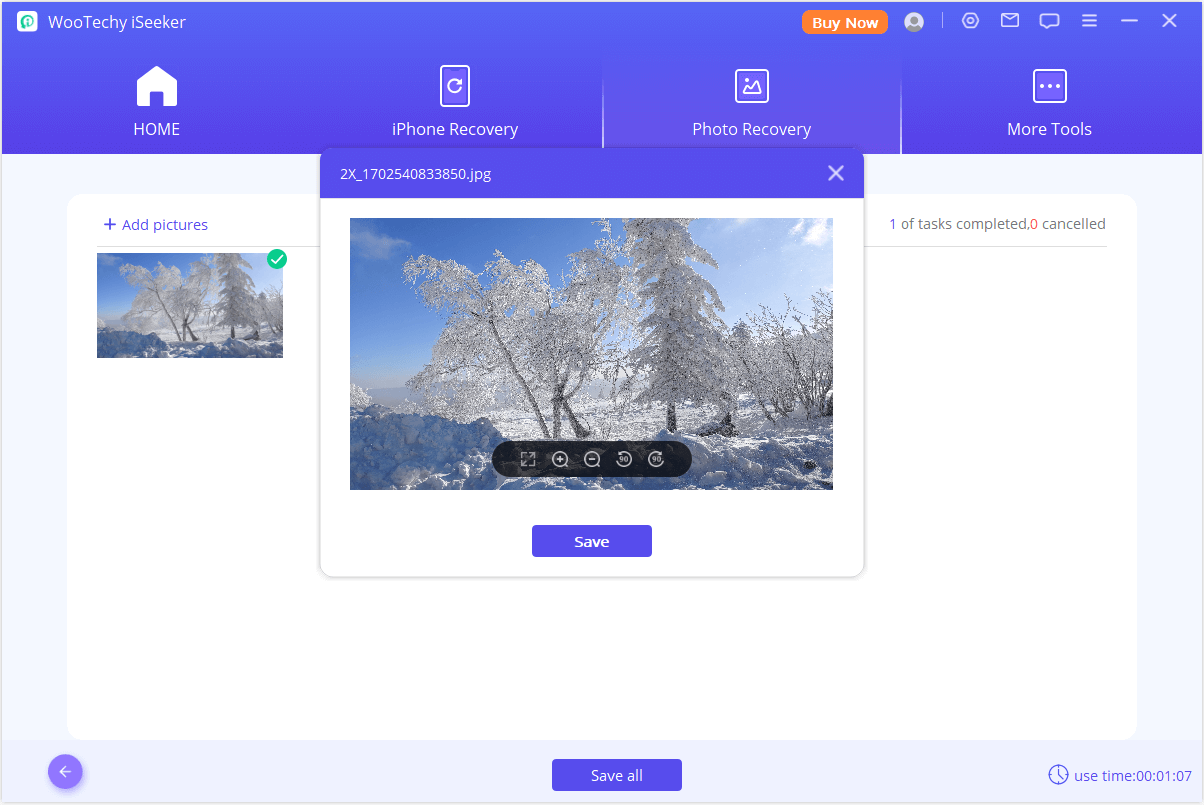
Select the photo/image from your PC by clicking on Add pictures button, the program will load them and display the progress on the screen.
Step 3: Successfully Clarify Photo
After a while, your blurry photo/image will be clear. Then you can save the enhanced photos.

More Tools
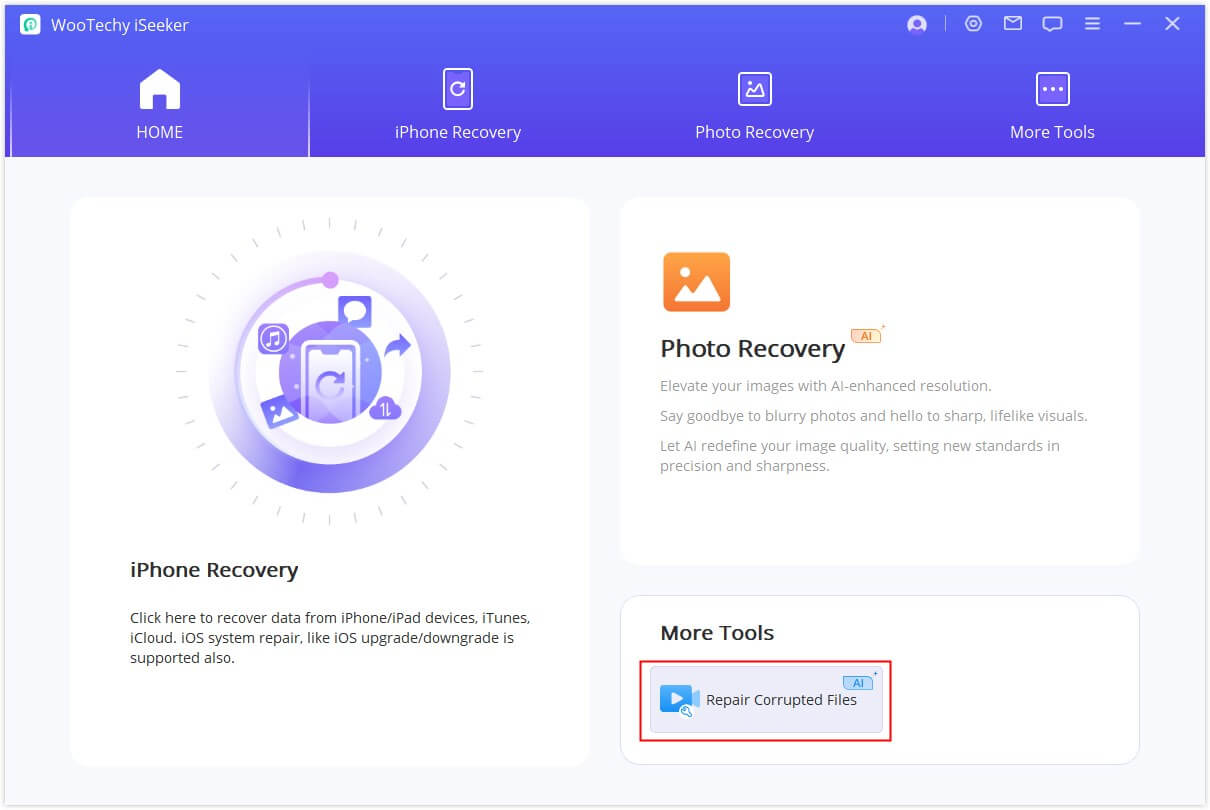
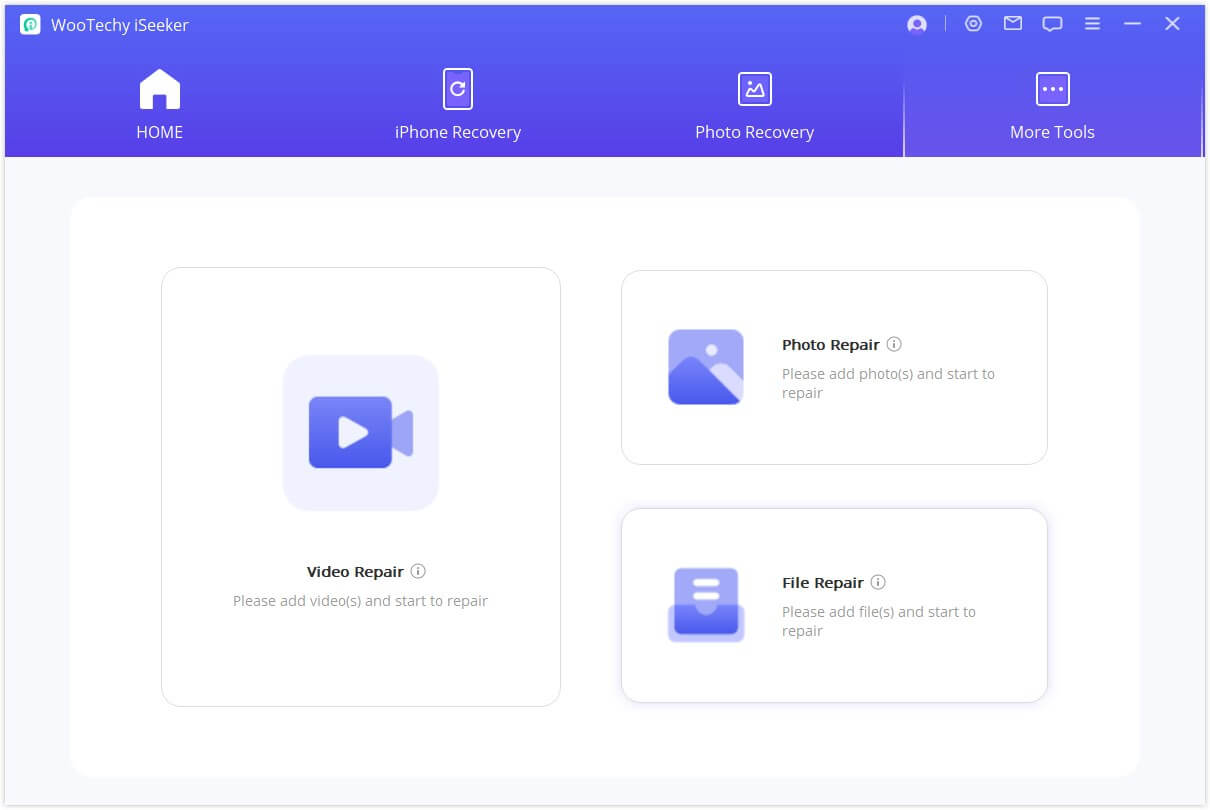
Besides recovering iOS data and enhancing photo clarity, iSeeker does more than you expect. In this powerful software, it has a toolkits section, where you can repair your damaged videos, photos/images, and files.
Part 1. Video Repair
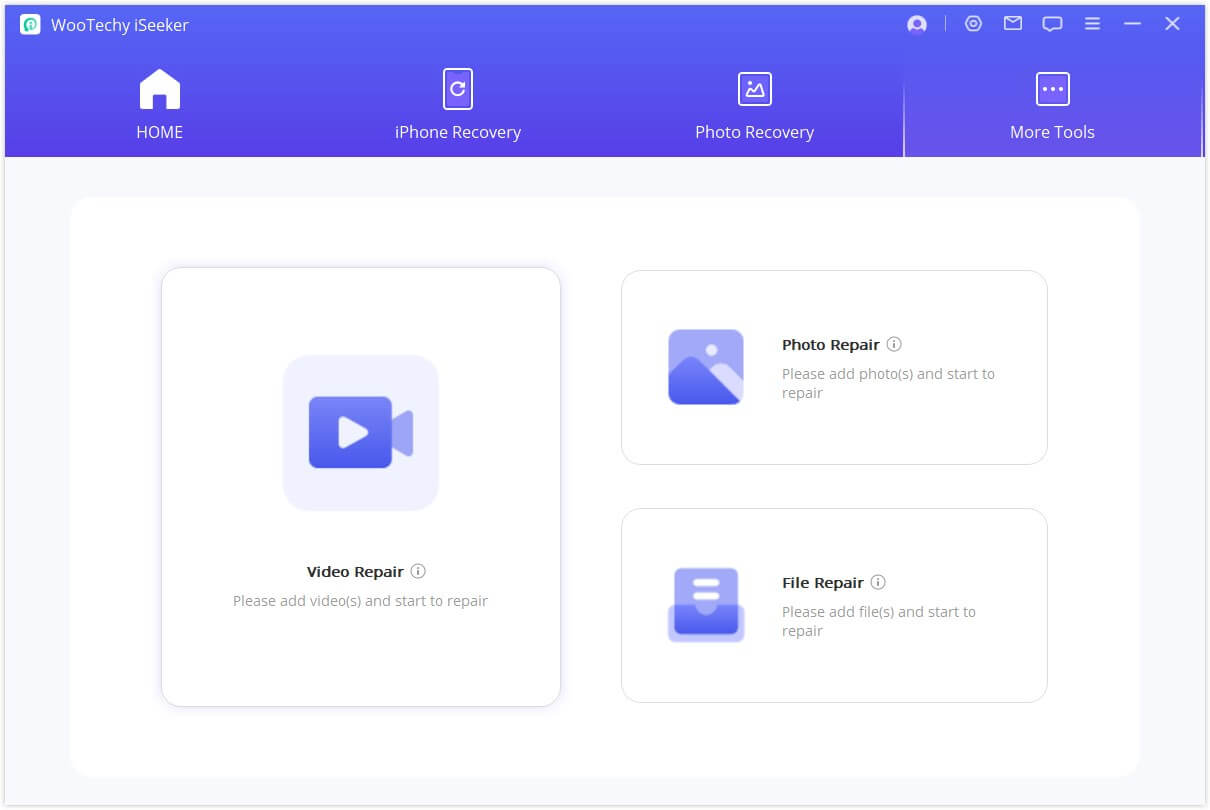
Step 1: Choose Video Repair
Firstly, select "Video Repair" mode and then click on the "Add video" button. The repair tool now accommodates various video formats including MP4, MKV, FLV, MXF, AVI, MTS, and M2TS. It can also handle multiple videos of different formats simultaneously.
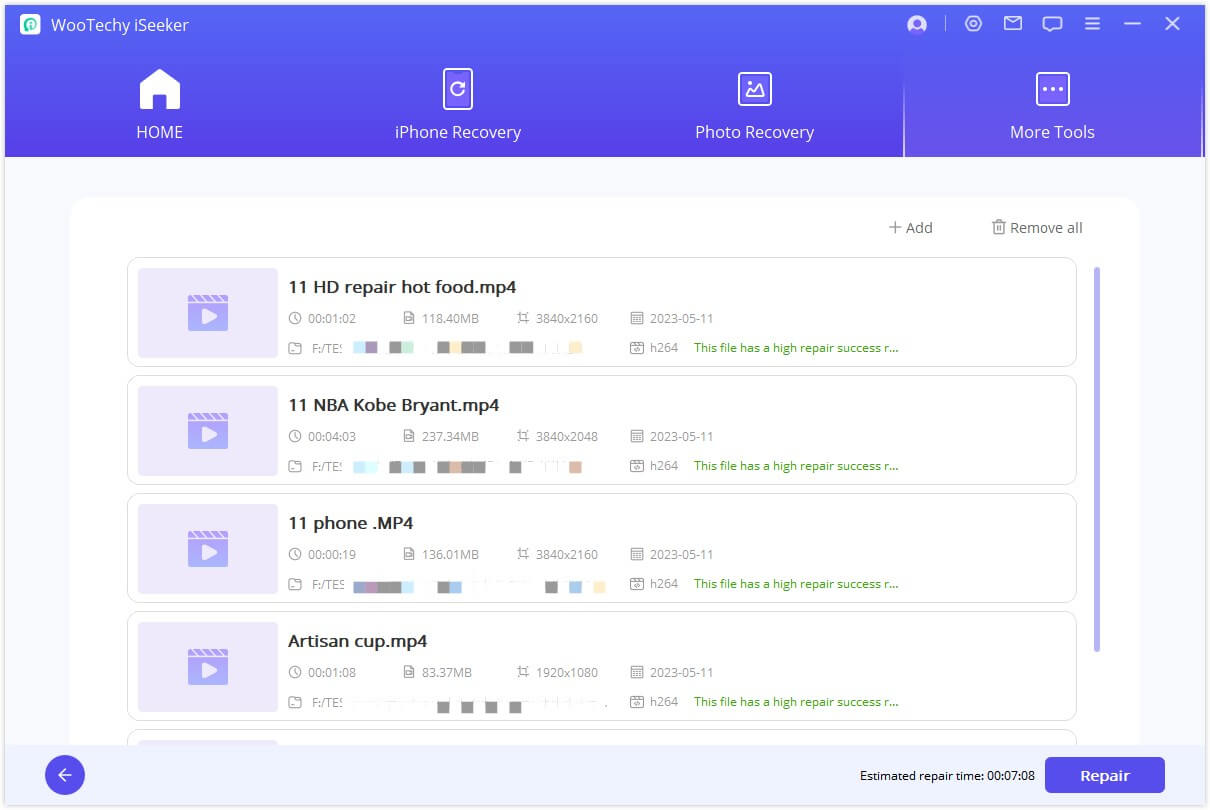
Upon completion of the upload process, you'll find the details such as file name, size, duration, and resolution of the damaged videos on the user interface.
Step 2: Start Video Repair
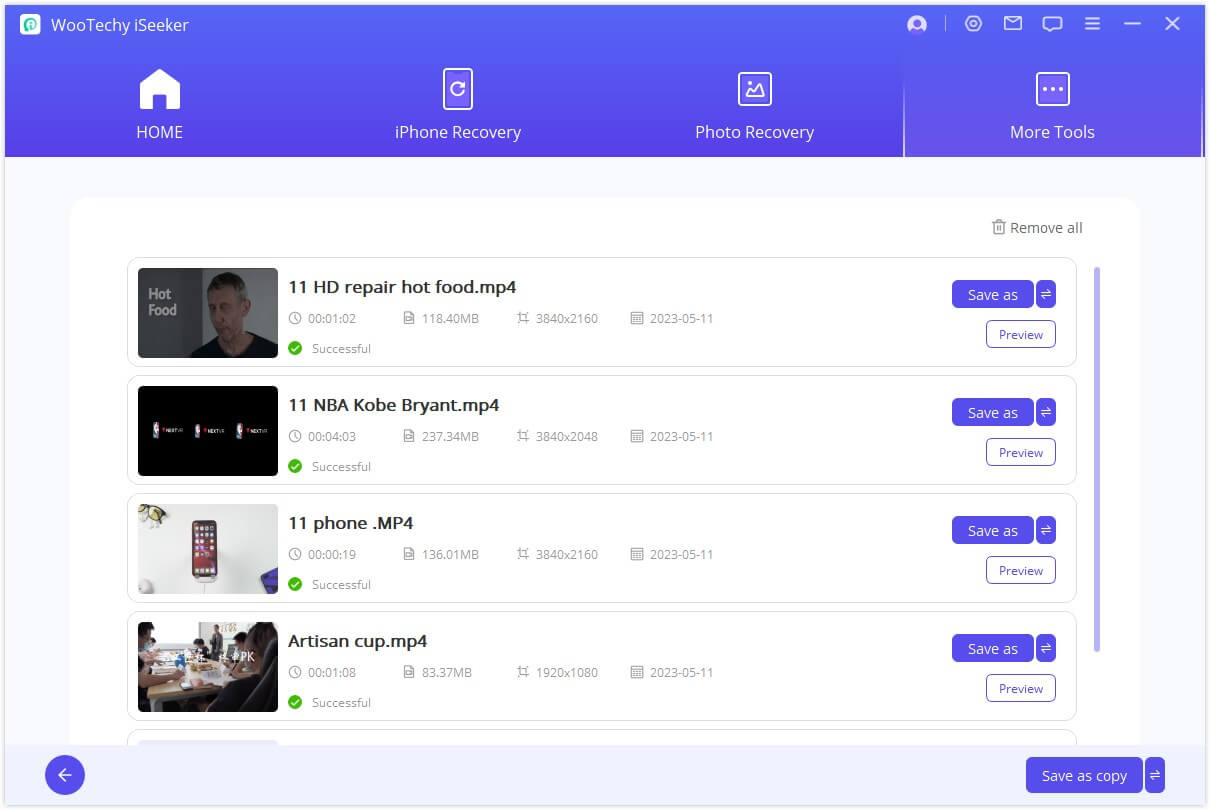
Once the repair process finishes, a notification window will indicate the successful repair of your videos, and optionally, you can choose to save them on your computer.
Step 3: Save the Repaired Video
Now, you can save all the repaired videos by selecting "Save" or "Save All". Remember to designate the storage path before finalizing the save.
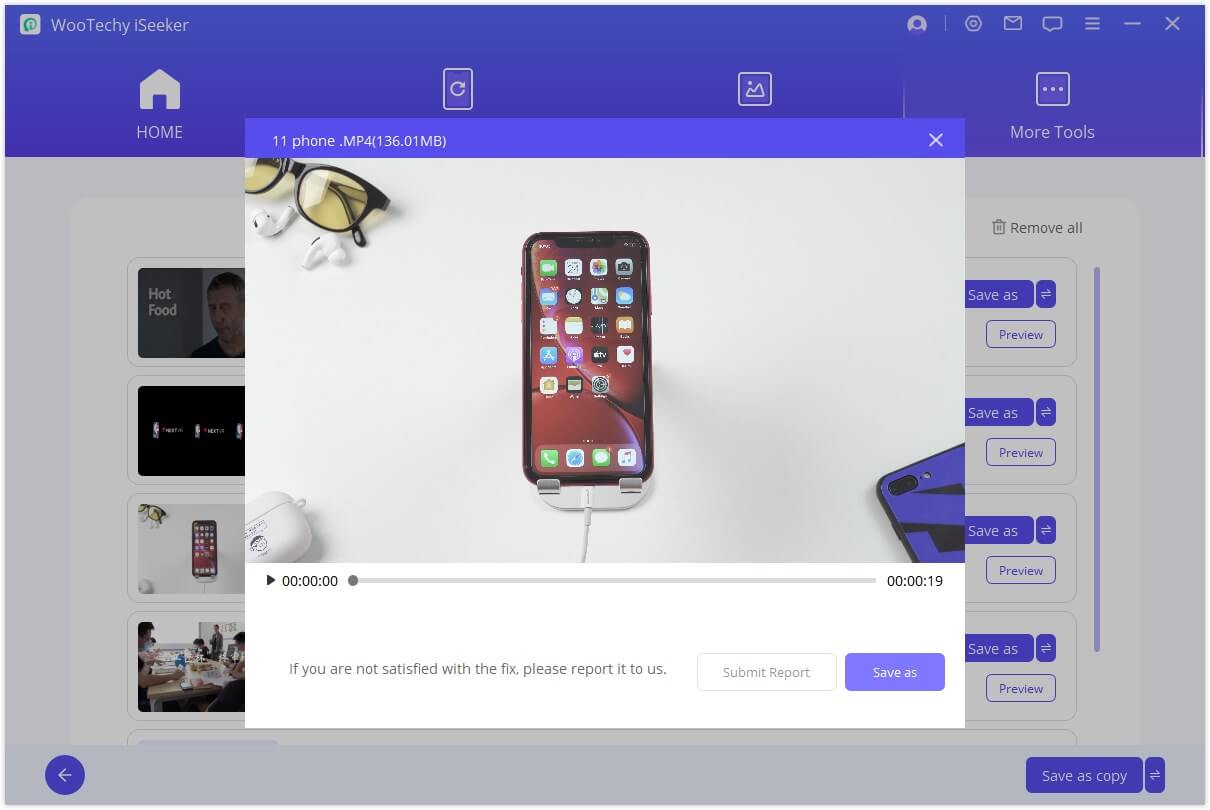
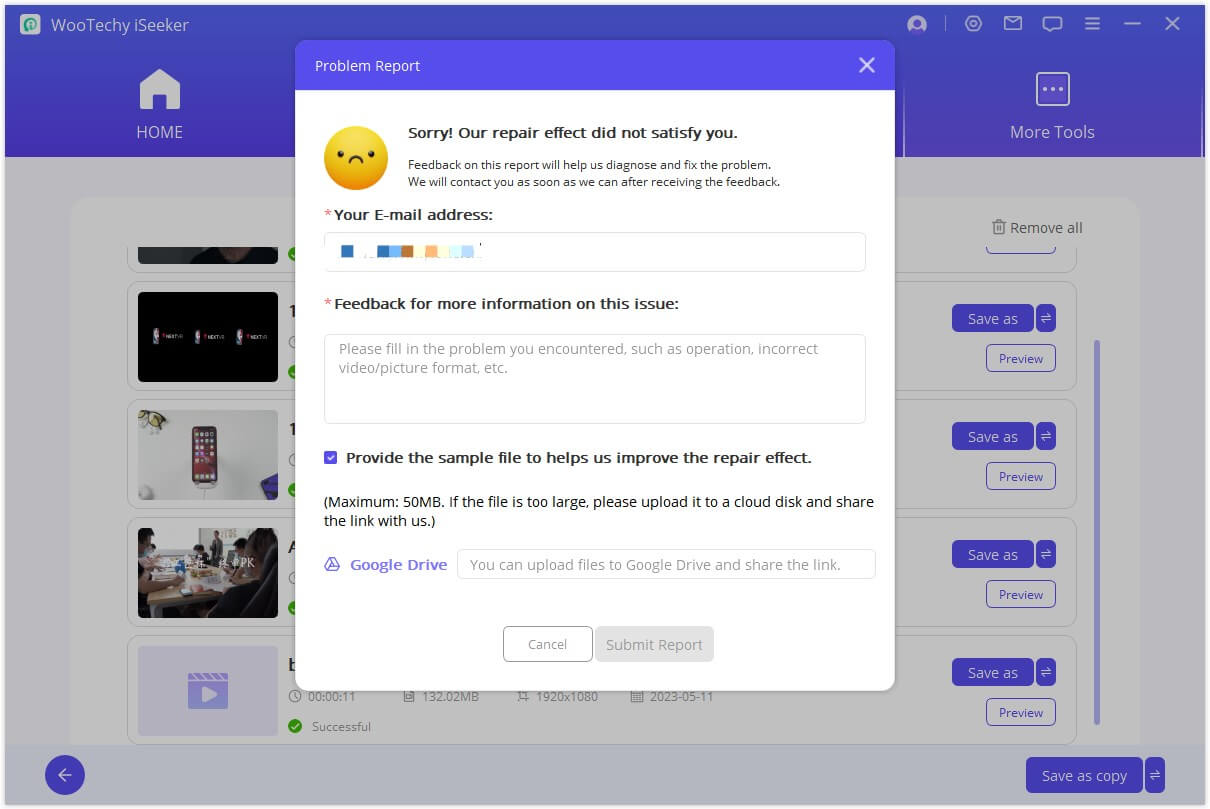
If your damaged video remains unrepaired:
- Please fill out the problem report and send the damaged video to us via email, or contact our customer service for further assistance.
Part 2. Photo/Picture Repair
Step 1: Photo Repair
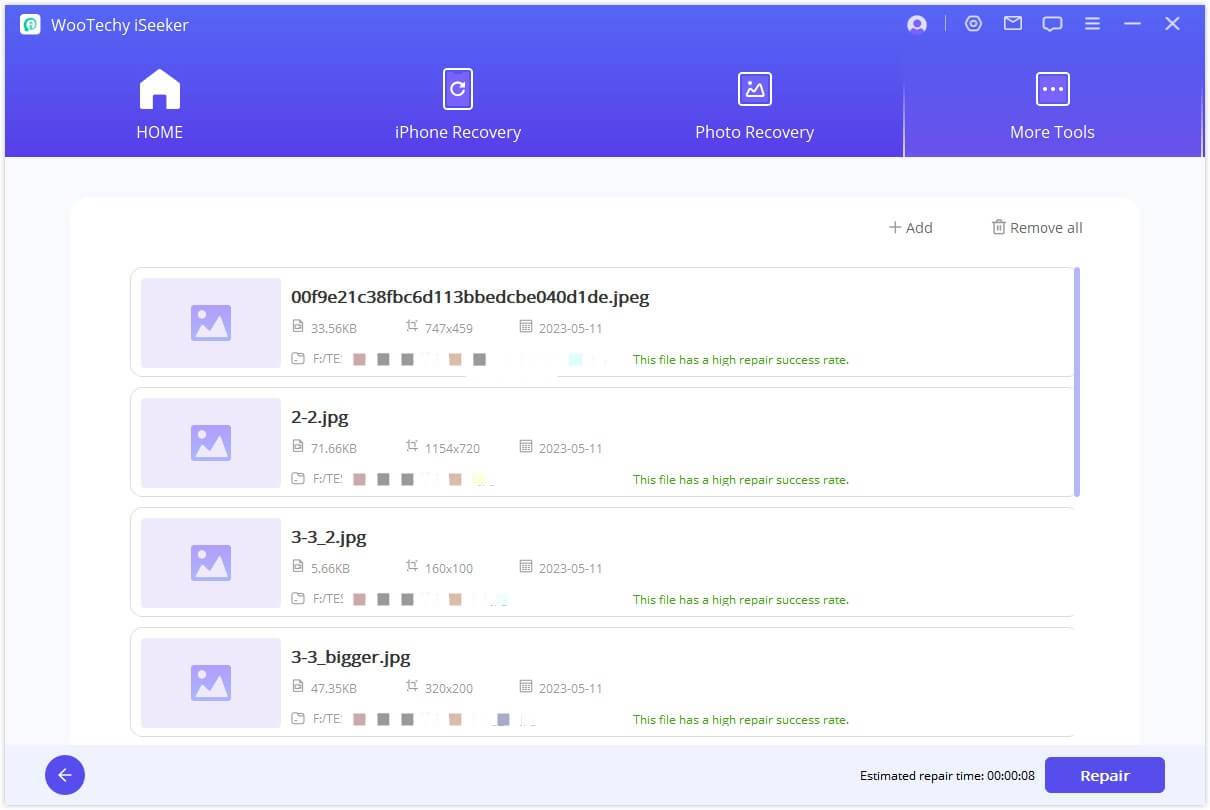
Click on the picture icon or the "Add photo" button to upload pictures in need of repair. The Photo Repair function supports JPG, JPEG, and GIF formats, and can handle multiple photos of different formats simultaneously.
Various issues such as pixelation, grayscale images, and incorrect colors can be addressed. Once uploaded, you'll see thumbnails and other information about the photos, such as size and resolution.
Step 2: Begin Photo Repair
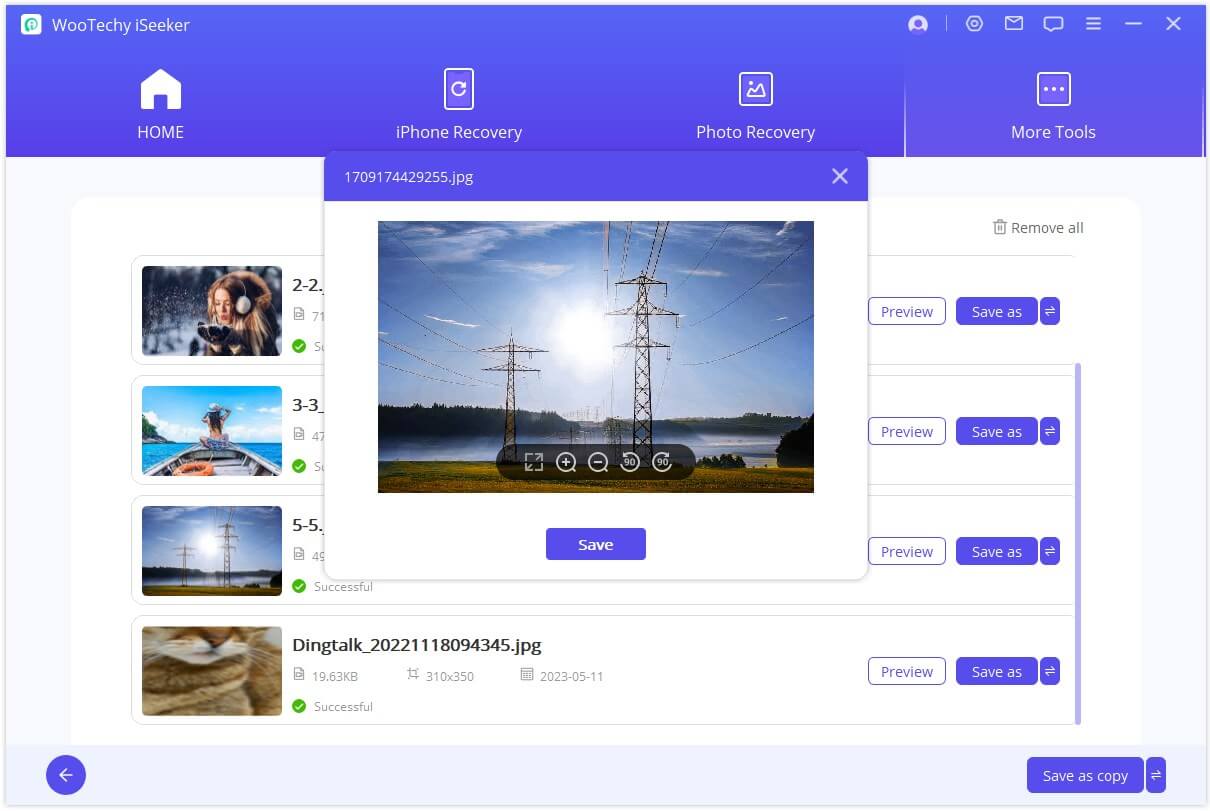
Click "Repair" and wait for the process to complete. The result will be displayed afterward.
Step 3: Finalize Photo Repair
After successfully repairing the photo, save it to your desired location.
Part 3. File Repair
Step 1: Start File Repair
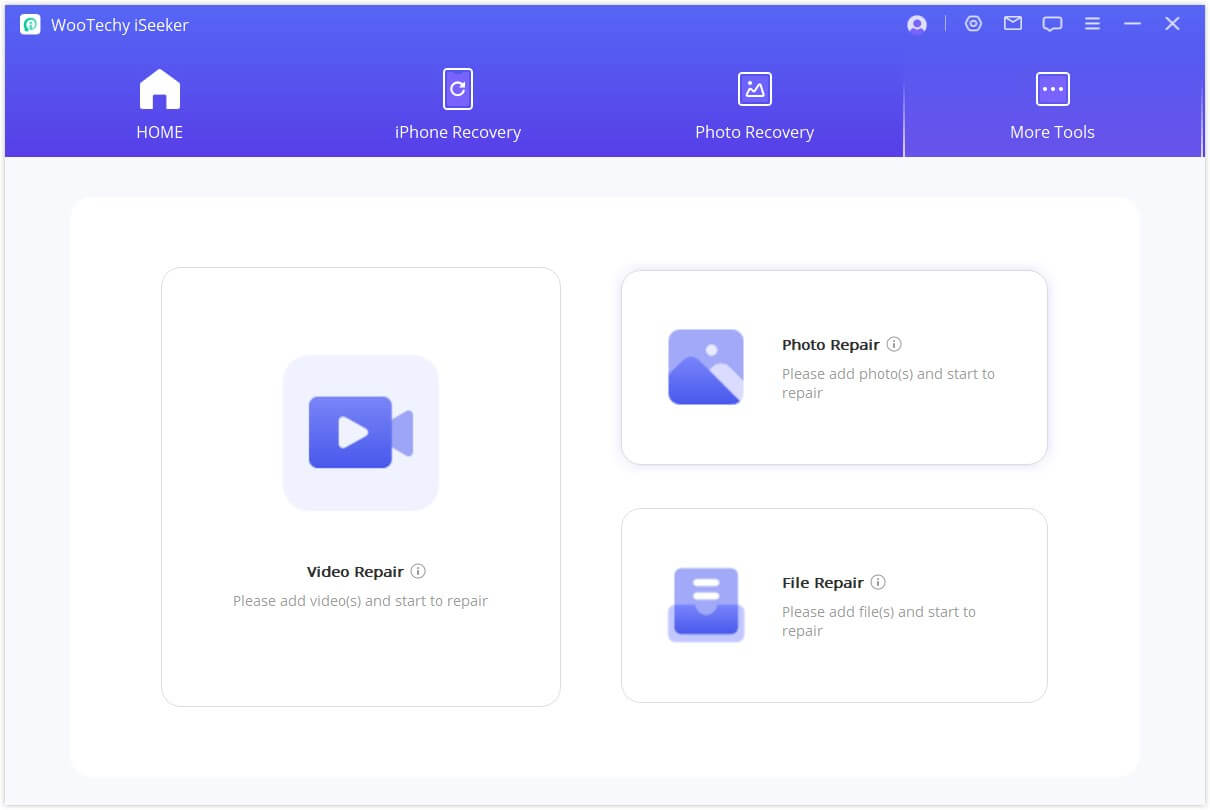
Choose "File Repair" and click the "Add Files" button to select corrupted files. You can upload multiple documents of different formats simultaneously.
This action will prompt a browser window to open, directing you to the location where the corrupted file is saved. Take advantage of AI Repair's batch processing feature by selecting multiple documents for repair.
Note:
- You have the flexibility to load multiple documents of different formats simultaneously, thanks to AI Repair's batch processing feature.
Step 2: Start File Repair
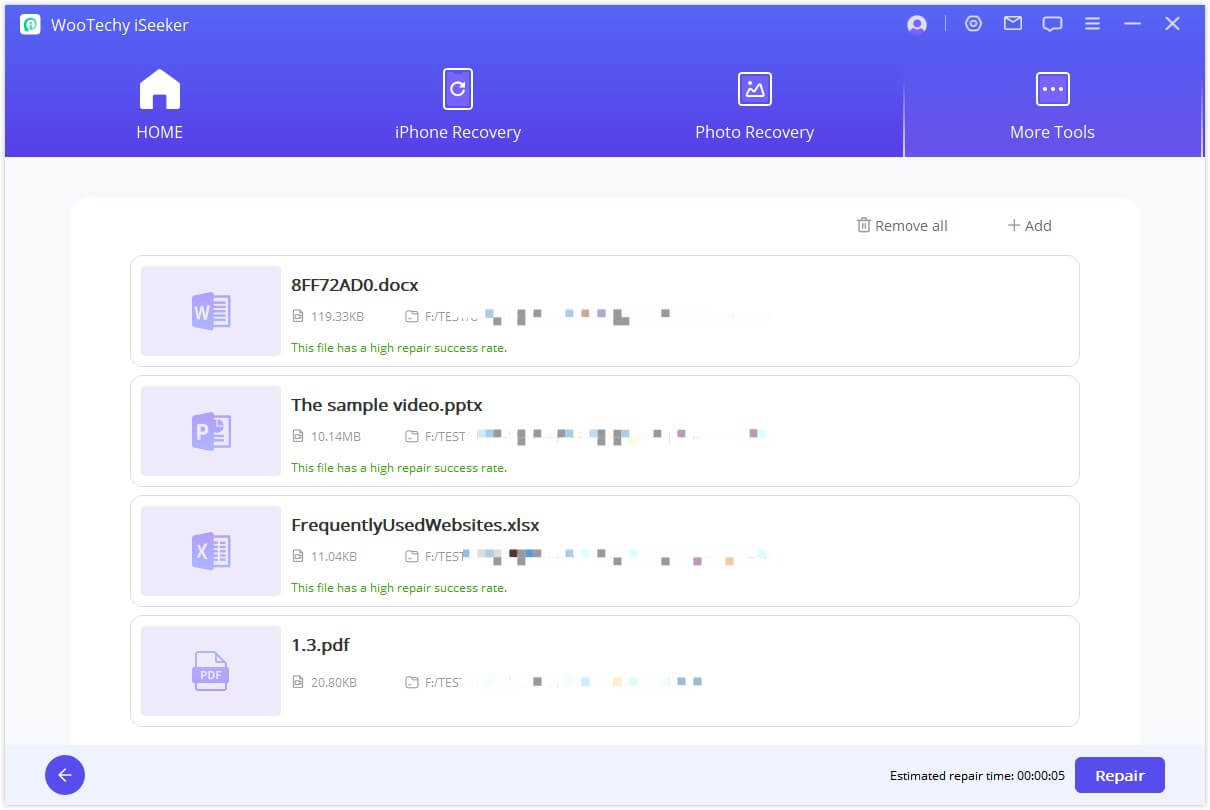
Upon selecting Word, Excel, or PowerPoint files from your PC, the program will load them and display the repair progress on the screen.
Note:
- In case of an incorrect file upload, utilize the trash can icon next to the file details to delete it. Alternatively, clear all files at once by clicking the "Remove All" button located at the bottom.
Step 3: Complete File Repair
The application will meticulously scan the loaded documents and address various minor or major issues. You can pause the repair process at any time as needed.
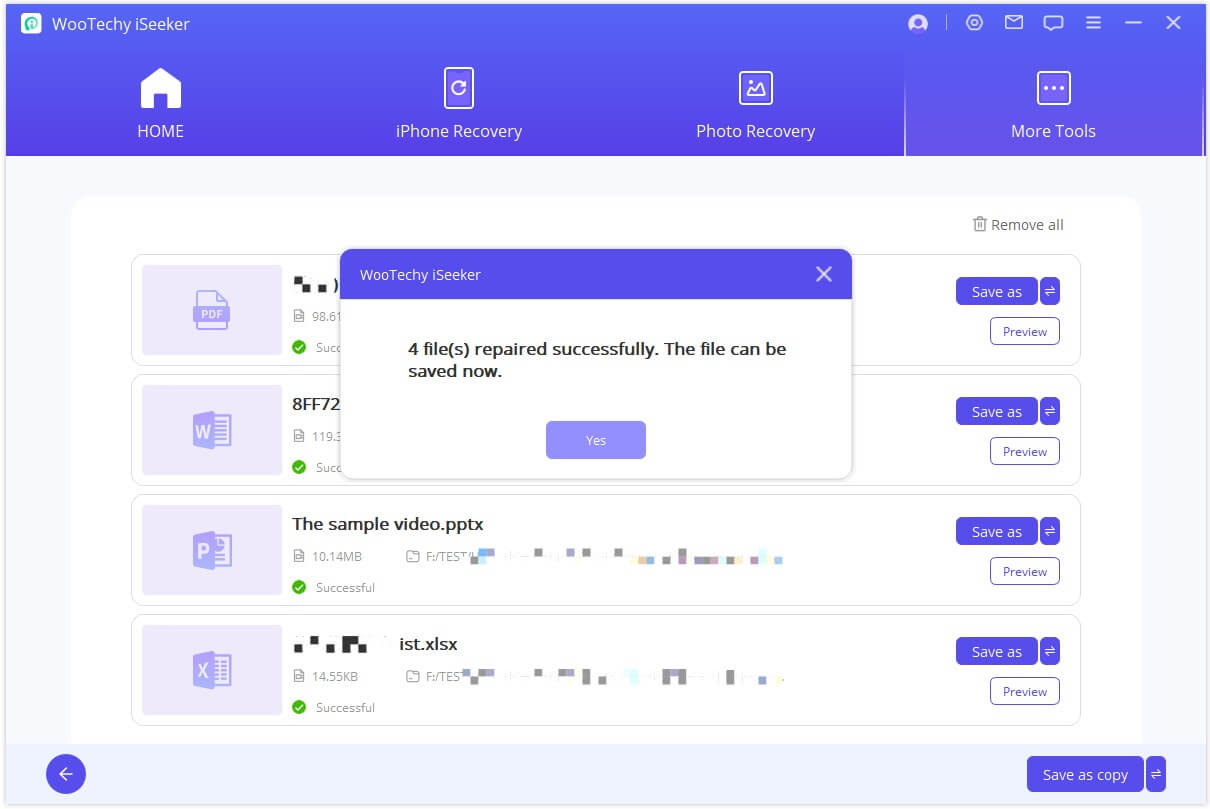
once it's complete, a pop-up message will notify you of the repair outcomes. A successfully repaired file will be marked with a "Success" sign below it.
However, if a document remains excessively damaged and unrepairable, you can seek expert assistance by clicking on "B" in the menu bar on the interface. Provide details about your severely damaged file to receive specialized help.
Step 4: Save the Repaired File
After the repair process concludes, navigate to the bottom and click on the "Save As" button. This will allow you to save individual files or all the repaired files. Proceed to the directory where the repaired files are stored on your Windows PC to access them.
