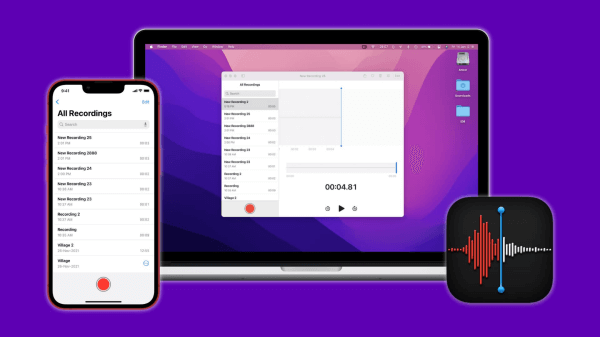
Voice Memos is a handy app to record your thoughts, classroom lectures, family moments, and other audio for later use. With the Voice Memos app, you can first record the audio and later use built-in editing tools to trim or fine-tune the audio. However, sometimes you might intend to transfer voice memos to your computer for further processing, make a backup of important audio, or free up space from your iPhone.
No matter what the case is, you can easily transfer voice memos from iPhone to PC. In this article, we will discuss in detail the 4 easy ways on how to transfer voice memos from iPhone to computer.
- Method 1. Transfer Voice Memos from iPhone to Computer via iCloud
- Method 2. Transfer Voice Memos from iPhone to Computer via iTunes
- Method 3. Transfer Voice Memos from iPhone to Computer through Sharing
- Method 4. Easiest Way to Transfer Voice Memos from iPhone to Computer
Method 1. Transfer Voice Memos from iPhone to Computer via iCloud
You can use the iCloud syncing feature to sync voice memos from your iPhone and access them across different devices. So, let's first discuss the steps on how to turn on voice memos sync with iCloud from iPhone:
Open Settings app from your iPhone.
Tap on your profile name and then tap iCloud.
Make sure the button next to Voice Memos is enabled.
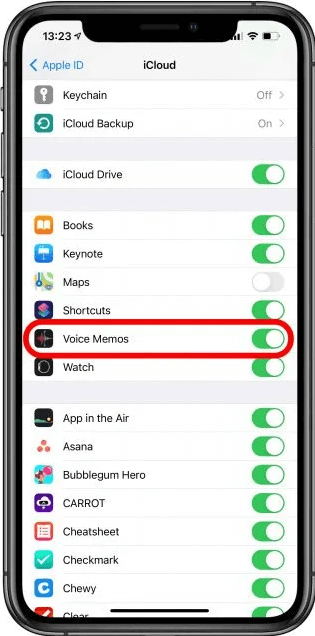
This way, all the voice memos from your iPhone will sync with iCloud. Now you can use iCloud to transfer voice memos from iPhone to your computer.
1. Transfer Voice Memos to Mac
Mac also comes with a built-in Voice Memos app that can sync with iCloud to transfer voice memos synced from iPhone. Follow the below steps to learn how to transfer voice memos from iPhone to computer (Mac):
Open the Voice Memos app on your Mac.
OA pop-up window will appear asking you for iCloud syncing. Click Enable.
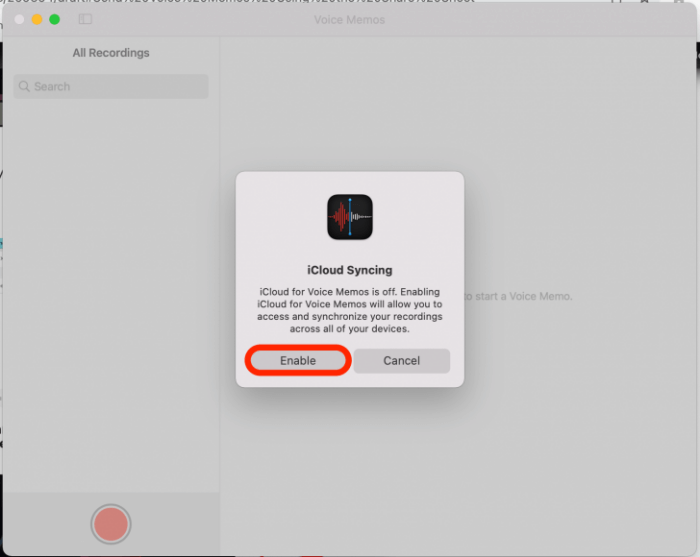
Wait till your Mac sync iPhone voice memos from iCloud. Once the download is completed, you can find all the memos under All Recordings.
This way, you can wirelessly transfer voice memos from iPhone to Mac via iCloud syncing.
2. Transfer Voice Memos to Windows
To transfer voice memos from iPhone to PC, you have to do some extra work. First, you have to copy the voice memos to a folder in iCloud Drive and then use iCloud for Windows software to access and download those voice memos to Windows. Follow the below steps to copy voice memos to iCloud Drive and then download them to your PC:
Open the Voice Memos app on your iPhone.
Tap All Recordings and then click the audio you want to transfer.
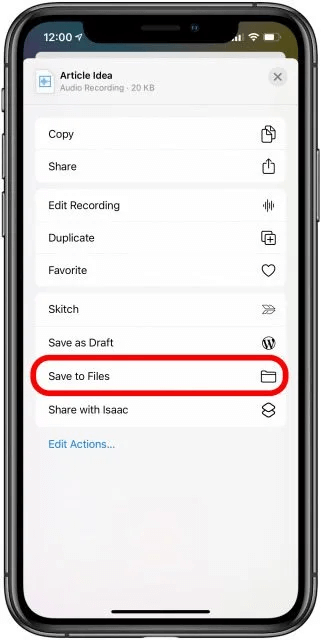
Tap the 3-dots icon from the top right side and then tap Save to Files.
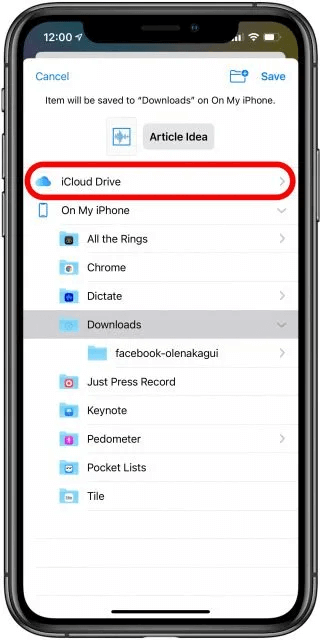
Select iCloud Drive and then select the folder where you want to save the audio and then tap Save. You can even create a new folder if you want.
Download and launch iCloud for Windows software.
Sign in using your Apple login credentials.
In the pop-up window, make sure the iCloud Drive checkbox is ticked and then click Apply.
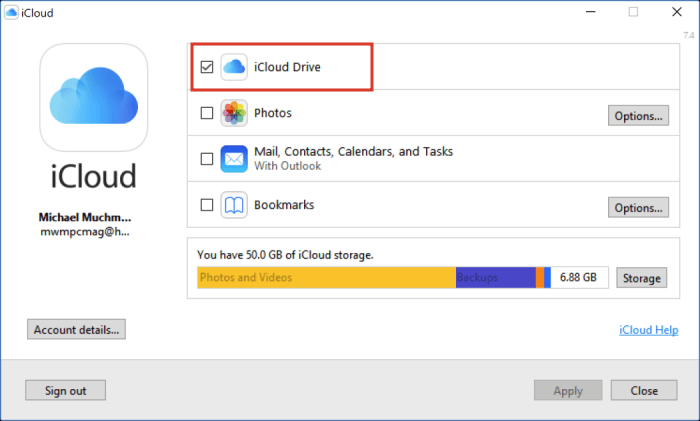
Wait till all the data from iCloud Drive is synced with your PC. Once done, go to This PC.
Click the iCloud Drive option on the left sidebar. There you can see the folder that contains the voice memos you transferred to iCloud Drive.
This way, you can transfer voice memos from iPhone to PC via iCloud Drive.
Method 2. Transfer Voice Memos from iPhone to Computer via iTunes
Another way to transfer voice memos from iPhone to the computer is via iTunes. You can use iTunes to sync all the audio files including voice memos to your computer. Follow the below steps to learn how to copy voice memos from iPhone to PC via iTunes:
Connect your iPhone to the computer with a USB cable and launch iTunes.
Select your iPhone from the left sidebar.
Select Music from the sidebar.
Tick the Sync Music checkbox and then also tick the Include voice memos checkbox.
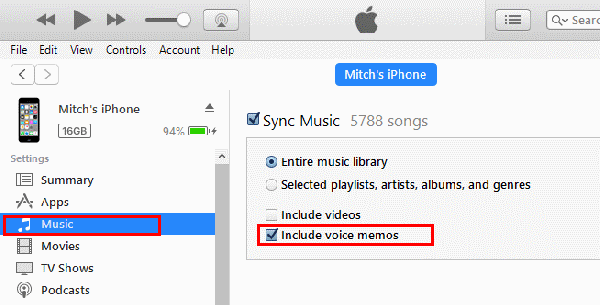
Lastly, click Apply.
Wait till the downloading is completed. Afterward, you can find all your voice memos on your computer under a folder named "Voice Memos".
Method 3. Transfer Voice Memos from iPhone to Computer through Sharing
Other than using iCloud or iTunes, you can also choose to share iPhone voice memos through email, Dropbox, or other third-party messaging apps. Follow the below steps to transfer voice memos from iPhone to PC through sharing:
Open the Voice Memos app on your iPhone.
Tap All Recordings and then tap the audio you want to transfer.
Tap the 3-dots icon from the top right side and then tap Share.
You will see multiple mediums that you can use to share the audio. Let's select Gmail. Afterward, enter your own email address under the To section and click the Send button.
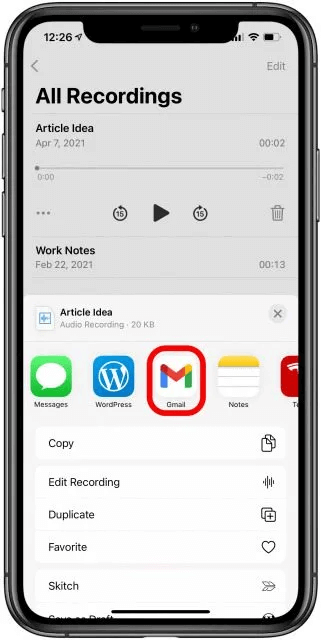
Open the same Gmail account on your computer, look for the email from the inbox, and download the audio.
This way, you can share and transfer voice memos from iPhone to computer. However, the drawback of this method is that you have to manually select and share memos one by one, which becomes a time-consuming process.
Method 4. Easiest Way to Transfer Voice Memos from iPhone to Computer
The above methods can all address how to transfer voice memos from iPhone to computer. But there is another method that provides the easiest and most efficient way to transfer voice memos with just the use of a USB cable. The method/tool is known as WooTechy iSeeker.
It is a powerful iPhone data transfer and recovery tool that provides an intuitive approach to instantly transfer voice memos, photos, videos, and 18+ data types to the computer. All it requires is connecting the iPhone to the computer using the USB cable and pressing just a few clicks to transfer voice memos from iPhone to computer.
What Makes iSeeker Stand Out

100.000+
Downloads
- It can transfer all voice memos from iPhone to computer in 3 simple steps without any data loss.
- It allows a preview of all the voice memos from within the tool.
- It allows selective downloading of voice memos to your computer.
- It supports all the latest iOS versions and iPhone models, including iOS 16 and iPhone 14.
Download Now
Secure Download
iSeeker can also act as an iPhone data recovery tool, as it is capable to recover lost/deleted photos, videos, audio, and other data from different data loss calamities. Moreover, it can also restore iCloud and iTunes backed-up data. In short, it is an all-in-one iPhone data transfer/recovery tool.
Follow the below steps to learn how to copy voice memos from iPhone to PC using iSeeker:
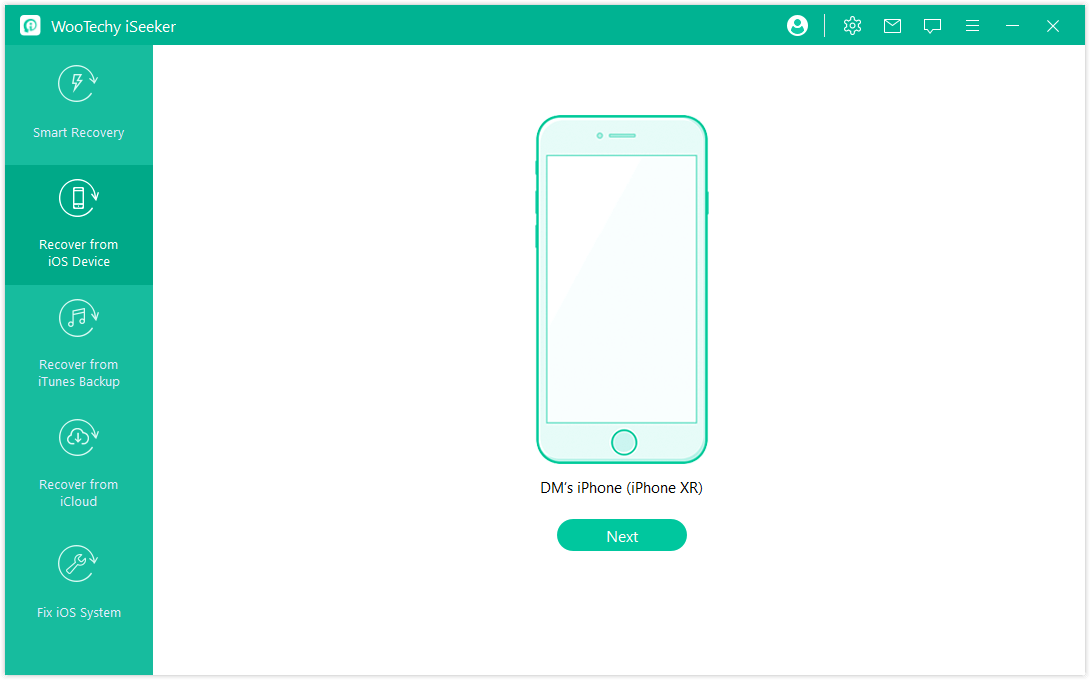
Step 1. Download and launch iSeeker on your computer and also connect your iPad with the computer. Afterward, select Recover from iOS Device and click Next.
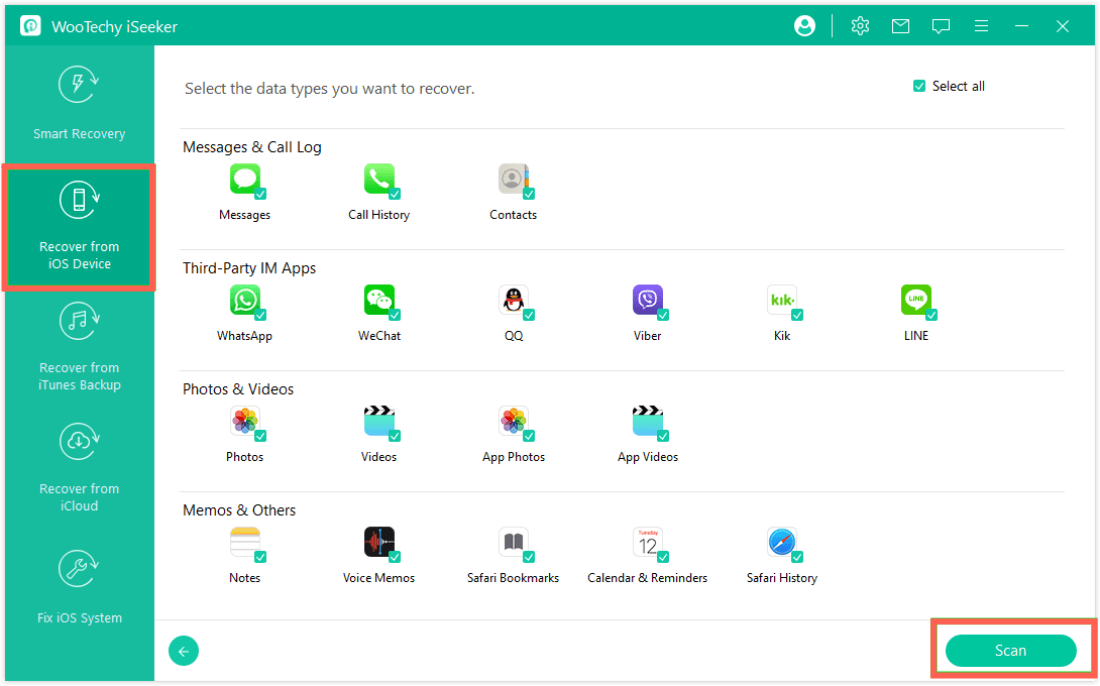
Step 2. Select the data types you want to recover. As you are trying to recover videos, tick the checkbox next to the Voice Memos icon and click Scan.
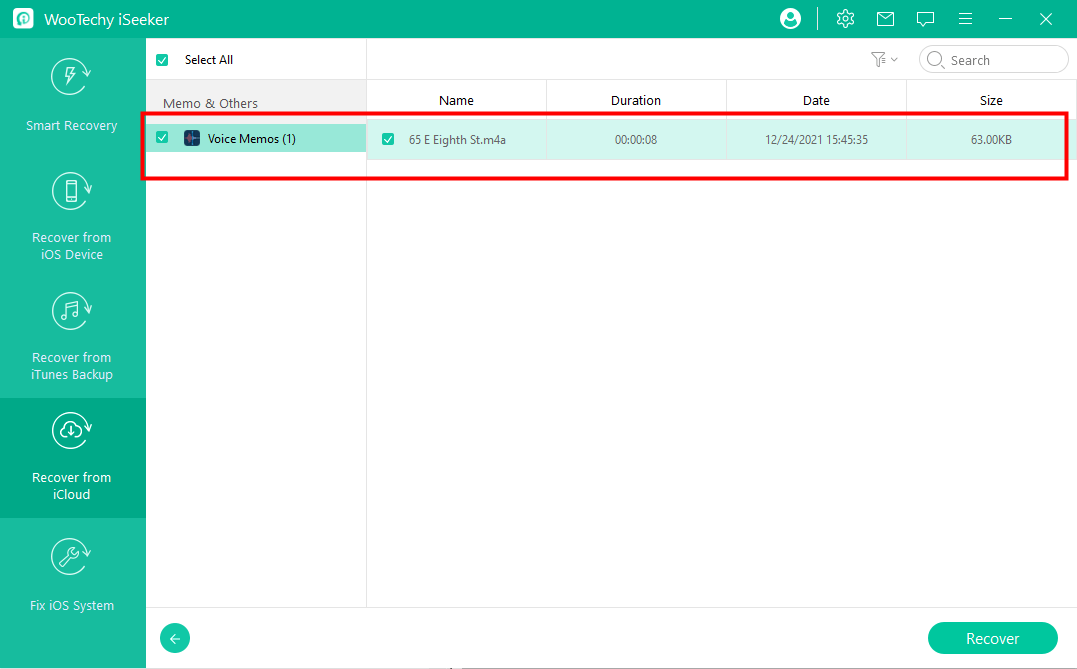
Step 3. Once the scan is completed, preview and select the voice memos you want to recover and click Recover.
Conclusion
There are many situations that can lead to the search for how to transfer voice memos from iPhone to computer. Above we have discussed the 4 best ways to do the transfer easily to either Mac or Windows.
However, if you are looking for the easiest, most powerful, and instant transfer of all voice memos from iPhone to PC, then WooTechy iSeeker is the best option for you. Its intuitive interface and preview-based selective recovery make transferring voice memos a hassle-free experience.
Download Now
Secure Download


