WWDC 2024 was held in June and iOS 18 developer beta was also released on the conference at the same time. The allure of the latest iOS beta can be irresistible to some Apple enthusiasts, offering a glimpse into upcoming features and functionalities. However, beta software is meant to carries instability and bugs.
If you've encountered issues with iOS 18 beta , like many users, and yearn to go back to iOS 17, you're fortunate. This article explores 2 effective methods to downgrade iOS 18 to iOS 17 and return to the stable iPhone experience.
Part 1. Back Up Before Downgrading from iOS 18 to iOS 17
If you have downloaded iOS 18 developer beta and want to go back to iOS 17, you should aware that downgrading from a beta version to a stable release comes with risks. In a worst-case scenario, if the downgrade process encounters unforeseen complications, you could lose all your data loss, including photos, videos, contacts, messages, and app data. What’s more, if the iOS 18 beta downgrade goes wrong, there is a chance that your iPhone won’t turn on at all.
So you can see how important it is to back up your iPhone in advance. Here we have offered 3 ways for you to back up your iPhone with or without computer. Pick one and follow the steps below.
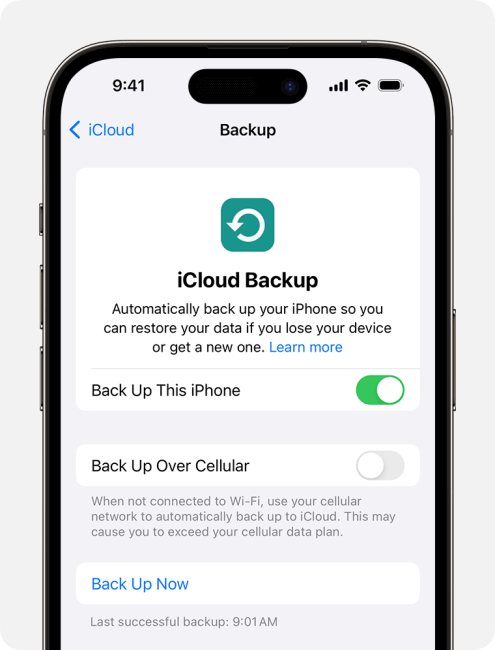
1. Back Up from iCloud
Connect your iPhone to Wi-Fi.
Go to Settings > [your name] > iCloud.
Tap on iCloud Backup.
Turn on iCloud Backup if it's not already on.
Tap on "Back Up Now" to create a manual backup. Your iPhone will automatically back up daily when connected to power, locked, and on Wi-Fi.
2. Back Up with Mac
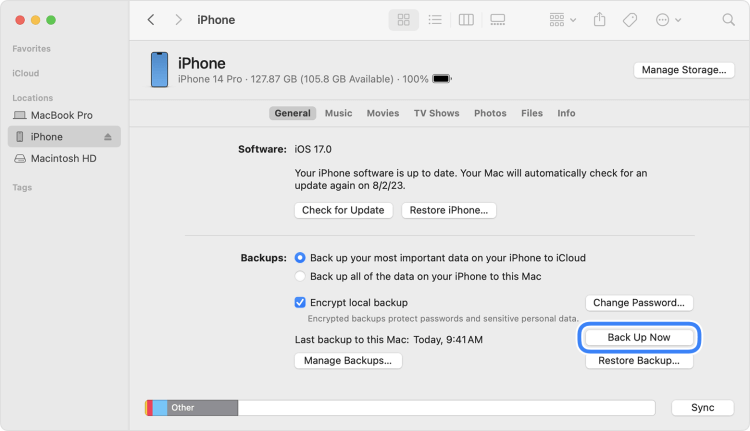
Open Finder on your Mac and connect your iPhone to it with a USB cable.
Trust the Mac if prompted.
Select your iPhone in the sidebar.
Click on "Back Up Now" under the "Backups" section.
When the backup finishes, you can see the date and time of the last backup if successfully.
3. Back Up with PC
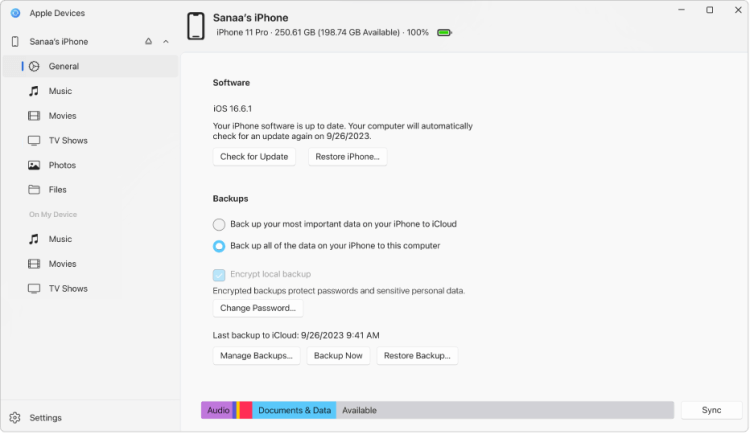
Connect your iPhone to your PC using the USB cable.
Verify trust on your iPhone if prompted. Enter your passcode to allow your computer to access your iPhone data.
Install and open the Apple Devices app on your PC. It should automatically detect your connected iPhone.
Locate your iPhone within the Apple Devices app window.
Click the "Back Up Now" button on General page to initiate the backup process.
Part 2. Go Back to iOS 17 Using a Professional iOS 18 Downgrade Tool
If you have any regrets about the iOS 18 update decision and are looking for a quick and effective way to go back from iOS 18 beta to iOS 17, then you can use a one-click-downgrade tool to do all the work for you. WooTechy iPhixer has offered such a solution for you. With iPhixer, you can easily downgrade iOS 18 and don’t need to worry about the data loss and the potential glitches that might occur during the downgrade.
The innovative "iOS Upgrade/Downgrade" feature requires no technical expertise, making it accessible for users of all levels. Its support extends to all iPhone models and iOS versions, including the latest iPhone 15.
Beyond downgrades, the iPhixer tool also serves as a comprehensive iOS system repair solution. It resolves common issues after iOS update such as being frozen on lock screen, boot loops, recovery mode loops, and Apple logo freezes.
Video Guide of Going Back to iOS 17
How to Go Back to iOS 17 with iPhixer?
Step 1: Download and install WooTechy iPhixer on your PC. Launch the software and select the "iOS Upgrade/Downgrade" option.
Free Download
Secure Download
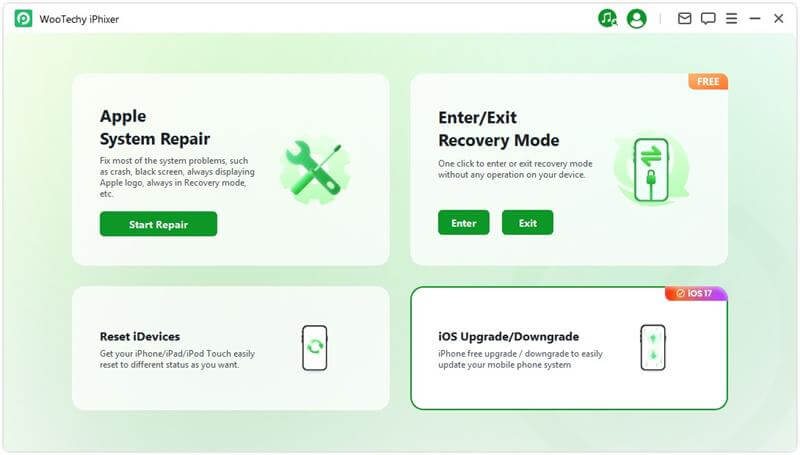
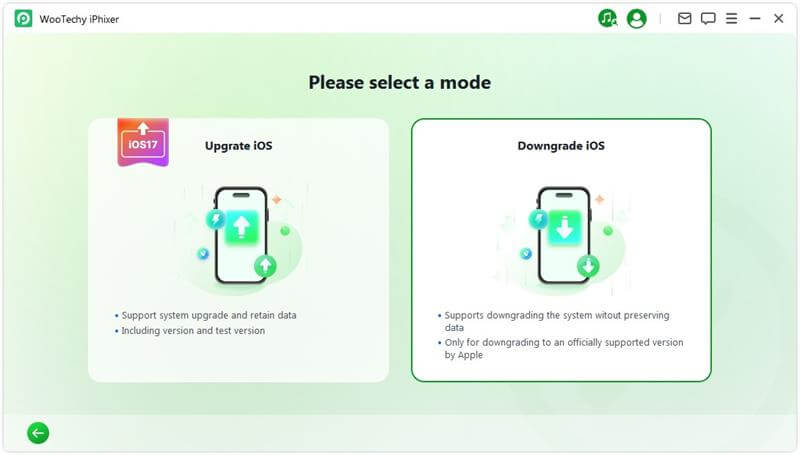
Step 2: Choose "Downgrade iOS" and connect your iPhone to the computer using a USB cable.
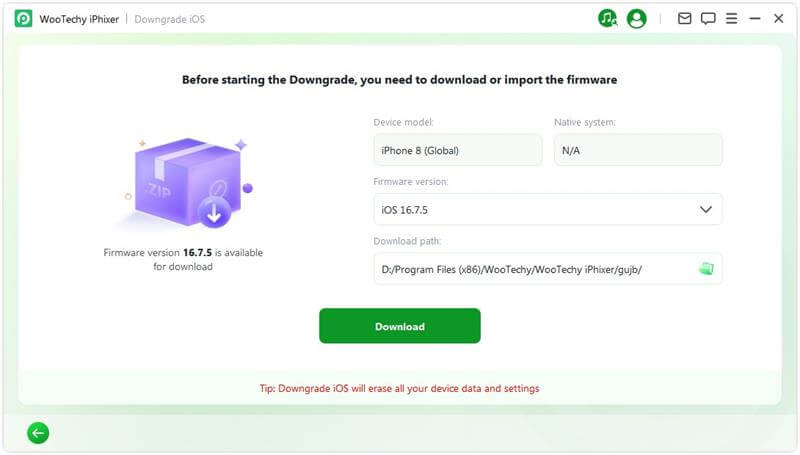
Step 3: Select your device model and click "Download" to obtain the appropriate firmware package. Wait a few minutes for the software to automatically extract the package.
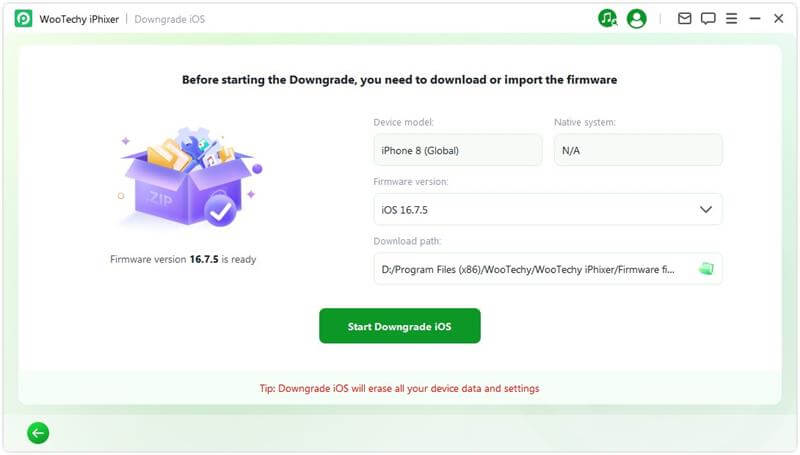
Step 4: Click "Start Downgrade iOS" to begin the process of downgrading to iOS 17.
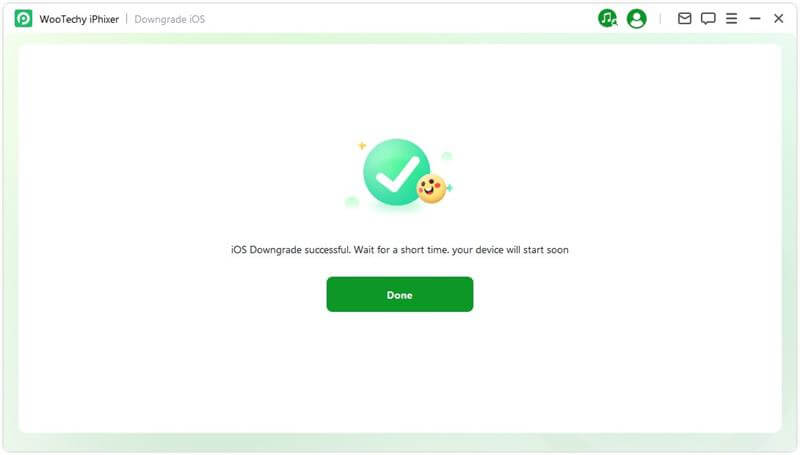
Once the process is complete, a pop-up message saying "Done" will appear, confirming that you have successfully downgraded from iOS 18 to iOS 17.
Part 3. Downgrade iOS 18 to iOS 17 via Recovery Mode
If you don’t feel like using a third-party tool to do the work for you, you can also utilize iTunes to revert to iOS 17. The steps involved can be a little complicated. Fortunately we have a step-by-step guide for you. So follow us now!
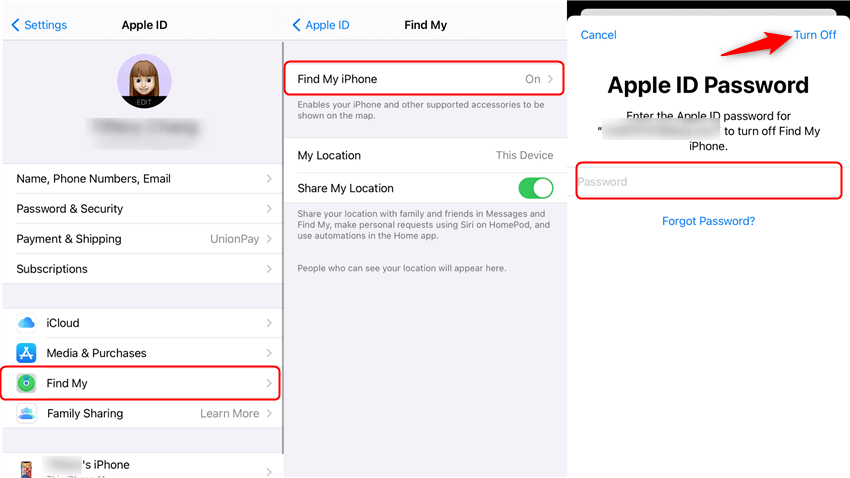
Step 1. Turn Off Find My
For this method to work, Find My needs to be turned off before you can proceed with the downgrade. This feature is essential for Activation Lock, which uses your Apple ID and password.
Go to Settings > Your Name > Find My.
Tap on "Find My iPhone" and toggle it off.
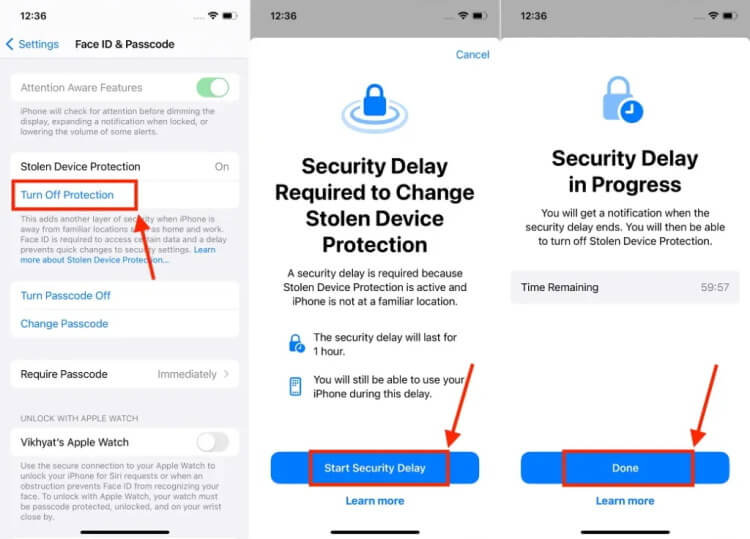
If the option is grayed out, you might need to deactivate "Stolen Device Protection" first.
Step 2. Put Your iPhone into Recovery Mode
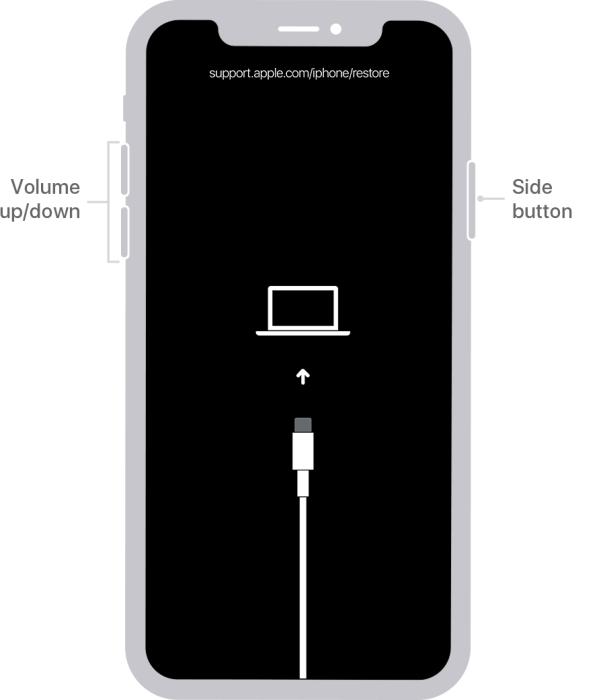
You'll need to enter recovery mode on your iPhone to start the downgrade process.
Press and quickly release the volume up button.
Press and quickly release the volume down button.
Press and hold the sleep/wake button. Keep holding it past the Apple logo until you see the recovery mode screen (a black background with a cable indicating a connection with the computer).
Step 3. Restore the iPhone to iOS 17
Once in recovery mode, you'll use your computer to restore the iPhone to the previous version of iOS.
Your computer will prompt you with an option to Update or Restore the iPhone.
If you see this dialog, click Restore. Confirm by clicking Restore and Update.
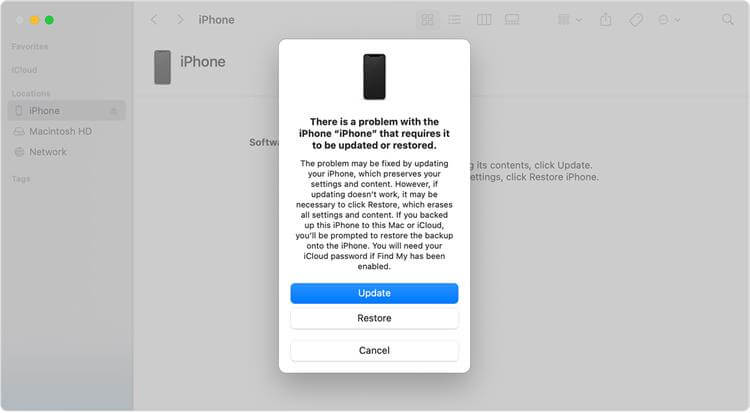
If you don't see the dialog:
Open a new Finder window (on MacOS) or the Apple Devices app (on Windows).
Select your iPhone in the sidebar.
Click Restore iPhone and follow the on-screen instructions.
Conclusion
By following these comprehensive instructions and exercising caution, you can successfully downgrade from iOS 18 beta to the stable and reliable iOS 17. Now you can reclaim control of your iPhone experience and enjoy the familiarity and stability of the current iOS release.
Many users recommended. Downgrade iOS 18 to iOS 17 easily without losing data.
Free Download
Secure Download


